Uncategorized

Uncategorized

Why Winter Is the Worst Time for Plumbing Problems

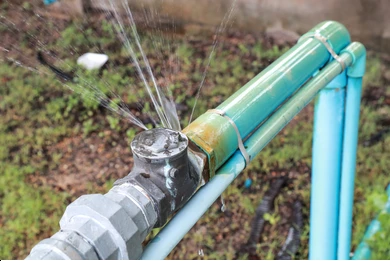
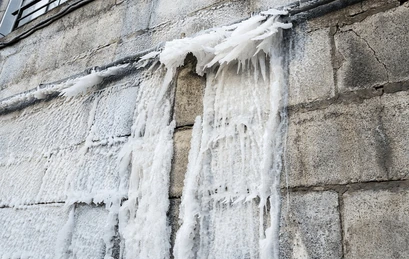
Winter can be one of the harshest seasons for homeowners, especially when it comes to plumbing systems. Cold temperatures, freezing pipes, and increased water usage create a perfect storm for potential plumbing disasters. Understanding why winter is the worst time for plumbing problems can help you prepare and avoid costly repairs. Freezing Temperatures Cause Pipe Bursts One of the most common plumbing issues during winter is frozen pipes. When the temperature drops below freezing, water inside pipes can freeze, expand, and cause the pipes to burst. This is a particular concern for exterior or uninsulated pipes that are more exposed to the cold. When pipes burst, the aftermath can be devastating—flooded basements, ruined furniture, and thousands of dollars in repairs. Frozen pipes often occur in areas where the cold isn’t usually a concern, like Texas. While it might not seem like an issue for places with milder winters, a sudden cold snap can catch homeowners off guard. When the temperature unexpectedly drops, unprotected pipes are at significant risk, leading to a surge in emergency plumbing calls. Increased Water Usage Strains the System Winter months typically bring an increase in water usage as families spend more time indoors. From hot showers to running the washing machine more frequently, this added demand can strain your plumbing system. If your home’s plumbing is already old or compromised, this extra usage may reveal hidden problems. Older pipes may not be able to handle the increased demand, leading to leaks or slow drainage. For homes with multiple bathrooms, all of this added stress on the plumbing can cause backups and clogged drains. These issues can escalate if left unresolved, making it crucial to pay attention to your plumbing system’s capacity during winter. Water Heaters Work Overtime The need for hot water is constant during winter, placing additional strain on your water heater. Whether you’re heating water for showers, washing dishes, or doing laundry, the demand for hot water spikes when temperatures fall. Overworking the water heater can result in wear and tear, which could lead to breakdowns or even leaks in the system. If your water heater is older or hasn’t been maintained, winter is when problems are most likely to surface. Water heaters that are nearing the end of their lifespan are more prone to failure under increased winter demand, leaving you with no hot water during the coldest months of the year. Holiday Season Brings Plumbing Challenges The winter months also coincide with the holiday season, which means family gatherings, parties, and house guests. Extra people in the house put more pressure on the plumbing system, from toilets to kitchen drains. You may experience frequent clogs in the bathroom or the kitchen sink, especially if your plumbing is not up-to-date or properly maintained. Holiday cooking can also wreak havoc on your kitchen’s plumbing. Grease, food scraps, and other debris can easily clog kitchen drains, especially if they’re not handled properly. Many homeowners make the mistake of pouring grease down the sink, not realizing it will solidify and cause blockages in the pipes once it cools. Additionally, with more people using the toilets, showers, and sinks, the chance of something going wrong increases. Your plumbing system will have to work overtime during the holiday season, leaving it more vulnerable to problems like backups and slow drains. Snow and Ice Can Damage Plumbing Another reason why winter is the worst time for plumbing issues is the snow and ice that accompany colder temperatures. Ice buildup on exterior pipes or drains can lead to serious damage. In regions with heavy snowfalls, outdoor plumbing components like hose bibs, sprinklers, and drainage systems can become buried and blocked, making it difficult for water to drain properly. Snow and ice also put pressure on underground pipes. As snow melts and refreezes, it can cause ground shifts that put stress on the plumbing system, leading to cracks or misalignments. Additionally, clogged gutters can contribute to ice dams, which can damage your roof and lead to water leaking into your home. Repairs Are Harder and More Expensive in Winter Winter plumbing repairs are not only more likely but also more difficult and expensive. The cold weather makes outdoor work challenging, and it can take longer for plumbers to diagnose and fix issues. In many cases, plumbers have to work in freezing conditions, which can delay repairs and increase labor costs. Additionally, when pipes freeze and burst, repairs often involve digging through snow or frozen ground to reach underground pipes. This adds time and expense to the repair process. Emergency plumbing services also tend to be in higher demand during the winter, which can lead to longer wait times and higher costs for homeowners. The Importance of Preventative Maintenance To avoid plumbing problems during winter, preventative maintenance is key. By taking steps to protect your plumbing before the cold weather hits, you can minimize the risk of expensive repairs. Insulating your pipes is one of the simplest and most effective ways to prevent freezing. Focus on exposed pipes in unheated areas like the basement, attic, or garage, as these are the most vulnerable. Another crucial step is to disconnect outdoor hoses and shut off exterior faucets. Water left in hoses or outdoor spigots can freeze and cause pipes to crack. If you have a sprinkler system, make sure it’s properly winterized to avoid damage from freezing temperatures. It’s also a good idea to have your water heater serviced before winter. Regular maintenance can help ensure it’s working efficiently and can handle the increased demand for hot water. Having your water heater inspected by a professional from Chrome Heating Air Conditioning before the cold season can help prevent unexpected breakdowns. Know When to Call a Professional While some homeowners attempt to fix minor plumbing issues themselves, winter plumbing problems often require the expertise of a professional. If you’re dealing with frozen pipes, lack of hot water, or persistent clogs, it’s essential to call in a licensed plumber. Attempting to fix these issues
Regular Plumbing Inspections
Uncategorized

Why You Should Never Skip Regular Plumbing Inspections

Maintaining a well-functioning plumbing system is crucial for any home or business. While it’s easy to take the plumbing for granted, skipping regular inspections can lead to costly and inconvenient problems down the road. In this article, we will explore the reasons why regular plumbing inspections are essential, the potential risks of neglecting them, and how these inspections can save you time, money, and stress in the long run. 1. Preventing Costly Emergencies One of the most significant reasons to schedule regular plumbing inspections is to prevent unexpected and expensive emergencies. Plumbing issues like leaks, blockages, or burst pipes can develop gradually, often without visible signs until they reach a critical point. A small leak, for instance, can lead to water damage, mold growth, or even structural problems if left unchecked. During an inspection, a qualified plumber can identify these issues early on, giving you the chance to address them before they turn into major emergencies. This proactive approach can save you hundreds, if not thousands, of dollars in repairs. Additionally, preventing plumbing disasters ensures that you avoid the stress and inconvenience of dealing with an emergency in the middle of the night or during a holiday. 2. Extending the Lifespan of Your Plumbing System Just like any other system in your home, your plumbing system has a finite lifespan. Regular maintenance and inspections are key to extending the life of your pipes, fixtures, and appliances. Over time, pipes can corrode, mineral deposits can build up, and seals can degrade. These issues may not be immediately noticeable, but they can cause significant wear and tear on your system. By scheduling regular plumbing inspections, a professional can spot early signs of wear and make recommendations for repairs or replacements before the problem worsens. Addressing minor issues now can help avoid the need for costly replacements later and ensure that your plumbing system remains in good working order for years to come. 3. Improving Water Quality The quality of your water is directly impacted by the condition of your plumbing system. Corroded or damaged pipes can introduce rust, sediment, or even contaminants into your water supply. In some cases, old pipes may be lined with materials that can degrade over time, leading to poor water quality and potential health risks. Regular plumbing inspections include checks for pipe corrosion, leaks, and other issues that could compromise the quality of your water. If your plumber detects any problems, they can recommend solutions to improve your water quality, such as replacing old pipes or installing water filtration systems. 4. Ensuring Proper Drainage One of the most common plumbing issues homeowners face is clogged or slow drains. These problems can often be traced back to blockages in the pipes caused by debris, grease buildup, or tree roots. Left unchecked, these blockages can lead to water backups, unpleasant odors, and even sewer line damage. Regular inspections help ensure that your drainage system is functioning correctly. Plumbers can use tools like drain cameras to inspect your pipes for blockages or potential damage. If they find any issues, they can perform a cleaning or repair to restore proper drainage before a more severe problem develops. 5. Reducing Water Bills Leaking pipes and fixtures are not only a waste of water but also a drain on your wallet. Even small leaks can add up over time, leading to higher water bills. Many homeowners are unaware that they leak until they receive an unusually high bill or notice signs of water damage. A plumbing inspection can identify hidden leaks that may otherwise go unnoticed. Fixing these leaks promptly can lead to significant savings on your monthly water bills. Additionally, repairing leaks is an environmentally friendly choice, as it helps conserve water, a precious resource. 6. Protecting Your Home from Water Damage Water damage is one of the most destructive forces a homeowner can face. Leaks, burst pipes, or faulty water heaters can cause extensive damage to walls, floors, ceilings, and valuable belongings. The cost of repairing water damage and replacing damaged items can be astronomical. Regular plumbing inspections are your first line of defense against water damage. Plumbers can identify potential problem areas, such as corroded pipes, faulty water heaters, or leaky faucets before they have a chance to cause significant damage. By addressing these issues early, you can protect your home and avoid costly repairs. 7. Ensuring Compliance with Local Plumbing Codes Building codes and regulations change over time, and it’s essential to ensure that your plumbing system is up to date with local requirements. Whether you’re planning a renovation or simply want to ensure that your home is compliant, a plumbing inspection can help. Professional plumbers are well-versed in local plumbing codes and can identify any issues that may need to be addressed to bring your system up to standard. This is particularly important if you’re planning to sell your home, as non-compliant plumbing can be a deal-breaker for potential buyers. 8. Improving the Efficiency of Plumbing Appliances Plumbing appliances such as water heaters, dishwashers, and washing machines rely on your plumbing system to function efficiently. Over time, these appliances can become less efficient due to issues like sediment buildup, mineral deposits, or poor water pressure. During a plumbing inspection, your plumber will assess the performance of your plumbing appliances and recommend maintenance or repairs if needed. Keeping your appliances in good working order not only extends their lifespan but also helps reduce energy and water consumption, leading to lower utility bills. 9. Avoiding Sewer Line Problems Sewer line issues are often the result of clogs, tree roots, or damage to the pipes. These problems can lead to unpleasant sewage backups and pose health risks if left untreated. Sewer line repairs are typically expensive and disruptive, requiring excavation and replacement of damaged sections. A regular plumbing inspection includes checking the condition of your sewer lines to ensure they are free from blockages or damage. By identifying potential issues early, you can avoid the mess and expense of a

Fix a Running Toilet
Uncategorized

How to Fix a Running Toilet in Less Than an Hour

A running toilet is not only annoying, but it can also waste a significant amount of water, driving up your utility bills. Luckily, fixing a running toilet is usually a simple task that can be completed in under an hour, even if you’re not a seasoned DIY enthusiast. In this guide, we’ll walk you through the steps to troubleshoot and fix the most common causes of a running toilet, using basic tools that most homeowners already have on hand. Step 1: Gather Your Tools and Materials Before you start, make sure you have all the tools and materials you’ll need to fix your running toilet. The good news is that you won’t need anything too specialized: Adjustable wrench Flathead screwdriver Replacement parts (depending on the problem, this could include a new flapper, fill valve, or flush valve) Towel or sponge (for drying up any water spills) Gloves (optional) Once you’ve gathered your tools, turn off the water supply to the toilet. The valve is typically located on the wall behind the toilet. Turn it clockwise to shut off the water flow. Step 2: Inspect the Flapper The flapper is one of the most common culprits behind a running toilet. The flapper is the rubber or plastic stopper at the bottom of the tank that lifts when you flush, allowing water to flow into the bowl. Over time, flappers can warp, crack, or simply wear out, preventing them from sealing properly. Remove the tank lid and set it aside. Flush the toilet and watch the flapper in action. If the flapper doesn’t close completely after flushing, it’s likely worn out and needs to be replaced. How to replace the flapper: Turn off the water supply. Drain the tank by flushing and then sponging out any remaining water. Disconnect the chain attached to the flush handle. Remove the old flapper by unclipping it from the bottom of the overflow tube. Install the new flapper by clipping it in place and reattaching the chain. Make sure the chain has some slack but is not too loose. Once you’ve replaced the flapper, turn the water back on and see if the toilet stops running. Step 3: Check the Fill Valve If replacing the flapper didn’t solve the problem, the next thing to check is the fill valve. The fill valve controls the water level in the tank, and if it’s malfunctioning, water may continuously flow into the tank, causing it to overflow into the overflow tube and leading to a constantly running toilet. Inspect the water level. If it’s above the overflow tube, your fill valve may be set too high or malfunctioning. Adjust the fill valve. Many modern fill valves have an adjustment screw that you can turn to lower the water level. Use a screwdriver to turn the screw clockwise and lower the water level in the tank. If adjusting the water level doesn’t fix the issue, you may need to replace the fill valve. How to replace the fill valve: Turn off the water supply and drain the tank. Disconnect the water supply line from the bottom of the fill valve. Remove the old fill valve by loosening the nut at the bottom of the tank. Insert the new fill valve and tighten the nut. Reconnect the water supply line and turn the water back on. Adjust the water level as needed. Step 4: Examine the Flush Valve If the flapper and fill valve are functioning correctly but the toilet is still running, the issue may lie with the flush valve. The flush valve is located at the bottom of the tank and includes the seat that the flapper seals against. If this seat is cracked or damaged, water can leak into the bowl, causing the toilet to run continuously. To check the flush valve: Inspect the valve seat. Look for cracks or rough spots on the valve seat where the flapper seals. Even a small imperfection can cause water to leak. If you notice any damage to the valve seat, it may need to be replaced. How to replace the flush valve: Turn off the water supply and drain the tank. Remove the tank from the bowl by unscrewing the bolts that secure it. Once the tank is removed, you can access the flush valve from underneath. Remove the old flush valve and install a new one according to the manufacturer’s instructions. Reattach the tank to the bowl, reconnect the water supply, and turn the water back on. Step 5: Adjust the Chain Sometimes the simplest fixes can solve the problem. If the chain connecting the flush lever to the flapper is too short or too long, it can prevent the flapper from sealing properly. To fix this: Check the chain. If it’s too tight, the flapper may not close fully after a flush. If it’s too loose, it may not lift the flapper enough to allow a full flush. Adjust the length. Simply reposition the hook on the chain to give it a little more or less slack as needed. Step 6: Test the Toilet After you’ve made adjustments or replaced parts, it’s time to test the toilet and ensure the running problem is resolved. Turn the water supply back on and let the tank fill up. Flush the toilet and observe the tank for a few minutes. If the water stops filling once it reaches the correct level and the toilet no longer runs, congratulations—you’ve successfully fixed your running toilet! If the problem persists despite trying the above steps, there may be a more complex issue that requires professional attention. When to Call a Professional While most running toilet problems can be fixed with basic tools and a little DIY effort, sometimes the issue may be more complicated. If you’ve tried the steps above and the toilet is still running, or if you feel uncomfortable performing any of the tasks, it may be time to call a professional. The experts at Chrome Heating Air Conditioning in Plano,

Clogged Drain
Uncategorized

When You Should Call a Pro for a Clogged Drain

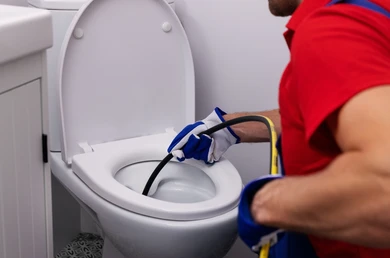
Clogged drains are one of the most common household plumbing issues. While some clogs are easy to handle with DIY solutions, others may require professional intervention to avoid further damage or costly repairs. Knowing when to call a professional for a clogged drain can save you time, money, and the hassle of dealing with bigger plumbing problems down the line. In this article, we’ll discuss the signs that indicate it’s time to bring in an expert and how a professional plumber can help. 1. Slow Drains That Don’t Improve with DIY Methods A slow-draining sink or bathtub is often the first sign of a clogged drain. Homeowners commonly reach for a plunger, drain snake, or chemical cleaner to address the issue. However, if you notice that your drain is still slow even after multiple attempts at fixing it, it may indicate a deeper blockage or a buildup of debris further down the pipes. At this point, calling a professional is your best option. Experts use specialized equipment, such as hydro-jetting machines or industrial-grade augers, to clear stubborn blockages. These tools are far more effective than anything typically found in a household and can remove years of accumulated grease, hair, soap scum, and other materials from your pipes. 2. Recurring Clogs in the Same Drain If you find yourself frequently dealing with clogs in the same drain, it’s a clear sign that there’s a more serious underlying issue. DIY methods may offer temporary relief, but they rarely address the root of the problem. Recurring clogs could be caused by damaged pipes, tree roots infiltrating your sewer line, or a buildup of debris that isn’t being fully removed. When this happens, it’s time to call a pro. A licensed plumber will not only clear the current clog but also conduct a thorough inspection of your plumbing system to identify any long-term issues that may be causing the recurring problem. This proactive approach can help you avoid costly repairs in the future and ensure that your drains continue to flow freely. 3. Multiple Clogged Drains in the House If more than one drain in your home is clogged at the same time, it’s usually a sign of a serious plumbing issue. Multiple clogged drains often indicate a blockage in the main sewer line, which is a problem that requires immediate professional attention. A clogged main sewer line can cause significant damage to your home if left untreated. Wastewater can back up into your sinks, showers, or toilets, leading to unpleasant odors, water damage, and even health hazards. A professional plumber has the expertise and equipment to diagnose and repair main sewer line blockages, ensuring that your home’s plumbing system is functioning properly. 4. Water Backing Up Into Other Fixtures One of the more alarming signs of a clogged drain is when water starts backing up into other fixtures. For example, if you flush your toilet and water begins to rise in your shower or bathtub, or if running the sink causes water to back up into another drain, you’re likely dealing with a major blockage. This is a serious issue that should be addressed by a professional as soon as possible. Backups like these are often caused by clogs deep within your plumbing system, and they can lead to flooding, sewage leaks, and other costly damage if not taken care of promptly. 5. Unpleasant Odors Coming from the Drains Bad smells coming from your drains are another indication that it’s time to call in a professional plumber. Foul odors are usually caused by trapped food, grease, or organic matter that has started to decompose within your pipes. While a simple clog might only produce a minor inconvenience, a severe buildup can lead to bigger issues, such as mold growth or even pest infestations. If you’ve tried cleaning the drain with natural solutions like baking soda and vinegar or have used over-the-counter drain cleaners without success, it’s a sign that the clog is deeper than you can reach on your own. A plumber will be able to assess the situation, clear the clog, and sanitize your pipes to eliminate the odors. 6. Gurgling Noises from the Drains If you hear gurgling noises coming from your drains, especially when water is not actively being used, this can be a sign of a clogged or blocked vent pipe. Vent pipes help regulate the air pressure in your plumbing system, and when they become blocked, they can cause air bubbles to get trapped, resulting in gurgling sounds. This issue should be addressed by a professional because vent pipe problems can lead to serious issues, such as sewer gas entering your home or the complete failure of your plumbing system. A professional plumber will inspect the system, find the source of the blockage, and restore proper air flow to prevent future problems. 7. Standing Water in Your Sink or Bathtub Standing water is a clear indication that your drain is severely clogged. Whether it’s a sink that won’t empty or a bathtub that remains full of water after a shower, standing water is a sign that the blockage is too severe for DIY methods to resolve. Not only is standing water unsanitary, but it can also cause damage to your fixtures over time. A professional plumber has the tools to quickly remove the clog and prevent standing water from becoming a recurring issue. In some cases, standing water can also indicate a more serious problem with your plumbing, such as pipe corrosion or a broken sewer line. A plumber will be able to identify these issues during their inspection. 8. Flooding or Water Damage If a clogged drain has caused water to flood parts of your home, it’s time to call a professional immediately. Flooding from a clogged drain can lead to significant damage to your flooring, walls, and even the foundation of your home if not addressed quickly. It can also increase the risk of mold growth, which can pose serious health hazards to you and

Water Heater Stops Working
Uncategorized

Signs Your Hot Water Heater Needs Immediate Attention

Water heaters are one of the most essential appliances in any home. They ensure that you have access to warm water for showers, washing dishes, and laundry, making daily tasks more convenient and comfortable. However, like any appliance, water heaters can wear down over time and may start to show signs of malfunction. Recognizing these warning signs early can save you from more significant issues and costly repairs later. In this article, we’ll explore the most common signs that your water heater may need immediate attention. While some problems may seem minor, they can often signal more significant underlying issues that could lead to complete failure if not addressed quickly. 1. Fluctuating Water Temperatures One of the first signs that something may be wrong with your water heater is inconsistent water temperature. If you notice that the water is sometimes too hot and other times too cold, it may be a sign that the heating elements inside the water heater are malfunctioning. A properly functioning water heater should provide a consistent temperature based on your settings. Fluctuating temperatures could be due to sediment buildup in the tank, a faulty thermostat, or a problem with the heating element itself. While fluctuating water temperatures may seem like a minor annoyance, they can worsen over time, leading to a complete failure of the system. If this issue persists, it’s best to call a professional to inspect the system and determine the root cause before it escalates. 2. Strange Noises Coming from the Unit Another red flag that indicates your water heater may need attention is unusual noises coming from the unit. Over time, sediment can accumulate at the bottom of the water heater tank. As this sediment heats up and moves around, it can cause popping, banging, or rumbling noises. This sediment buildup not only affects the efficiency of the heater but can also cause damage to the tank. If left untreated, the sediment can lead to corrosion, leaks, or even cracks in the tank, requiring a full replacement of the water heater. If you start to hear these noises, it’s a good idea to have a professional service the unit, flush the tank, and ensure everything is in proper working order. 3. Leaking Water Around the Tank A water leak around your water heater is one of the most obvious signs that something is wrong. Water leaks can occur for several reasons, including a broken valve, a crack in the tank, or corrosion around the fittings. Even a small leak can lead to significant water damage in your home if not addressed quickly. If you notice water pooling around the base of the unit, you should turn off the power to the heater and contact a professional immediately. Leaking can lead to rust, mold growth, and even structural damage to your home. It’s essential to resolve the issue as soon as possible to avoid more extensive repairs. 4. Discolored or Rusty Water When you turn on your hot water tap, the last thing you expect to see is rusty or discolored water. If your water appears brown, yellow, or rusty, it could be a sign that your water heater’s tank is corroding from the inside. As the tank corrodes, rust particles can break off and mix with the water, resulting in discolored water flowing from your faucets. Rusty water can not only be unpleasant to use but may also pose health risks if consumed. This discoloration is often an indicator that your water heater is nearing the end of its life. In some cases, replacing the anode rod can help, but if the tank itself is corroding, you may need to replace the entire unit. 5. Hot Water Runs Out Quickly If you find that your hot water doesn’t last as long as it used to, it may be a sign that your water heater is struggling to keep up with the demand. This issue is often caused by sediment buildup in the tank, which reduces the amount of available hot water. The more sediment that accumulates, the less efficient the water heater becomes, and the less hot water you’ll have for your daily needs. Another potential cause of running out of hot water quickly is a malfunctioning heating element. If one of the heating elements is not working correctly, the water heater won’t be able to heat the water as efficiently, resulting in shorter periods of hot water availability. 6. Water Has an Unpleasant Smell If your hot water has a strange, sulfur-like odor, it could be due to bacterial growth inside the water heater tank. This is particularly common in homes that use well water, but it can happen with any water supply if the conditions inside the tank are right for bacteria to grow. The smell is often described as similar to rotten eggs and can make using the water unpleasant for bathing or cooking. This issue can often be resolved by flushing the tank and treating the water with a disinfectant. However, if the problem persists, it may indicate a more serious issue with the water heater that requires professional attention. 7. Visible Signs of Corrosion While some parts of your water heater may naturally rust over time, visible corrosion on the tank itself is a significant warning sign that your unit is deteriorating. Once rust starts to eat away at the metal, it compromises the structural integrity of the tank and increases the likelihood of leaks or even complete failure. If you notice corrosion on the outside of your water heater, it’s essential to have it inspected by a professional. In many cases, visible rust is a sign that the unit is nearing the end of its life and may need to be replaced. 8. Age of the Water Heater Even if your water heater appears to be functioning properly, its age can be a significant indicator that it’s time for a replacement. Most water heaters have a lifespan of around 8 to 12 years, depending

Uncategorized

How to Repair a Busted Water Pipe Quickly

A busted water pipe is one of the most urgent and stressful situations homeowners face. Water damage can escalate rapidly, leading to costly repairs if not addressed promptly. Knowing how to fix a busted water pipe quickly is essential for minimizing damage and restoring your plumbing system. In this guide, we’ll walk through the steps you can take to repair a busted pipe efficiently while highlighting key precautions to avoid further complications. 1. Identifying the Problem The first step in addressing a busted water pipe is recognizing the signs of a problem. Some common indicators include: Decreased Water Pressure: If water pressure suddenly drops in your home, it could indicate a burst pipe. Water Stains: Look for discoloration on walls, ceilings, or floors, which might be caused by leaking water. Pooling Water: Unexplained puddles or damp areas around your home are clear signs of a burst. Unusual Sounds: If you hear banging or hissing sounds in your walls, it could be due to a broken water pipe. Once you notice any of these signs, it’s critical to act fast to prevent water damage from spreading. 2. Turn Off the Main Water Supply As soon as you suspect a pipe has burst, turn off your home’s main water supply. This will prevent more water from flooding your home and reduce the risk of further damage. The shut-off valve is typically located near the water meter, in the basement, or outside your home. Be sure to familiarize yourself with the location of this valve before any emergencies occur. If you’re unable to locate or shut off the main water valve, contact a professional immediately for assistance. 3. Drain the System After shutting off the main water supply, you need to drain the remaining water from your pipes. Open all faucets throughout your home, starting from the lowest point and working your way up. This allows any water left in the pipes to escape, which will minimize the chance of additional leaks while you work on repairs. 4. Locate the Burst Pipe The next step is to locate the specific section of the pipe that has burst. You may need to inspect walls, ceilings, or floors to find where the leak is coming from. In many cases, pipes will burst in areas that are exposed to freezing temperatures, such as basements, crawl spaces, or attics. Once you find the damaged pipe, carefully assess the severity of the damage. If the break is extensive or the pipe is located in a hard-to-reach area, it might be necessary to call a licensed plumber for help. 5. Repairing the Busted Pipe Depending on the extent of the damage, there are several methods to repair a busted water pipe: Pipe Clamps If the break is small, a pipe clamp can be used as a temporary fix. These clamps are easy to use and can stop the leak until a more permanent solution is found. To apply a pipe clamp: Dry the area around the burst pipe. Place the clamp over the damaged section. Tighten the clamp to secure it in place. This method can hold for a while, but it is not a long-term solution. You’ll still need to address the pipe’s damage with a permanent repair. Epoxy Putty Epoxy putty is another temporary fix for small leaks. It works well for minor cracks or holes in pipes. To use epoxy putty: Turn off the water and dry the area around the leak. Mix the epoxy putty according to the manufacturer’s instructions. Apply the putty directly to the damaged area and smooth it out. Allow the putty to harden, which typically takes about 30 minutes. While epoxy putty can be effective, like pipe clamps, it should only be used as a short-term solution. Replacing the damaged pipe section is the best long-term fix. Pipe Replacement For more severe damage, it’s often best to replace the damaged section of the pipe. Here’s how you can replace a busted pipe quickly: Cut the Pipe: Use a pipe cutter or hacksaw to cut out the damaged section of the pipe. Be sure to measure and cut carefully, ensuring you remove the entire damaged area. Smooth the Edges: After cutting the pipe, use sandpaper or a deburring tool to smooth the edges of the remaining pipe. This will ensure a proper fit for the new pipe section. Install a Replacement Pipe: Measure and cut a new section of pipe that matches the length of the section you removed. Use pipe connectors or couplings to attach the new pipe to the existing plumbing. Be sure to follow the manufacturer’s instructions for tightening the connectors. Seal the Joints: Once the new pipe is in place, use pipe sealant or plumber’s tape on the joints to ensure a tight, leak-proof connection. Test the Repair: Turn the water supply back on and check for any leaks. If the repair was successful, the water should flow smoothly without any signs of leakage. 6. Prevent Future Pipe Bursts After repairing a busted pipe, it’s important to take steps to prevent future issues. Busted pipes often occur due to freezing temperatures or excessive pressure. Here are a few tips to help protect your plumbing system: Insulate Pipes: Insulating your pipes, especially in unheated areas like basements or attics, can prevent them from freezing during the winter months. Seal Cracks and Openings: Check for any cracks or openings in your home’s walls or foundation that could let in cold air, and seal them to prevent pipes from freezing. Maintain a Consistent Temperature: Keep your home heated, even when you’re away, to ensure pipes remain at a safe temperature during colder months. Check Water Pressure: High water pressure can also lead to pipe damage. Install a pressure regulator if needed to maintain safe levels within your plumbing system. 7. When to Call a Professional While many minor pipe repairs can be handled by homeowners, there are certain situations where it’s best to contact a professional. If the damage is

Ignore a Small Leak
Uncategorized

Why You Should Never Ignore a Small Leak

When it comes to home maintenance, one of the most common issues many homeowners encounter is a small leak. Whether it’s a drip from a faucet, a tiny trickle under the sink, or a barely noticeable damp spot on the wall, it might seem harmless at first glance. However, even the smallest leaks can lead to significant problems if left unattended. Understanding the importance of addressing these leaks early can save you from more extensive damage, costly repairs, and unnecessary stress. The True Cost of a Small Leak At first, a small leak might not seem like a big deal. It might only appear as a minor inconvenience, with a few drops of water here and there. However, these small leaks can add up over time. According to the U.S. Environmental Protection Agency (EPA), a single household leak can waste more than 10,000 gallons of water annually, enough to fill a swimming pool. This water waste increases your utility bills and contributes to the global water crisis. Moreover, the financial impact isn’t limited to just your water bill. A small leak can slowly worsen over time, causing structural damage to your home. Water can seep into floors, walls, and foundations, leading to mold growth, wood rot, and damage to electrical systems. The longer you wait to fix the leak, the more expensive the repairs become. Damage to Your Home’s Structure One of the most significant dangers of ignoring a small leak is the damage it can cause to your home’s structure. Water might seem harmless, but it can be incredibly destructive over time. Constant exposure to moisture can lead to the rotting of wooden structures such as floor joists, beams, and studs. It can also weaken drywall and insulation, causing it to become soggy and lose effectiveness. Over time, this can result in sagging ceilings, warped floors, and even compromised foundations. For instance, if you have a small leak in your attic or roof, it could slowly drip down into the walls, leading to water stains, peeling paint, and mold growth. If left unchecked, this could require major renovations, including replacing drywall, repainting, and treating mold infestations. By addressing small leaks early, you can avoid these costly and invasive repairs. Mold and Mildew: Hidden Health Hazards One of the silent but dangerous consequences of a small leak is the growth of mold and mildew. Mold thrives in damp, dark environments, which makes your walls, floors, and ceilings the perfect breeding ground. Once mold begins to grow, it can spread rapidly throughout your home, affecting air quality and potentially causing health problems for your family. Mold exposure has been linked to various health issues, including respiratory problems, allergic reactions, and skin irritation. Those with asthma or weakened immune systems are particularly susceptible to the adverse effects of mold. In extreme cases, prolonged mold exposure can lead to more severe health complications, such as lung infections. In addition to the health risks, mold is notoriously difficult and expensive to remove. Professional mold remediation services are often required, and extensive portions of your home’s structure may need to be replaced. By addressing small leaks as soon as they appear, you can prevent mold growth and ensure your home remains a safe, healthy environment for your family. Wasting Water and Money Another reason you should never ignore a small leak is the waste of water—and by extension, your hard-earned money. A tiny drip from a faucet might seem insignificant, but over time, it can lead to a surprising amount of wasted water. For example, a faucet that drips once per second can waste over 3,000 gallons of water per year. That’s money going down the drain! If you live in an area prone to water shortages or droughts, like Plano, TX, conserving water is even more critical. Local governments often impose restrictions on water usage during dry spells, and wasting water due to a small leak could lead to fines or penalties. Addressing leaks promptly is a simple way to save water, reduce your utility bills, and contribute to the responsible use of a precious resource. Electrical Hazards: A Hidden Danger Water and electricity are a dangerous combination, and a small leak can easily lead to significant electrical hazards in your home. Water from a leak can find its way into electrical wiring, outlets, or appliances, increasing the risk of short circuits, electrical fires, or electrocution. If a leak occurs near electrical systems, the risk of fire increases dramatically. For instance, a leak near a ceiling light fixture can cause water to drip onto live wires, sparking a fire. Additionally, water can damage appliances, rendering them unsafe to use and requiring costly replacements. To avoid these risks, it’s essential to repair leaks near electrical systems as soon as possible. It’s also a good idea to have a professional assess the extent of the damage to ensure your home is safe from electrical hazards. Protecting the Environment Beyond the immediate financial and health implications, fixing small leaks plays a significant role in environmental conservation. Water is a finite resource, and in many parts of the world, it’s becoming increasingly scarce. By addressing leaks in your home, you can do your part to reduce water waste and lessen the environmental impact. Moreover, water treatment and delivery require energy. The more water wasted through leaks, the more energy is required to treat and pump that water, contributing to greenhouse gas emissions. Fixing leaks is a small but meaningful way to reduce your household’s carbon footprint and support sustainable living. The Importance of Professional Help While some homeowners may be tempted to fix small leaks on their own, it’s often better to seek professional help. DIY repairs can be risky, especially if you don’t have the necessary experience or tools. A quick fix might seem effective in the short term, but it could lead to bigger problems down the road if not done correctly. A licensed plumber can accurately assess the cause of the leak and make

Preventing Frozen Pipes
Uncategorized

Top 5 Tips for Preventing Frozen Pipes This Winter

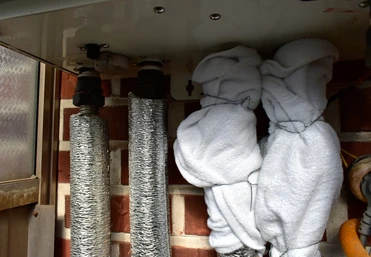
As the temperatures start to drop and winter approaches, homeowners often face the risk of frozen pipes, which can lead to costly repairs and significant damage. Pipes are particularly vulnerable during cold weather, especially in areas where the winters are relatively mild but freezing spells still occur. For homeowners in Plano, TX, it’s important to take preventive steps before winter hits full force. This guide provides five essential tips to keep your pipes safe and prevent them from freezing during the colder months. 1. Insulate Your Pipes Properly One of the most effective ways to prevent frozen pipes is by insulating them. Exposed pipes in areas like basements, attics, garages, and crawl spaces are particularly at risk of freezing. By adding insulation to these pipes, you create a protective barrier between them and the cold air, helping to maintain a warmer temperature inside the pipes. Pipe insulation can come in various forms, including foam rubber or fiberglass sleeves. These materials are affordable and can be found at most hardware stores. When insulating, pay close attention to any joints, corners, and bends in the pipes. These areas are often more vulnerable to cold temperatures. Additionally, wrapping hot water pipes, as well as cold water pipes, helps ensure that even the warmest pipes maintain a consistent temperature, reducing the risk of freezing during especially cold nights. Bonus Tip: If you’re unsure which pipes need insulation or if you’re concerned about hard-to-reach areas, a professional inspection from a plumbing expert can provide a thorough assessment and help you avoid potential issues. 2. Keep a Consistent Thermostat Setting When temperatures drop, it’s essential to maintain a consistent thermostat setting, both day and night. Many homeowners lower their thermostat at night to save energy, but this can increase the risk of frozen pipes if the house cools down too much. A general rule of thumb is to keep the thermostat set to at least 55°F, even if you’re going away for an extended period. This ensures that your home’s internal temperature stays high enough to prevent any freezing inside your pipes. Modern thermostats often have energy-saving features that can keep your heating system efficient without sacrificing warmth. If you haven’t upgraded your thermostat yet, consider a programmable or smart thermostat to help regulate temperatures more efficiently throughout the day. Bonus Tip: If you plan to be away from home for several days during the winter, it’s a good idea to ask a friend or neighbor to check on your house and make sure the heating system is running correctly. 3. Let Faucets Drip During Freezing Weather Allowing your faucets to drip slightly during freezing weather can help prevent pipes from freezing. Moving water is less likely to freeze than still water, so even a small drip keeps water flowing through the pipes, reducing the chances of ice formation. This is especially helpful for pipes located along exterior walls or those exposed to colder parts of the house. When a faucet is left to drip, it helps relieve the pressure inside your plumbing system, which is often what causes pipes to burst when they freeze. However, this technique is best used in conjunction with other preventive measures like insulation and maintaining a warm home temperature. Bonus Tip: You don’t need to leave all faucets dripping. Focus on faucets connected to exposed pipes or areas that are more likely to freeze, like the kitchen or bathroom. 4. Seal Cracks and Gaps Around Pipes Cracks and gaps in walls, windows, or doors can allow cold air to seep into your home and come into contact with your pipes. Sealing these gaps will not only help you prevent frozen pipes, but it will also improve your home’s overall energy efficiency. Use caulk or insulation foam to seal any cracks around windows, doors, or areas where pipes enter your home. Pay particular attention to areas around utility pipes, which may have gaps that let cold air in. Additionally, check for drafts near areas like attics, basements, and crawl spaces where pipes are often exposed to colder temperatures. Sealing these areas prevents cold air from getting into your home and ensures that your pipes stay at a more consistent temperature. Bonus Tip: Don’t forget to check outdoor areas like garden hoses, sprinklers, or exterior faucets. Disconnect hoses and cover outdoor faucets with insulated covers to protect them from freezing temperatures. 5. Drain and Shut Off Outdoor Water Sources Your outdoor water supply is more vulnerable to freezing, so taking steps to drain and shut off outdoor faucets and sprinklers is crucial before winter arrives. Start by draining water from hoses, sprinkler systems, and any outdoor faucets. Once drained, disconnect and store hoses inside to prevent damage. For homes with sprinkler systems, make sure to follow the manufacturer’s instructions for winterizing the system. This often involves draining the water from the system and shutting off the water supply to avoid any remaining water from freezing in the lines. Similarly, shut off the water supply to any outdoor faucets that aren’t in use during the winter, especially those connected to exterior walls. Bonus Tip: If your home has a pool or any other outdoor water features, take the necessary steps to winterize them as well. Even a small amount of standing water in pipes connected to these features can freeze and cause damage. Preventing frozen pipes should be a priority for homeowners in Plano, TX, especially during unpredictable winter weather. Taking these simple preventive measures can save you from the stress and expense of dealing with burst pipes and water damage. Insulating your pipes, maintaining a consistent indoor temperature, letting faucets drip, sealing gaps, and winterizing outdoor water sources are all essential steps in keeping your home’s plumbing safe throughout the winter. For professional help with your plumbing or HVAC needs, the team at Chrome Heating Air Conditioning is here to assist you. Whether you need advice on winterizing your home or require emergency repairs, we provide expert service to ensure your

Right Plumber for Your Repairs
Uncategorized

How to Choose the Right Plumber for Your Repairs

When it comes to home repairs, plumbing issues can be some of the most challenging and stressful problems to deal with. A leaky faucet, clogged drain, or burst pipe can quickly disrupt your daily routine and, if not addressed promptly, lead to more severe damage. Whether you’re facing a minor repair or a major plumbing overhaul, finding the right plumber is essential to ensure the job is done correctly. Here’s a guide to help you choose the best plumber for your repairs and avoid costly mistakes. 1. Check for Proper Licensing and Certification The first step in choosing the right plumber is to verify their credentials. A professional plumber should be fully licensed and certified to perform plumbing work in your area. This ensures that they have undergone the necessary training and are familiar with local plumbing codes and regulations. When contacting potential plumbers, always ask for their licensing information and verify it through your local regulatory body. In addition to a general plumbing license, some plumbers may hold additional certifications in specific areas, such as backflow prevention or gas fitting. These qualifications can be valuable if your plumbing needs require specialized knowledge. 2. Look for Experience and Expertise Experience matters in the plumbing industry. While newly licensed plumbers can be skilled, an experienced plumber brings years of hands-on knowledge to the table. This expertise can make a significant difference, especially when dealing with complex plumbing systems or unexpected complications. A plumber with a long track record of successful repairs and installations is more likely to provide reliable service. When researching plumbers, look for those who have experience handling repairs similar to yours. Whether you need help with a simple fixture replacement, a drain cleaning, or a water heater installation, a plumber who has tackled these tasks many times before will be more efficient and effective. 3. Read Reviews and Ask for Recommendations One of the most reliable ways to find a trustworthy plumber is by reading online reviews and asking for recommendations from friends, family, or neighbors. Many homeowners have dealt with plumbing issues at some point, and they can offer valuable insights into which plumbers in your area provide excellent service. Online platforms such as Google, Yelp, and Angie’s List are excellent resources for reading customer reviews. Pay attention to feedback about the plumber’s punctuality, professionalism, pricing, and quality of work. While a few negative reviews are inevitable, consistently poor feedback should be a red flag. 4. Ask About Insurance and Warranties Plumbing work can sometimes involve risks, including property damage or personal injury. For your protection, it’s crucial to choose a plumber who carries both liability insurance and workers’ compensation. Liability insurance covers any damage that may occur during the repair, while workers’ compensation protects you from being held liable if the plumber is injured while working on your property. Additionally, inquire about warranties on both labor and parts. A reputable plumber should offer a guarantee on their workmanship and use high-quality parts that come with manufacturer warranties. This gives you peace of mind knowing that if something goes wrong after the repair, you’re covered. 5. Evaluate Their Communication Skills Good communication is a hallmark of a professional plumber. From the initial phone call or consultation, the plumber should be clear, courteous, and transparent about what they can offer. They should take the time to explain the problem, outline possible solutions, and provide an accurate estimate for the work. Avoid plumbers who are vague or evasive when discussing the details of your repair. You want someone who is honest and upfront about the cost, timeline, and any potential challenges they foresee. A plumber who communicates well will also keep you informed throughout the repair process, ensuring there are no surprises. 6. Compare Multiple Quotes It’s a good idea to get quotes from at least three different plumbers before making a decision. This allows you to compare pricing, services, and availability. Be cautious of unusually low estimates, as they may indicate a plumber who cuts corners or uses subpar materials. When reviewing quotes, make sure they are detailed and itemized. The estimate should include the cost of labor, materials, any additional fees (such as for emergency services or after-hours work), and an estimated completion time. Don’t hesitate to ask the plumber to explain any part of the quote that seems unclear or inflated. 7. Consider Availability and Response Time Plumbing emergencies can happen at any time, and when they do, you need a plumber who can respond quickly. Before hiring a plumber, ask about their availability for emergency services. Some plumbers offer 24/7 emergency repairs, which can be a lifesaver if you’re dealing with a burst pipe or severe water damage. Even for non-emergency repairs, you want a plumber who can fit you into their schedule promptly. Long wait times can allow a minor issue to escalate into a more serious (and expensive) problem. 8. Check Their Tools and Technology The right plumber should have access to modern tools and technology to efficiently diagnose and repair your plumbing issues. Plumbing has evolved over the years, and cutting-edge equipment like video inspection cameras, hydro-jetting machines, and electronic leak detection devices can help plumbers address problems more accurately and with minimal disruption to your home. During your consultation, ask the plumber what tools and techniques they use for common repairs. Plumbers who stay up to date with the latest advancements in the industry are more likely to provide efficient and high-quality service. 9. Ask About Payment Plans and Financing Options Plumbing repairs, especially large ones like water heater replacements or pipe rerouting, can be expensive. If you’re concerned about the cost, ask the plumber about their payment options. Many plumbing companies offer flexible payment plans or financing options to help homeowners manage the financial burden of unexpected repairs. A plumber who is willing to work with you on payment options demonstrates that they prioritize customer satisfaction and understand the financial strain that major repairs can cause. 10. Verify Their

DIY Drain Cleaning
Uncategorized

Why DIY Drain Cleaning Could Be a Big Mistake

Drain clogs are a common household issue that most homeowners have dealt with at one time or another. Whether it’s a slow drain in the bathroom or a full blockage in the kitchen sink, the temptation to tackle the problem yourself is understandable. After all, a quick trip to the local hardware store for some tools or chemicals seems much easier and less expensive than calling in a professional plumber. However, DIY drain cleaning can often lead to bigger problems, making what seemed like a simple task a costly and stressful ordeal. In this article, we’ll explore the reasons why attempting to clean your drains on your own could be a big mistake and why leaving it to the professionals is often the best course of action. 1. Risk of Pipe Damage One of the most significant risks of DIY drain cleaning is damaging your pipes. Commercial drain cleaners, which are often the first go-to for homeowners, contain harsh chemicals designed to dissolve clogs quickly. While these products might provide temporary relief, they can severely damage your pipes over time. Chemical drain cleaners generate heat as they break down the clog, and this heat can weaken or melt certain types of pipes, especially older PVC or plastic ones. Additionally, if the clog is not fully dissolved, these chemicals can sit in your pipes, corroding the walls and potentially leading to leaks or pipe bursts down the line. In some cases, using a snake or other mechanical tools improperly can also cause physical damage to the pipes, resulting in costly repairs. 2. Temporary Fixes Don’t Solve the Underlying Problem Many DIY solutions for drain cleaning provide only a temporary fix. You may manage to clear out some debris, but the root cause of the clog could remain. Drains can become clogged for a variety of reasons, from grease build-up to tree root intrusion or a misalignment of the pipes. Without proper diagnostic tools, it’s challenging to identify what’s causing the blockage. A professional plumber has access to specialized tools, such as video inspection cameras, that can assess the condition of your pipes and locate the true source of the problem. By identifying the underlying issue, they can provide a long-lasting solution that prevents future clogs from occurring. 3. DIY Cleaning Can Lead to Bigger Problems It’s not uncommon for homeowners to try and tackle drain cleaning on their own, only to make the situation worse. For example, forcing a drain snake into the pipes or using a plunger incorrectly can compact the clog further or even push it deeper into the plumbing system, making it more difficult to remove. In some cases, DIY attempts can lead to a complete blockage, requiring more intensive work to resolve. Additionally, without the right experience or tools, you might miss warning signs that indicate a more significant issue, such as sewer line blockages or damage. Addressing the problem early on can save you from more expensive repairs in the future, like needing to replace large sections of your plumbing system. 4. Health and Safety Risks Using chemicals to clean drains poses significant health risks. Most commercial drain cleaners contain caustic substances like lye or sulfuric acid, which can cause chemical burns, respiratory issues, and other health problems if they come into contact with your skin or if the fumes are inhaled. Moreover, if multiple chemical drain cleaners are mixed, they can produce dangerous gases that can be harmful in enclosed spaces like bathrooms or kitchens. Additionally, DIY drain cleaning often involves removing debris by hand. If you’re dealing with water that’s been sitting in the pipes for a while, it could contain harmful bacteria or contaminants. A professional plumber will have the proper protective equipment and knowledge to handle these hazards safely. 5. Hidden Costs of DIY Drain Cleaning While attempting to clean a drain yourself may seem like a cost-effective solution, it often leads to hidden expenses. For example, if a chemical cleaner damages your pipes or a tool breaks during the cleaning process, you may end up paying for expensive repairs or replacements. Additionally, repeated purchases of drain cleaners or DIY tools can add up over time. Hiring a professional plumber might seem like a bigger upfront cost, but it can save you money in the long run. A professional will be able to resolve the problem efficiently and provide a long-lasting solution that reduces the need for frequent maintenance or repair. 6. Lack of Professional Expertise One of the most significant downsides of DIY drain cleaning is the lack of professional expertise. While there are plenty of online tutorials and tips available, they can’t match the years of experience and knowledge that a trained plumber brings to the table. Professionals understand the complexities of plumbing systems and can identify issues that are not immediately visible. For example, what seems like a simple clog might actually be a sign of a more severe problem, such as a collapsed pipe or tree root intrusion. A plumber will have the tools and expertise to fix these issues quickly and efficiently, preventing future problems from arising. 7. Environmental Impact Another reason to reconsider DIY drain cleaning is its potential environmental impact. Many chemical drain cleaners contain toxic ingredients that can harm the environment when washed down the drain. These chemicals can contaminate water supplies, damage local ecosystems, and pose a risk to wildlife. Additionally, improper disposal of DIY drain cleaning tools or chemicals can contribute to environmental pollution. Professional plumbers often use environmentally friendly methods to clean drains, such as hydro jetting, which uses high-pressure water to clear blockages without the need for harsh chemicals. By choosing professional services, you’re not only protecting your home but also doing your part to reduce your environmental footprint. When to Call a Professional While minor clogs caused by hair or small debris may be manageable with basic tools, it’s essential to recognize when a problem is beyond your expertise. If you notice frequent clogs, foul odors, gurgling sounds,

Scroll to Top
Chrome Logo Web Transparent

Scheduled an Appointment