Uncategorized

Uncategorized

How Long Does AC Last Texas? How Long Should an AC Unit Last in the Texas Heat?

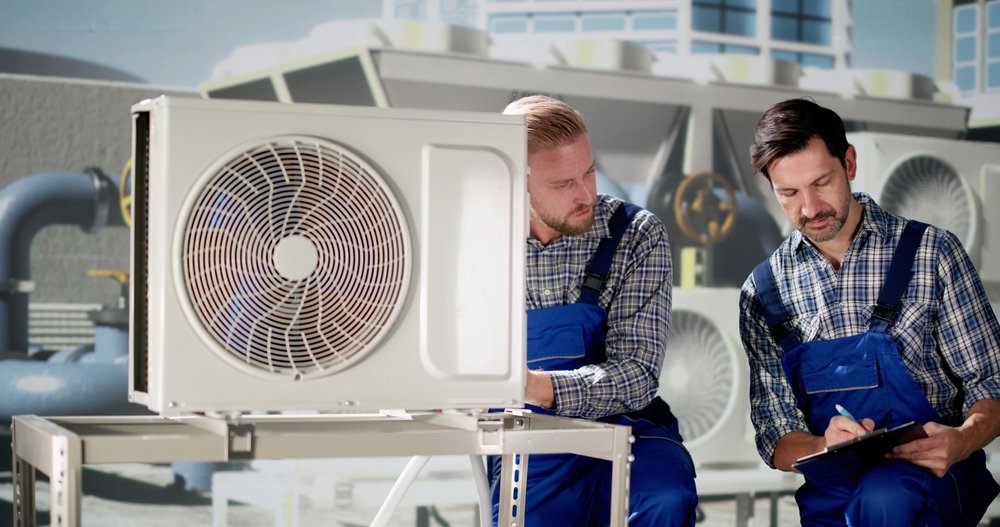
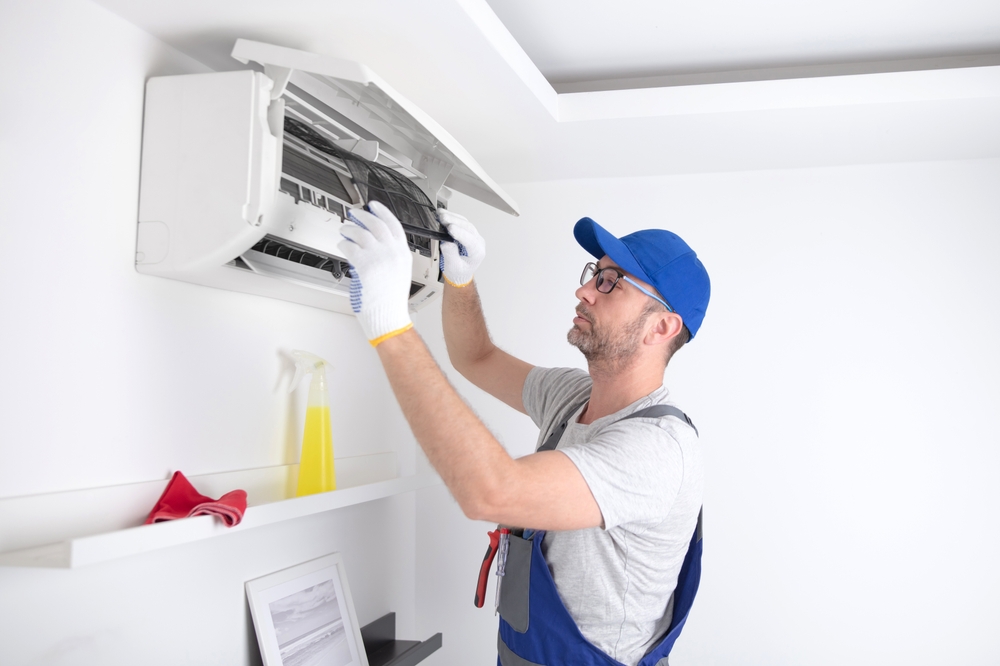
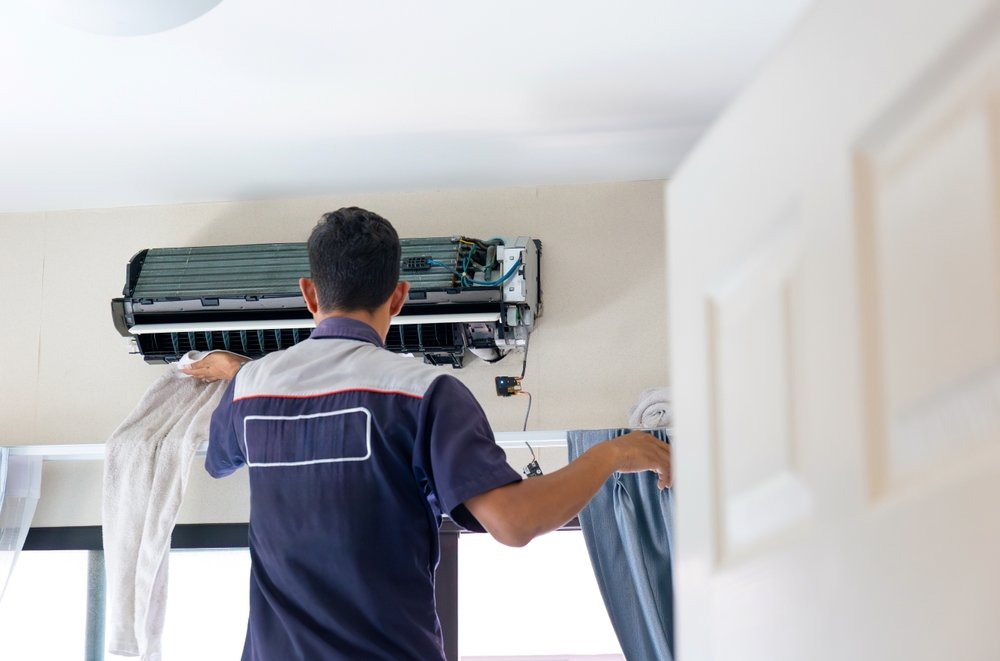
  How Long Does AC Last Texas? How Long Should an AC Unit Last in the Texas Heat? Texas heat can be extremely demanding on an air conditioning system. With long summers and extended periods of high temperatures, homeowners often ask, how long does AC last Texas? While many residential AC systems can last around 10 to 15 years with proper maintenance, the actual lifespan depends on usage, installation quality, maintenance, system size, and operating conditions. At Chrome Air Conditioning, we help homeowners understand when an aging AC system needs maintenance, repair, or replacement. Knowing the warning signs can help you plan ahead instead of facing an unexpected breakdown during the hottest part of a Texas summer. How Long Does an AC Unit Typically Last in Texas? The average residential air conditioner can often provide approximately 10 to 15 years of service, although some systems may last longer when properly maintained. Texas conditions can be particularly demanding because your AC may operate for extended periods throughout the year. Frequent cycling, high outdoor temperatures, poor airflow, neglected maintenance, and improper installation can all contribute to premature wear. If your system is approaching or exceeding its expected lifespan, it is worth monitoring its performance and considering your future AC replacement cost Dallas TX before a major failure occurs. What Affects AC Lifespan in Texas? Several factors can determine how long your air conditioner continues operating effectively. Maintenance Regular AC maintenance can help identify worn components, restricted airflow, dirty coils, and other issues before they become larger problems. Annual professional service is especially valuable before the cooling season. Usage A system that runs extensively during hot Texas summers experiences more operating hours than one used in a mild climate. Heavy usage can contribute to faster component wear. Installation Quality An improperly sized or poorly installed system may work harder than necessary. Professional AC installation Dallas TX can help ensure the equipment is correctly matched to the home’s cooling requirements. System Age As an AC system gets older, repairs may become more frequent. Eventually, replacement may make more financial sense than continuing to invest in an aging unit. Signs Your AC May Be Ready for Replacement Age alone does not necessarily mean your AC needs to be replaced. However, several warning signs can indicate that replacement should be considered. If your AC requires frequent repairs, struggles to maintain comfortable temperatures, produces unusual noises, or causes increasingly high energy bills, it may be approaching the end of its useful life. Homeowners should also pay attention when repair costs begin adding up. Comparing the cost of another repair with the AC unit replacement cost can help you make a more informed decision. If your system is older and experiencing repeated problems, ask a qualified HVAC professional whether AC repair vs replacement makes more sense for your home. How Much Does AC Replacement Cost? The cost of replacing an air conditioner varies significantly depending on system size, efficiency, equipment type, installation requirements, ductwork, electrical work, and other factors. When researching AC replacement cost, avoid choosing a contractor based only on the lowest initial estimate. A professional evaluation should explain what equipment is being recommended and what is included in the installation. The average AC replacement cost can also differ considerably between homes. A small, straightforward replacement will generally have different requirements from a larger system that needs ductwork modifications or electrical upgrades. For homeowners researching HVAC replacement cost Dallas TX, getting a detailed estimate based on your home’s specific requirements is the best approach. Is It Better to Repair or Replace an Older AC? There is no single answer for every homeowner. Repairing a relatively young system with a minor problem may be the most practical choice. However, replacing an older system with repeated breakdowns may provide better long-term value. Consider the system’s age, repair history, efficiency, comfort performance, and estimated replacement cost. If you are constantly paying for AC repair Dallas, it may be time to discuss replacement options. A professional can compare the cost to replace AC unit with the expected cost of continued repairs. How Can You Extend Your AC’s Lifespan? Although no AC lasts forever, proper care can help your system operate reliably for as long as possible. Replace or clean filters according to manufacturer recommendations, keep outdoor equipment clear of debris, maintain good airflow, and schedule professional inspections. Promptly address unusual noises, refrigerant-related concerns, poor cooling, and other performance changes. Regular air conditioning installation by qualified professionals is also important when replacing a system because proper sizing and installation can affect long-term performance. Frequently Asked Questions How long does AC last Texas? A residential AC system commonly lasts around 10 to 15 years, but Texas heat, heavy usage, maintenance, installation quality, and system condition can affect its actual lifespan. How do I know when my AC needs replacement? Frequent repairs, rising energy costs, inconsistent cooling, declining performance, and an aging system are common signs that replacement may be worth considering. Is it cheaper to repair or replace an AC? It depends on the system’s age and the repair required. A minor repair may be worthwhile on a newer unit, while repeated expensive repairs on an older system may make replacement more practical. What is the cost to replace an HVAC system? The cost to replace HVAC system equipment varies based on system size, efficiency, installation requirements, ductwork, and other factors. A professional inspection is needed for an accurate estimate. How often should an AC be maintained? Annual professional maintenance is a common recommendation. Scheduling service before the heavy summer cooling season can help identify potential problems before demand increases. When to Call a Professional You should contact an HVAC professional if your AC is no longer cooling properly, runs constantly, makes unusual sounds, produces strange odors, or requires frequent repairs. You should also schedule an evaluation if your system is approaching 10 to 15 years old. Chrome Air Conditioning can inspect your system and help you determine whether repair or replacement

AC Installation, AC Repair Frisco TX, AC Repair McKinney TX, AC Repair Plano TX, Air Conditioning, Energy Efficiency, Geothermal, Uncategorized

How to Handle an Overflowing Toilet Without Panic

Dealing with an overflowing toilet can be an unsettling experience. It’s one of those household emergencies that catches many homeowners off-guard, causing panic and stress. However, the situation doesn’t have to spiral out of control if you follow a step-by-step approach to resolve the issue calmly. In this guide, we will explain how to handle an overflowing toilet with confidence, making sure you minimize damage and restore order swiftly. 1. Understand the Cause of the Overflow The first step in managing an overflowing toilet is understanding why it’s happening. An overflow occurs when water fills the bowl and can’t drain properly. This is usually caused by a blockage in the plumbing system, which prevents water from passing through the pipes as it should. The most common causes include: Clogged Pipes: Items like excessive toilet paper, sanitary products, wipes, or foreign objects can get stuck in the pipes, obstructing the flow. Faulty Float Mechanism: If the toilet’s float mechanism (inside the tank) malfunctions, the tank may continue to fill with water, leading to overflow. Sewer Line Issues: In more severe cases, the sewer line might be blocked, causing backups that lead to toilet overflow. Knowing what caused the overflow is helpful because it informs how to approach the fix. If it’s a simple clog, you might be able to resolve it yourself. But if it’s a more serious problem, like a sewer line blockage, you’ll need professional help. 2. Turn Off the Water Supply When you notice that your toilet is overflowing, the first thing to do is stop the water from flowing into the bowl. Look behind or around your toilet for a shutoff valve. This valve, often located on the wall, can be turned clockwise to cut off the water supply immediately. If the shutoff valve is stuck or hard to turn, you can remove the lid of the toilet tank and manually stop the water flow. To do this: Lift the float (the ball or cup-shaped device) upward. This action should stop the water from filling the tank. Alternatively, reach down to the flapper (the rubber or plastic component at the bottom of the tank) and close it. This stops water from flowing into the bowl. Once the water supply is shut off, you can begin assessing the situation without worrying about additional overflow. 3. Plunge the Toilet Carefully If the overflow is due to a clog, your next move is to use a plunger. Make sure you have a good-quality plunger with a flange at the bottom that creates a tight seal in the toilet bowl. Here’s how to plunge effectively: Position the Plunger: Place the plunger directly over the hole at the bottom of the toilet bowl, ensuring it creates a tight seal. Push and Pull: Start by pushing down gently. If you push too forcefully, you might splash water. Once you establish a seal, plunge with more vigor, using both downward and upward strokes. Keep Plunging: Continue plunging for about 20-30 seconds. You may need to repeat this process a few times before the clog dislodges. Once the water begins to drain and the clog clears, flush the toilet to check if it operates normally. If the toilet still overflows or doesn’t drain properly, it may be time to call a professional plumber. 4. Clean Up the Overflowing Water After you’ve resolved the clog, it’s time to deal with the mess. Toilet overflow water can be unsanitary, so it’s essential to clean it up quickly to prevent damage and maintain hygiene. Follow these steps: Wear Protective Gear: Before cleaning up, wear rubber gloves to protect your hands. If the overflow is extensive, you might also want to wear boots and use towels or paper towels to create a barrier between the water and your floor. Soak Up the Water: Use towels, mops, or a wet-dry vacuum to soak up the water. Remove as much water as possible to prevent damage to your flooring. Disinfect the Area: After the water is removed, disinfect the area with a mixture of water and bleach (1:10 ratio) to eliminate bacteria and prevent contamination. Ventilate: Open windows and use fans to dry the space quickly. This will prevent mold and mildew from developing. 5. Prevent Future Overflows Once the immediate problem is under control, it’s essential to take preventive measures to ensure this doesn’t happen again. Here are some tips to keep your toilet functioning properly: Be Mindful of What You Flush: Only flush toilet paper and human waste. Avoid flushing sanitary products, wipes, or any foreign objects. Regular Maintenance: Schedule regular inspections and maintenance for your plumbing system. Chrome Heating Air Conditioning in Plano, TX, offers comprehensive plumbing services, including drain cleaning, to help prevent blockages. Upgrade Your Toilet: If your toilet is older, consider upgrading to a newer, more efficient model. Modern toilets use less water and are less prone to overflows caused by faulty mechanisms. 6. Know When to Call a Professional While many toilet overflows can be managed with quick thinking and the right tools, there are times when calling a professional is the best course of action. Here are a few situations where you should seek expert help: Persistent Clogs: If the toilet keeps clogging despite your best efforts, it could be a sign of a more significant problem, such as an issue with your sewer line. Slow Draining: If your toilet drains slowly, even after plunging, it may indicate a partial blockage that requires professional equipment to remove. Sewer Line Blockages: If you suspect a sewer line blockage, such as when multiple drains in your home are affected, you’ll need the expertise of a plumber to diagnose and fix the problem. For residents in the Plano, TX area, Chrome Heating Air Conditioning provides reliable plumbing services that can resolve even the most challenging overflow issues. Their team of professionals is equipped with the latest tools to diagnose and fix any plumbing issue, ensuring your toilet works correctly. 7. What to Expect From a

AC Installation, AC Repair Frisco TX, AC Repair McKinney TX, AC Repair Plano TX, Air Conditioning, Energy Efficiency, Geothermal, Uncategorized

5 Common Plumbing Problems and How to Solve Them

  When it comes to home maintenance, plumbing issues can be one of the most frustrating and disruptive problems you face. The good news is that many common plumbing problems can be fixed with a little know-how and the right tools. In this article, we’ll explore five of the most common plumbing issues and offer solutions, along with highlighting how Chrome Heating Air Conditioning provides professional plumbing services in Garland, TX, Dallas, TX, Frisco, TX, McKinney, TX, and Plano, TX. 1. Leaky Faucets Leaky faucets are a common annoyance that wastes water and can lead to higher utility bills. A worn-out washer, O-ring, or valve seat often causes these leaks. Solution: Start by turning off the water supply to the affected faucet. Dismantle the faucet and inspect the washer or O-ring. Replace any worn parts with new ones from a hardware store, then reassemble the faucet. If the leak persists, it may be a deeper issue that requires professional assistance. Need help? Chrome Heating Air Conditioning offers fast, efficient faucet repair services. Call for assistance in Garland, Frisco, or surrounding areas. 2. Clogged Drains Whether it’s the kitchen sink or the shower, clogged drains are a common headache. They are usually caused by hair, soap scum, or food debris buildup. Solution: For minor clogs, use a plunger or a drain snake. Chemical drain cleaners can be effective, but use them sparingly to avoid pipe damage. For stubborn clogs, call in the professionals to avoid further damage. Need a professional touch? Our plumbing experts at Chrome Heating Air Conditioning are available across Dallas and McKinney to clear tough clogs and ensure smooth water flow. 3. Running Toilets A running toilet can waste up to 200 gallons of water per day. This issue is often caused by a faulty flapper, float, or fill valve. Solution: First, check the flapper to ensure it seals properly. If it’s worn out, replace it. Next, inspect the float and fill valve. Adjusting these components can often resolve the problem. If you are unsure, consult a professional plumber.   4. Low Water Pressure Low water pressure can be frustrating, especially when showering or trying to wash dishes. The causes can range from a clogged aerator to more severe pipe issues. Solution: Clean the aerator on your faucets and showerheads to remove any mineral buildup. If this doesn’t help, it could indicate a larger problem in your plumbing system, such as leaks or pipe blockages.   5. Water Heater Issues No hot water? This could be due to a malfunctioning water heater. Common water heater problems include sediment buildup, thermostat issues, or a faulty heating element. Solution: For sediment buildup, try flushing the tank. If that doesn’t solve the problem, check the thermostat settings. Replacing the heating element or thermostat may be necessary, which is best left to a professional.   Plumbing Services by Chrome Heating Air Conditioning Dealing with plumbing problems can be a hassle, but with the right expertise, you can avoid major headaches and costly repairs. If you’re facing any plumbing issues in Garland, TX, Dallas, TX, Frisco, TX, McKinney, TX, or Plano, TX, the professionals at Chrome Heating Air Conditioning are ready to help. We offer a wide range of plumbing services, including: Leak detection and repair Drain cleaning Water heater installation and repair Pipe repair and replacement Emergency plumbing services Contact us today to schedule a service or for emergency plumbing needs. Our experienced plumbers are just a call away, ensuring your home’s plumbing system runs smoothly.    FAQ What should I do if my faucet is leaking? A leaky faucet is usually caused by a worn-out washer or O-ring. To fix it, turn off the water supply, disassemble the faucet, and replace the damaged parts. If you’re unsure, it’s best to consult a professional. How can I unclog a slow-draining sink? For a slow-draining sink, try using a plunger or a drain snake. You can also use a mixture of baking soda and vinegar followed by hot water. If these methods don’t work, there may be a deeper blockage that requires professional attention. Why is my toilet constantly running, and how can I fix it? A running toilet is often caused by a faulty flapper or fill valve. Replacing the flapper or adjusting the float mechanism should stop the water from running. If these parts are worn out, consider replacing them. How do I prevent low water pressure in my home? Low water pressure can result from clogged pipes or faulty valves. Cleaning aerators, checking for leaks, and ensuring the main water valve is fully open can help. If the problem persists, it might be due to a larger plumbing issue that requires professional service. What causes water heater issues, and how can I resolve them? Common water heater issues include lack of hot water, strange noises, or water leaks. Check the thermostat settings, flush the tank to remove sediment buildup, or replace a faulty pressure relief valve. If the issue continues, contact a plumber for repairs or replacement.  

Troubleshooting Water Heater Issues
Uncategorized

Troubleshooting Water Heater Issues: Common Problems and Fixes for No Hot Water

1. Check the Power Supply or Fuel Source Before delving into deeper issues, always start with the basics. If you have an electric water heater, check that the power supply is working. Often, circuit breakers can trip, cutting off power to the heater. Go to your breaker box, find the breaker for the water heater, and ensure it hasn’t tripped. For gas water heaters, verify that the gas valve is open and that you have a steady supply of gas to the unit. Fix: If the circuit breaker is off, switch it back on. If it continues to trip, this could be a sign of an electrical problem within the water heater or your electrical panel, which will need a professional inspection. For gas water heaters, if the gas supply is cut off or interrupted, you’ll need to contact your gas provider. 2. Look for Sediment Buildup Sediment buildup is one of the most common culprits of reduced water heating performance, especially if you live in an area with hard water. Over time, minerals like calcium and magnesium in hard water settle at the bottom of the tank, creating a layer that insulates the water from the heating element. This prevents the heater from effectively heating the water, causing lukewarm or even cold water to flow through your taps. Fix: To fix sediment buildup, drain and flush the tank. Start by turning off the heater’s power supply and water inlet, then attach a hose to the tank’s drain valve. Let the water fully drain, then briefly turn on the cold water supply to flush out any remaining sediment. If you’re comfortable with maintenance tasks, you can do this on your own; otherwise, call a professional to ensure the tank is properly flushed and cleaned. 3. Test the Thermostat The thermostat is a crucial component of your water heater, as it regulates the temperature. If it’s set too low, your water won’t get hot enough. On the other hand, a faulty thermostat might not read temperatures correctly, causing lukewarm or cold water. Most water heaters have two thermostats, one for the upper heating element and one for the lower. If either one fails, it can cause inconsistent water temperatures. Fix: First, check the thermostat setting and ensure it’s at a temperature high enough for your needs, typically around 120°F to 140°F. If the thermostat is already set correctly, test it by using a multimeter. If you find that the thermostat isn’t registering correctly, replace it with a compatible part for your model. This is a straightforward task but can require some technical skills, so consult a professional if you’re uncertain. 4. Inspect the Heating Element Electric water heaters rely on one or more heating elements to heat water, while gas models use a burner. Heating elements can burn out over time, especially if there’s sediment buildup or they’ve been in constant use. If one of these elements is damaged, it can result in only partially heated water or no hot water at all. Fix: To inspect the heating element, shut off power to the heater, drain the tank, and remove the element. Use a multimeter to test the element for continuity. If it shows an open circuit, the element is broken and needs replacement. Install a new heating element compatible with your water heater model. This is a bit more involved, so calling a professional is advisable if you don’t feel comfortable with the process. 5. Pilot Light or Ignition Problems in Gas Heaters Gas water heaters rely on a pilot light or an electronic ignition system to ignite the burner. If the pilot light goes out or the ignition system fails, the burner won’t heat the water. The pilot light may go out due to a draft, a dirty burner, or a faulty thermocouple. Fix: For heaters with a pilot light, follow the manufacturer’s instructions to relight it. If it doesn’t stay lit, check the thermocouple. This is a small metal rod near the pilot light that senses whether the flame is on. If it’s defective, the pilot light won’t stay lit, and the thermocouple will need replacement. In newer water heaters with electronic ignition, if the ignition system fails, you’ll likely need a professional technician to diagnose and repair the issue. 6. Faulty Dip Tube The dip tube directs incoming cold water to the bottom of the tank, allowing the heating elements or burner to effectively heat the water. If the dip tube is broken or damaged, cold water will mix with the hot water at the top of the tank, resulting in lukewarm or cold water from your faucets. Fix: You’ll need to inspect the dip tube by removing the cold water inlet and examining the tube for cracks or breakage. If it’s damaged, replace it with a new dip tube compatible with your water heater model. If this feels out of your comfort zone, consider contacting a technician for a proper replacement. 7. Tank Size and Usage Sometimes, the issue isn’t mechanical but rather due to a mismatch between your water heater’s capacity and your household’s hot water demands. If you frequently run out of hot water during peak usage times, it could mean that your tank is too small to meet the needs of your home. Fix: Consider upgrading to a larger tank if you consistently find yourself short of hot water. Another option is a tankless water heater, which heats water on demand and can provide a continuous supply. Assessing your household’s needs can help you decide whether an upgrade is worthwhile. 8. Water Heater Age Most water heaters have a lifespan of about 8-12 years. Older units are more prone to issues like sediment buildup, worn heating elements, and failing thermostats. If your water heater is nearing or has surpassed this age range, it may be more cost-effective to replace it rather than continuously repair it. Fix: If your water heater is older, consider replacement as a long-term solution. Newer models are not

Plumber for Low Water Pressure
Uncategorized

When to Call a Plumber for Low Water Pressure

Low water pressure can be more than a minor inconvenience—it can indicate underlying plumbing issues that might worsen over time if left unaddressed. While some low water pressure issues can be resolved with basic DIY fixes, others call for professional expertise. Here’s a comprehensive guide on how to identify the causes of low water pressure, when to try a quick fix, and when it’s time to call a plumber to ensure your home’s plumbing system runs smoothly. Understanding Low Water Pressure Low water pressure occurs when water flow from faucets or showerheads is weaker than usual. It can be felt as a sluggish trickle or reduced spray strength, making tasks like showering, washing dishes, and doing laundry much less efficient. For most households, normal water pressure is typically around 45-60 psi (pounds per square inch). Anything below this range can disrupt your daily routine and, over time, cause wear and tear on appliances that rely on proper water pressure. Common Causes of Low Water Pressure There are various reasons why your home might experience low water pressure, ranging from minor issues to significant plumbing concerns. Here are some of the most common causes: Sediment and Mineral Buildup Over time, minerals from hard water can accumulate inside pipes, fixtures, and appliances, restricting water flow. If you live in an area with hard water, mineral buildup is likely and can lead to gradual pressure loss. Leaks in the Plumbing System A leak anywhere in the plumbing system can reduce water pressure because water that should reach your faucets is escaping elsewhere. This is not only wasteful but can also cause structural damage if left unattended. Old or Corroded Pipes Older homes often have galvanized steel pipes prone to corrosion over time. Corrosion can cause blockages, reducing water flow and leading to uneven pressure throughout the house. Faulty Pressure Regulator A pressure regulator is designed to maintain steady water pressure. However, if it malfunctions, it can result in excessively high or low pressure, affecting your fixtures’ efficiency and longevity. Clogged Aerators or Showerheads Aerators and showerheads can become clogged with debris, sediment, and mineral deposits, especially if the water is hard. Fortunately, these are often easy to clean or replace. Main Water Valve Issues The main water valve controls the flow of water into your home. If it’s partially closed or obstructed, it can restrict water flow and cause lower pressure throughout the home. Municipal Supply Issues Sometimes, low water pressure is beyond your control and may be due to issues with the municipal water supply. Contact your water utility company to verify if they’re conducting maintenance or experiencing system issues. When to Try DIY Fixes for Low Water Pressure While it’s wise to contact a plumber for complex issues, some low water pressure cases are simple enough to troubleshoot yourself. Here’s when to try a DIY fix before calling in a professional. 1. Clean Faucet Aerators and Showerheads Mineral buildup on faucet aerators or showerheads can cause pressure drops. You can remove these fixtures and soak them in vinegar for an hour to dissolve the deposits. Once they’re clean, reinstall them to see if pressure improves. 2. Check Your Main Shutoff Valve Sometimes, low water pressure is due to a partially closed shutoff valve. Locate the valve, which is typically found near your water meter, and ensure it’s fully open. Turn it counterclockwise to maximize water flow. 3. Look for Signs of Leaks Leaks can be a significant cause of low water pressure. Check for damp spots, water stains on walls or ceilings, and unexplained puddles around pipes. If you find a visible leak, shutting off the water supply and calling a plumber is advised. 4. Test All Faucets If only one or two faucets exhibit low water pressure, the issue may be isolated to those specific fixtures. Try cleaning or replacing their aerators or cartridges. However, if the problem persists across multiple fixtures, it might be due to a larger system issue requiring professional assistance. When to Call a Plumber for Low Water Pressure If your DIY efforts don’t resolve the problem, it’s best to consult a professional plumber. Here are the key signs that indicate it’s time to call in an expert. 1. Persistent Low Water Pressure in the Whole House If every faucet and fixture throughout the house has consistently low water pressure, this could signal a systemic issue. Causes might include an aging or failing pressure regulator, issues with your main water valve, or even a blockage in the main water line. A plumber can diagnose the root cause and perform necessary repairs or replacements to restore normal pressure. 2. Signs of Corrosion or Rust in Pipes If your home has older plumbing, especially galvanized steel pipes, corrosion may be to blame. Rust-colored water, odd-tasting water, or water pressure that fluctuates randomly can all point to corroded pipes. Since corroded pipes often need to be replaced, a professional plumber can inspect and recommend a course of action, whether it’s repiping specific sections or the entire system. 3. Suspected Leak That You Can’t Locate A hidden leak can be difficult to pinpoint, especially if it’s behind walls or beneath floors. Persistent low pressure combined with damp spots, mold growth, or the sound of running water when no fixtures are on could all indicate a hidden leak. A plumber has the tools to detect leaks accurately, often using specialized equipment like infrared cameras and acoustic leak detection. 4. Problems with Your Pressure Regulator A faulty pressure regulator can lead to uneven water pressure. If you experience extreme fluctuations or low pressure throughout the home, a plumber can check if the regulator needs adjustment or replacement. 5. Issues with the Water Heater Sometimes, low water pressure only affects hot water, which might mean there’s an issue with your water heater. Sediment buildup in the tank, a malfunctioning valve, or corroded pipes around the water heater could all impact pressure. In such cases, a plumber can flush the tank, replace faulty

How to Repair a Sputtering Faucet
Uncategorized

How to Repair a Sputtering Faucet

A sputtering faucet is more than a minor inconvenience. It can be an indication of air in the plumbing lines, buildup in the faucet’s aerator, or even underlying issues in your water system. A sputtering faucet often releases bursts of water mixed with air, leading to erratic water flow and potentially bigger issues if not addressed. Fortunately, most cases can be solved with a few easy repairs. In this article, we’ll explore common causes of a sputtering faucet, ways to troubleshoot, and steps for effective repair. Common Causes of a Sputtering Faucet Understanding why your faucet is sputtering can help you determine the best repair approach. Here are some of the most common causes: Air in the Water Line This is one of the primary reasons for sputtering faucets, especially in areas with recently serviced plumbing lines. When air enters the system, it creates gaps in the water flow, leading to sputtering. This can happen if there’s a new installation, recent repairs, or even after seasonal changes. Buildup in the Aerator The aerator, a small mesh screen located at the faucet’s spout, is designed to filter out sediment and debris. Over time, minerals and other deposits can clog the aerator, reducing water flow and causing sputtering. Regular cleaning can help prevent this issue. Faulty Valve Cartridges Inside your faucet, valve cartridges control water flow. If these cartridges are damaged or worn out, they may not open or close smoothly, leading to sputtering as water is inconsistently released. Sediment in the Pipes Sediment, often found in areas with hard water, can accumulate in pipes and reduce water flow. This blockage may contribute to sputtering as water forces its way through restricted sections of the plumbing. Issues with Water Pressure Sometimes, water pressure fluctuations can also lead to sputtering faucets. High-pressure spikes or low-pressure issues can both affect the faucet’s operation. Now that we know the potential causes, let’s dive into how to repair a sputtering faucet. Step-by-Step Guide to Repairing a Sputtering Faucet Step 1: Inspect the Aerator The aerator is often the main culprit when dealing with sputtering faucets. Follow these steps to inspect and clean the aerator: Remove the Aerator Carefully unscrew the aerator from the faucet spout using your hands or an adjustable wrench. If it’s difficult to remove, try wrapping the spout with a cloth to prevent scratching, and use pliers. Clean the Aerator Rinse the aerator under running water, using a soft brush to remove debris. If there’s mineral buildup, soak the aerator in a small bowl of vinegar for 30-60 minutes to dissolve the deposits. Reassemble the Aerator Once clean, reassemble the aerator and screw it back onto the faucet. Turn on the water to check if the sputtering has stopped. If the problem persists, continue to the next steps. Step 2: Check for Air in the Plumbing Lines If the aerator is clean but the faucet continues to sputter, you may have air trapped in the water lines. Here’s how to resolve this: Turn Off the Water Shut off the main water supply. This can usually be found near your water meter or in the basement. Open All Faucets Open every faucet in the house, including outdoor spigots, starting with the one closest to the main water valve. Let the water drain completely from the lines. This should flush out any trapped air. Turn the Water Back On Turn the main water supply back on and gradually close each faucet, one by one, beginning with the farthest faucet from the main valve. This process should help release any remaining air pockets. Step 3: Examine the Valve Cartridges If the sputtering continues, you might have an issue with the faucet’s valve cartridges. Here’s how to address this: Turn Off the Water Supply to the Faucet Locate the shutoff valves under the sink and turn them off to cut off the water supply to the affected faucet. Remove the Faucet Handle Depending on the faucet model, you’ll need to remove the handle to access the valve cartridges. Use a screwdriver or hex wrench as needed. Extract the Valve Cartridge Using pliers, carefully pull out the valve cartridge. Examine it for wear or damage. If it’s old or corroded, it’s best to replace it with a new one. Install the New Cartridge Insert the new cartridge, reassemble the faucet, and turn the water supply back on. Test the faucet to see if the sputtering has been resolved. Step 4: Address Sediment in the Pipes In areas with hard water, mineral deposits can accumulate in the pipes, leading to restricted water flow and sputtering. To address sediment in the pipes, consider these steps: Flush the Pipes Turn off the water supply and open all faucets to drain the system completely. Once drained, turn the main water supply back on to flush the pipes. This helps remove any loose sediment. Install a Water Filter If sediment buildup is a recurring issue, consider installing a water filter on your main water line. This can prevent debris from reaching your faucet and causing blockages. Step 5: Regulate Water Pressure If your water pressure is too high, it can contribute to sputtering faucets and even cause damage to your plumbing system. Here’s how to address it: Check the Water Pressure Use a pressure gauge to measure your water pressure. Ideally, the pressure should be between 40 and 60 PSI. Anything above 80 PSI is considered too high. Adjust the Pressure Regulator If the pressure is too high, locate your pressure regulator (usually near the main shutoff valve) and adjust it to a lower setting. If you don’t have a regulator, it might be wise to install one to help maintain optimal pressure. Additional Tips for Preventing Sputtering Faucets Regular Maintenance Clean aerators and showerheads every few months to prevent mineral buildup and clogs. This proactive approach can help keep your faucets working smoothly. Address Hard Water If you live in an area with hard water, consider using a water softener to

Air Conditioning Service
Uncategorized

Why You Should Fix Clogged Drains Immediately

Clogged drains are more than just a minor annoyance—they’re often the beginning of much larger issues if left unresolved. From unpleasant odors to potential property damage, ignoring a clogged drain can lead to a cascade of expensive and time-consuming problems. Here’s why you should act quickly to fix clogged drains and avoid these unwanted consequences. 1. Prevent Damage to Pipes and Fixtures One of the primary reasons to fix a clogged drain immediately is to prevent potential damage to your plumbing. When water can’t flow freely through your pipes, it exerts pressure on the walls of the pipes, increasing the likelihood of cracks, leaks, or even burst pipes. The debris blocking the drain, whether it’s hair, soap scum, grease, or foreign objects, also has a corrosive effect on pipes over time, weakening them and causing gradual degradation. Immediate action can keep your plumbing system in top shape and save you money on costly repairs down the line. 2. Avoid Health Hazards Clogged drains can create stagnant water, which attracts bacteria and other microorganisms. Over time, this build-up can lead to unpleasant smells, but more importantly, it creates a breeding ground for harmful bacteria. The health risks associated with clogged drains include exposure to harmful pathogens, mold growth, and other allergens. For people with allergies, asthma, or immune system sensitivities, these risks are heightened. Fixing clogs quickly prevents bacteria and mold growth, ensuring a safer, healthier home environment. 3. Prevent Unpleasant Odors A clogged drain can produce lingering, foul odors that spread throughout your home, creating an uncomfortable living space. When food particles, grease, soap, and other organic materials become trapped in the drain, they begin to decompose, which produces unpleasant smells. This issue becomes more pronounced if the clog is in a kitchen drain, as the food residues that accumulate can attract pests as well as emit strong, foul odors. Fixing the drain as soon as you notice the issue will eliminate these odors and keep your home smelling fresh. 4. Minimize Water Damage and Flooding Risks Ignoring clogged drains increases the risk of water overflow and flooding. If a drain becomes too clogged, water can back up and spill over onto floors, causing water damage to cabinets, floors, and walls. This is especially concerning in rooms with fixtures that hold large amounts of water, such as bathtubs, sinks, and washing machines. Even a small overflow can seep into flooring and wall materials, leading to mold growth, wood rot, and mildew. Addressing clogs as they occur is one of the best ways to prevent costly water damage and the need for extensive repairs. 5. Improve Drain Efficiency and Water Flow A clear drain allows water to flow efficiently, which is not only convenient but also essential for conserving water. When you have a clogged drain, it takes longer for water to drain out of sinks, tubs, or showers, which can be frustrating and time-consuming. Over time, the efficiency of the drainage system can be compromised, resulting in poor performance across your entire plumbing system. Regularly unclogging drains and addressing any issues helps maintain the water flow rate, saving time and reducing water waste. 6. Save Money on Potential Repairs What may seem like a minor clog can quickly escalate into a significant issue requiring professional intervention. When water backs up due to a blockage, it can cause pressure build-up that damages pipes and fixtures. The cost of repairing or replacing damaged plumbing is much higher than the expense of routine drain cleaning and unclogging. In addition, if the clog leads to water damage, you might also face high repair costs for flooring, walls, and furniture. By fixing clogged drains as soon as possible, you reduce the risk of needing expensive plumbing and home repairs. 7. Preserve the Longevity of Your Plumbing System Clogs cause undue strain on your plumbing system, wearing out pipes, fittings, and seals faster than normal. Frequent clogs and prolonged blockage lead to wear and tear that reduces the lifespan of your plumbing. By clearing clogs quickly and keeping drains clean, you’re extending the longevity of your pipes and reducing the frequency of repairs or replacements. In the long run, a proactive approach to clog management ensures that your plumbing system remains reliable and functional for years. 8. Reduce Stress and Maintain a Comfortable Living Environment Few things are as disruptive to daily life as a plumbing issue. Clogged drains make routine tasks—such as washing dishes, taking a shower, or brushing your teeth—more difficult and less pleasant. In addition to the practical inconvenience, dealing with a clogged drain can also be stressful, especially if the clog persists or leads to further plumbing issues. By addressing clogs promptly, you maintain a comfortable and functional home, ensuring peace of mind and a better quality of life. 9. Protect Your Home’s Structural Integrity Over time, prolonged water exposure due to clogged drains can weaken the structural integrity of your home. When water overflows or leaks due to a clog, it can seep into walls, flooring, and foundations, causing gradual deterioration. Structural damage is not always visible immediately, but over time, it can lead to foundational issues, weakened walls, and compromised floor stability. Fixing clogged drains promptly prevents unnecessary water exposure, preserving your home’s value and structural strength. 10. Avoid Attracting Pests and Insects Clogged drains can attract unwanted pests, including insects, rodents, and cockroaches. These pests are drawn to the food particles and moisture that build up in blocked drains. Once they enter your home, they can be challenging to eliminate and may carry germs that pose health risks. In addition, some pests, such as cockroaches, thrive in warm, damp environments created by clogged drains, making your home an ideal habitat. By keeping drains clear, you’re reducing the chances of attracting these unwanted pests and maintaining a cleaner, more hygienic space. Tips for Preventing Clogged Drains To avoid the issues associated with clogged drains, practice these preventive measures: Avoid pouring grease and oil down the drain: These substances harden

Uncategorized

How to Install a Water Softener in Your Home

Hard water can be a challenge for many households, leading to mineral buildup in pipes, dry skin, and inefficient appliances. Installing a water softener in your home can be a great way to mitigate these issues. This guide walks you through the installation process, so you can enjoy the benefits of soft water. Understanding Water Softeners A water softener is a device that removes calcium, magnesium, and other minerals from your water. These minerals are responsible for hard water, which can damage appliances and plumbing over time. By removing them, a water softener provides many benefits, including cleaner dishes, softer skin, and a longer lifespan for your appliances. Step 1: Choose the Right Location The ideal location for a water softener is near your home’s main water supply line. Here are some tips on finding the best spot: Close to the Water Supply: Place the softener close to where the water enters your home, typically in the basement or utility room. Nearby Drain Access: Water softeners require a drain for the backwash cycle. Electrical Outlet: Since most water softeners are powered by electricity, ensure there’s an outlet nearby. Protect Against Freezing: If installing in an unheated space, take precautions to prevent the system from freezing. Step 2: Gather Your Tools and Materials Before starting the installation, gather the following tools and materials: Water softener unit Plumbing fittings and pipe wrench Flexible water line connectors Teflon tape PVC pipe or copper piping (depending on your home’s plumbing) Hacksaw or pipe cutter Bucket and towels for cleanup Step 3: Shut Off the Water Supply Locate your home’s main water shut-off valve and turn it off. This will prevent water from flowing through the pipes while you’re installing the water softener. After shutting off the main valve, open a few faucets to drain any remaining water from the pipes. Step 4: Cut Into the Main Water Line Using a pipe cutter or hacksaw, carefully cut into the main water supply line at the location where you’ll install the water softener. Place a bucket beneath the line to catch any remaining water. Once you’ve made the cut, deburr the edges of the pipe to ensure a smooth fit for the fittings. Step 5: Install the Bypass Valve Most water softeners come with a bypass valve that allows you to divert water around the softener for maintenance. Attach the bypass valve to the unit according to the manufacturer’s instructions. The valve typically has two settings: Service Mode: Water flows through the softener for treatment. Bypass Mode: Water bypasses the softener, useful during maintenance or repairs. Step 6: Connect the Inlet and Outlet Pipes Using flexible water connectors, attach the softener to your main water supply line. Follow these guidelines: Connect the Inlet Pipe: This pipe directs incoming water into the softener. Wrap the threads with Teflon tape for a secure, leak-free connection, and then tighten the inlet pipe. Connect the Outlet Pipe: This pipe carries softened water to your home’s plumbing system. Use Teflon tape on the threads and tighten it as well. Step 7: Set Up the Drain Line During its regeneration cycle, a water softener needs to flush out the collected minerals, which means it needs a drain line: Attach the Drain Line to the Water Softener: Secure the line to the drain valve, ensuring it fits snugly to prevent leaks. Run the Line to a Drain: The drain line should lead to a floor drain, utility sink, or other approved drain outlet. Follow local codes and manufacturer’s instructions regarding the distance and height of the drain line. Step 8: Connect the Overflow Tube (Optional) If your water softener has a brine tank overflow fitting, it’s a good idea to attach an overflow tube. This tube provides an extra safety measure in case the brine tank overfills, directing any overflow to a drain. Attach the Tube to the Brine Tank: Secure the overflow tube to the fitting on the side of the brine tank. Run the Tube to a Drain: Position the other end near a drain to prevent accidental flooding. Step 9: Add Salt to the Brine Tank Water softeners use salt to remove minerals from hard water, so adding the right kind of salt is essential for operation: Select the Right Salt: Use high-quality salt specifically designed for water softeners, such as solar salt or evaporated salt pellets. Add Salt to the Tank: Open the brine tank lid and pour in salt, filling the tank at least halfway to ensure it can handle the regeneration cycles effectively. Step 10: Turn the Water Back On and Test After completing all connections, it’s time to test your water softener: Switch the Bypass Valve to Service Mode: This will allow water to flow through the softener. Turn On the Water Supply: Slowly turn on the main water valve and check for leaks around the connections. Run a Regeneration Cycle: Follow your water softener’s instructions to start an initial regeneration cycle. This step primes the unit and ensures it’s ready to start softening your water. Step 11: Adjust the Water Softener Settings Water softeners usually have settings you can adjust based on your household’s water usage and hardness level: Set the Hardness Level: Use a water hardness test kit or refer to your water supplier’s data to determine the hardness level of your water. Set the softener according to these results. Program the Regeneration Cycle: Most units allow you to set the frequency of regeneration based on your household’s water consumption. Maintenance Tips for Your Water Softener To keep your water softener running efficiently, consider the following maintenance tips: Check Salt Levels Monthly: Add salt as needed, keeping the brine tank at least half-full. Clean the Brine Tank Annually: Over time, salt can build up and form a crust. Empty and clean the tank once a year to prevent issues. Inspect for Leaks: Regularly check all connections for signs of leaks or corrosion, especially around the drain line. Benefits of Installing a Water Softener

Uncategorized

The Hidden Dangers of Plumbing Leaks

Plumbing leaks are more than just minor nuisances; they can lead to significant damage, health hazards, and costly repairs if left unaddressed. From hidden mold growth to compromised structural integrity, the dangers of plumbing leaks often go unnoticed until they escalate into serious issues. This article will delve into the hidden dangers of plumbing leaks, exploring their effects on property, health, and finances. 1. Structural Damage One of the most concerning dangers of plumbing leaks is the structural damage they can cause to a home. Water seeps through walls, floors, and ceilings, often causing warping, sagging, and decay. Over time, this constant exposure to moisture can weaken wooden structures, damaging beams and supports. In severe cases, leaks can even lead to the collapse of ceilings or compromise the stability of walls, making the property unsafe. The continuous presence of moisture is particularly detrimental to materials like drywall and wooden frames. Water-soaked drywall becomes soft and loses its structural integrity, eventually needing complete replacement. Homeowners may not notice this until they start seeing cracks in walls, sagging ceilings, or peeling paint—all of which are indicators of prolonged exposure to moisture. 2. Mold and Mildew Growth Mold and mildew thrive in damp environments, making plumbing leaks an ideal catalyst for their growth. When water leaks into areas with poor ventilation, like behind walls or under floors, it creates the perfect environment for mold to flourish. Mold exposure can lead to health problems, especially respiratory issues, as mold spores are easily inhaled. Exposure to mold can cause symptoms like sneezing, coughing, eye irritation, and even more severe respiratory issues for those with asthma or allergies. Black mold, in particular, poses significant health risks and is challenging to eradicate. The longer a leak goes undetected, the greater the potential for mold to spread, not only increasing health risks but also driving up repair costs for mold removal. 3. Increased Utility Bills A small, unnoticed leak can have a surprisingly large impact on your water bill. Even minor leaks can lead to hundreds of gallons of wasted water every month, driving up utility costs. According to the Environmental Protection Agency (EPA), an average household’s leaks can account for nearly 10,000 gallons of water wasted per year. Fixing leaks promptly can prevent unnecessary water waste and save money. Leaking toilets, faucets, or pipes often seem insignificant because they may only drip occasionally, but the cumulative effect is substantial. Taking the time to inspect and repair plumbing regularly can reduce water waste and lower monthly expenses. 4. Damage to Belongings Leaks, especially those that are slow and hidden, can go unnoticed long enough to cause damage to belongings like furniture, carpets, electronics, and appliances. For example, a slow leak under the kitchen sink can soak the cabinetry and ruin any items stored beneath. Likewise, leaks in the bathroom can affect adjacent rooms, leading to damage of flooring, walls, and personal belongings. Water stains, peeling wallpaper, or warping on wood surfaces are tell-tale signs of hidden leaks. By the time these symptoms are visible, the water damage is often already significant, requiring professional restoration. 5. Pest Infestations Water leaks create an ideal environment for pests. Damp and dark areas, such as those created by plumbing leaks, attract insects like cockroaches, ants, and termites. Rodents are also drawn to areas with consistent water sources, as they rely on water for survival just as much as food. Pests attracted to these areas can cause additional damage by chewing through wood, insulation, and even electrical wiring. Additionally, pest infestations bring their own set of health risks, as many pests are known carriers of bacteria and diseases. Fixing leaks promptly can help mitigate the risk of attracting pests into your home. 6. Health Risks Due to Poor Air Quality As mold, mildew, and bacteria proliferate in areas with leaks, they release spores and other allergens into the air. The result is poor indoor air quality, which can affect all household members, especially those with asthma, allergies, or compromised immune systems. In severe cases, airborne contaminants from mold and bacteria can lead to long-term respiratory issues. The smell of musty, damp areas is often a sign of declining air quality, indicating that mold and bacteria are present. If left unresolved, the air quality in a home can degrade to the point where professional remediation services are necessary, adding to repair costs. 7. Potential for Electrical Hazards Water and electricity are a dangerous combination, and plumbing leaks can create serious electrical hazards. If water from a leak reaches electrical wiring, outlets, or appliances, it poses a significant risk of electrical shock or fire. Leaks in walls near electrical outlets, or in ceilings above lighting fixtures, are particularly hazardous, as water can travel through insulation and other materials to come into contact with wiring. To minimize the risk of electrical hazards, it’s essential to address leaks promptly, especially in areas close to electrical installations. In some cases, homeowners may need to hire an electrician to inspect and repair wiring that has been exposed to water. 8. Foundation Damage For homes with slab foundations, plumbing leaks under the slab can lead to foundation damage. This type of leak, often called a slab leak, occurs when water pipes beneath the foundation crack or burst, releasing water directly into the ground under the home. Over time, this can cause soil shifting and lead to foundation cracks, uneven floors, and structural instability. Detecting a slab leak can be challenging, as symptoms like hot spots on the floor, unusually high water bills, or sounds of running water can be easily overlooked. Slab leaks require specialized equipment and expertise to locate and repair, making them costly and disruptive if not detected early. 9. Legal and Insurance Implications Plumbing leaks that lead to extensive damage may not only be expensive but can also cause legal and insurance issues. For instance, many homeowner insurance policies cover water damage, but if the damage is due to negligence (such as ignoring a known leak),

Water Heater Stops Working
Uncategorized

What to Do When Your Water Heater Stops Working

A water heater is a key part of any home, providing warm water for everything from morning showers to washing dishes and laundry. But when it stops working, it can disrupt your daily routine and leave you scrambling for solutions. In this article, we’ll explore the essential steps to take when your water heater stops working, including common issues, DIY troubleshooting tips, and when it’s time to call a professional. 1. Assess the Problem When your water heater stops working, the first step is to diagnose the problem. Different issues can cause a water heater to stop functioning, including no hot water, unusual noises, or water leaks. Before jumping to conclusions, check these three basic components: Power Supply: If you have an electric water heater, make sure it’s receiving power. A tripped circuit breaker or blown fuse can disrupt its operation. Gas Supply: For gas water heaters, verify that the pilot light is on and the gas supply is turned on. Thermostat: A faulty or improperly set thermostat can also cause water heaters to stop providing hot water. Starting with these checks can help you pinpoint the problem and decide whether a simple fix is possible. 2. Check for Power or Gas Issues For electric water heaters, check the circuit breaker or fuse box. If the breaker has tripped, reset it and see if the heater starts working. For gas heaters, verify that the gas valve is in the “on” position and inspect the pilot light. If it’s out, try relighting it according to the manufacturer’s instructions. If the pilot light won’t stay lit, there could be an issue with the thermocouple, which will likely require a technician. 3. Test the Temperature and Thermostat If your water heater is producing lukewarm water or failing to maintain a steady temperature, the thermostat might be the culprit. Most water heaters have a thermostat that allows you to set the desired temperature. Start by checking the thermostat setting; it’s typically recommended to set it to 120°F (49°C) for a balance between hot water availability and energy efficiency. To test it, turn the thermostat up and wait for about 15–20 minutes. If the water temperature doesn’t increase, there could be a problem with the heating elements or thermostat itself. Replacing a thermostat or heating element often requires basic tools, but you should only attempt this if you’re comfortable with electrical work and have turned off the power to the heater. 4. Look for Leaks or Rust Leaks are another common issue with water heaters. Start by examining the base of the heater and surrounding area for any water pooling. Minor leaks may indicate a loose drain valve, which can often be fixed by tightening it. However, if the tank is leaking, it usually means there’s corrosion and the entire water heater may need to be replaced. Similarly, visible rust on the water heater or rusty water coming from your taps can signal a deteriorating tank. 5. Flush the Tank Over time, sediment and mineral deposits accumulate inside the water heater tank, which can decrease its efficiency and lead to malfunctions. Flushing your water heater every 6-12 months can help remove these deposits. Here’s a quick guide to flushing the tank: Turn off the heater: For electric heaters, switch off the breaker. For gas heaters, set the thermostat to “pilot.” Attach a hose to the drain valve: Place the other end of the hose in a bucket or outside where water can safely flow out. Open the drain valve: Allow the water and sediment to drain until the tank is empty. Close the valve and refill: Close the drain valve, remove the hose, and turn on the cold-water supply. Once the tank is full, turn the heater back on. Sediment buildup can also affect the heating elements or burners, so flushing the tank can help prolong your water heater’s lifespan. 6. Inspect the Anode Rod The anode rod is a metal rod inside the tank that attracts corrosive particles in the water, preventing them from damaging the tank lining. Over time, the anode rod degrades and needs to be replaced. If your water heater is more than three years old, it’s a good idea to inspect the rod and replace it if it’s heavily corroded. Replacing the anode rod can be a relatively simple DIY fix, but it can significantly extend the life of your water heater. 7. Check for Noisy Operation If your water heater is making unusual noises—like popping, rumbling, or cracking sounds—sediment buildup could be to blame. As mentioned, flushing the tank may help. If the noise persists, it may indicate a more serious issue with the heating element or the tank itself. In such cases, it’s best to consult a professional. 8. Understand When to Replace the Heater A typical water heater lasts around 10–15 years. If your water heater frequently requires repairs, has a noticeable drop in efficiency, or shows signs of corrosion, it may be time to consider a replacement. Newer models are often more energy-efficient, saving you money in the long run. Tankless water heaters are another option to consider if you’re looking for an energy-saving and long-lasting replacement. 9. Call a Professional If you’ve gone through these troubleshooting steps and your water heater still isn’t working, it’s time to call a licensed plumber or technician. Attempting advanced repairs without the necessary expertise can be dangerous and might void any warranty on the unit. A professional can diagnose more complex issues, replace faulty parts, and recommend whether repair or replacement is the best option for you. Preventative Maintenance Tips While it’s not always possible to prevent breakdowns, regular maintenance can help prolong your water heater’s life and minimize repairs. Here are a few tips: Flush the tank annually to remove sediment buildup. Inspect the anode rod every few years and replace it as necessary. Test the temperature and pressure relief valve to ensure it’s functioning properly. Check the thermostat periodically and keep it at a consistent setting,

Scroll to Top
Chrome Logo Web Transparent

Scheduled an Appointment