Uncategorized

Uncategorized

Why You Should Never Ignore a Running Toilet

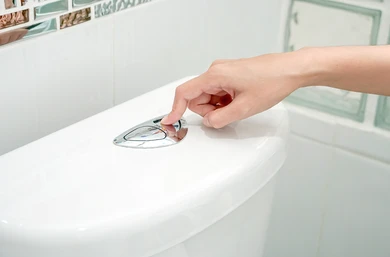
A running toilet might seem like a minor inconvenience, but ignoring it can lead to various problems that affect your home, your wallet, and even the environment. Many homeowners in Plano, TX, have faced this issue at least once, and while it may not seem urgent, addressing it quickly can save you a lot of trouble down the road. At Chrome Heating Air Conditioning, we specialize in various plumbing services, including fixing running toilets. This article explores why you should never ignore a running toilet and the benefits of timely repairs. The Basics: What Causes a Toilet to Run? Before diving into why you shouldn’t ignore a running toilet, it’s important to understand the common causes. A running toilet is usually the result of one or more issues with the internal components of the toilet’s tank. These include: Flapper Problems – The flapper is responsible for controlling the flow of water from the tank to the bowl. If it doesn’t seal properly, water will continuously leak into the bowl, causing the toilet to run. Faulty Fill Valve – The fill valve controls the water level in the tank. When it’s damaged or improperly adjusted, it can cause water to overflow and keep the toilet running. Float Issues – The float is designed to shut off the water flow once the tank is full. A broken or misaligned float can fail to signal the fill valve, leading to continuous water flow. Worn-out Seals – Over time, various seals and washers in the toilet tank can deteriorate, allowing water to leak and keeping the toilet running. Why Ignoring a Running Toilet Can Be Expensive A running toilet may not seem like a pressing issue, but the cost of water waste can quickly add up. In Plano, TX, where water conservation is essential due to regional droughts, a running toilet can be particularly problematic. Here are a few reasons why ignoring this problem can drain your wallet: 1. Higher Water Bills A running toilet can waste hundreds of gallons of water each day. In monetary terms, this can add anywhere from $50 to $200 to your monthly water bill, depending on how severe the issue is. Over time, this can amount to hundreds or even thousands of dollars in wasted resources. 2. Water Damage Risk Ignoring a running toilet increases the likelihood of water damage to your bathroom. If the toilet tank overflows or if there is a constant leak, it can damage your floors, walls, and baseboards. Water damage often leads to mold and mildew growth, which can spread quickly and compromise the structural integrity of your home. The cost to repair water damage is significantly higher than the cost of fixing a running toilet. 3. Costly Repairs Down the Line While it may seem like a running toilet is a small issue, allowing it to persist could lead to more significant problems. The constant water flow can put unnecessary strain on the toilet’s internal components, leading to wear and tear over time. Eventually, you may need to replace parts such as the fill valve, flapper, or even the entire toilet, which is much more expensive than an immediate fix. The Environmental Impact of a Running Toilet Beyond the financial costs, a running toilet has a significant environmental impact. Water is a precious resource, and conserving it is vital, particularly in areas like Plano, TX, where water scarcity can be a concern. According to the Environmental Protection Agency (EPA), the average household can waste up to 200 gallons of water per day due to leaks, including running toilets. Over time, this waste puts a strain on local water resources, exacerbating water shortages. 1. Contributing to Water Scarcity Plano, like much of Texas, has experienced periods of drought. A running toilet, while seemingly insignificant, contributes to the overall problem of water scarcity. By letting this issue persist, homeowners inadvertently contribute to the depletion of local water supplies, affecting the broader community. 2. Increased Energy Consumption You may not realize it, but a running toilet can also contribute to higher energy consumption. Water utilities require energy to treat and pump water to your home, and the more water you waste, the higher the energy costs for your city. By fixing your running toilet, you help reduce the energy demand and carbon footprint associated with water treatment. Health Risks Associated with a Running Toilet A running toilet can create a damp environment that fosters the growth of mold and mildew, which can pose health risks to your family. Mold spores can spread throughout your home, aggravating respiratory conditions such as asthma and allergies. If left unchecked, mold growth from excess moisture can become a more serious health hazard, leading to additional medical expenses. 1. Mold and Mildew Growth The consistent moisture from a running toilet creates an ideal breeding ground for mold and mildew, especially in the bathroom. Mold can quickly spread through drywall and flooring, affecting air quality and posing serious health concerns, especially for individuals with respiratory issues. 2. Contaminated Water In some cases, a running toilet can lead to backflow problems, where contaminated water from the toilet bowl mixes with the clean water in your home’s plumbing system. This can lead to unsafe drinking water and the spread of harmful bacteria, putting your family’s health at risk. Solutions: How Chrome Heating Air Conditioning Can Help At Chrome Heating Air Conditioning, we understand the importance of addressing plumbing issues quickly and efficiently. Our team of experienced professionals in Plano, TX, is ready to diagnose and fix your running toilet, ensuring that you avoid the costly and harmful effects discussed above. Here are some of the solutions we offer: 1. Quick Diagnosis Our plumbing experts can quickly identify the root cause of your running toilet. Whether it’s a flapper issue, faulty fill valve, or misaligned float, we’ll pinpoint the problem and provide a solution that works. 2. Efficient Repairs We carry a wide range of high-quality replacement parts and can perform most repairs

Strange Noises
Uncategorized

What to Do When You Hear Strange Noises in Your Pipes

Hearing unusual sounds from your pipes can be unsettling and could indicate potential plumbing issues. Whether it’s a persistent banging, gurgling, or whistling noise, understanding what these sounds mean can help you address minor problems before they turn into significant ones. In this article, we will explore the common causes of strange pipe noises, what you can do to resolve them, and when to call a professional, such as Chrome Heating Air Conditioning in Plano, TX, to help with your plumbing concerns. Common Types of Noises in Pipes and Their Causes Pipes can make a variety of sounds, and each type of noise usually points to a specific issue within your plumbing system. Here are some of the most common pipe noises and their likely causes: Banging or Knocking Noises Banging or knocking noises in pipes are often caused by water hammer, a situation where water flowing through the pipes suddenly stops or changes direction. This can happen when you turn off a faucet or appliance quickly, causing the water to slam into a closed valve. Over time, water hammer can damage pipes and lead to leaks if left unchecked.Solution: Install water hammer arrestors to absorb the shock of fast-moving water. Check your home’s water pressure. If it’s too high, it can exacerbate the water hammer issue. Secure loose pipes to prevent them from banging against walls or other surfaces. Whistling or High-Pitched Sounds Whistling noises usually occur when water flows through a narrow or restricted section of pipe. This could be caused by mineral buildup, corrosion, or a partially closed valve. A whistling sound can also indicate that the pressure in your system is too high.Solution: Clean or replace any clogged fixtures, such as faucets or showerheads. Check your water pressure and adjust it if necessary. Inspect your valves to ensure they are fully open and in good condition. Gurgling or Bubbling Sounds Gurgling or bubbling noises are often signs of a drainage issue. These sounds can occur when air is trapped in your pipes, typically due to a blockage. The noise happens when water tries to push past the air pockets, creating a gurgling effect. It is most common in sink drains and toilets.Solution: Use a plunger or drain snake to clear any clogs in your pipes. Avoid pouring grease or food waste down your drains to prevent future blockages. Consider installing vent pipes to release air and keep your plumbing system functioning smoothly. Rattling or Shaking Pipes Rattling or shaking sounds occur when pipes are loose or not properly secured. This can happen when water is flowing through the system, causing the pipes to vibrate against walls, floors, or other pipes.Solution: Inspect your plumbing system to find loose pipes and secure them using pipe straps or clamps. If you’re unable to locate the loose pipes yourself, a professional plumber can help identify the issue and provide the appropriate fix. Screeching or Squealing Noises These sounds are often associated with faucets or valves. A screeching noise occurs when a worn-out or defective washer in a valve or faucet restricts the water flow, causing the high-pitched sound.Solution: Replace the washers or seals inside the faulty faucet. If you’re unsure how to fix the issue, consider hiring a plumber to replace the faulty components for you. How to Prevent Noisy Pipes While noisy pipes are sometimes unavoidable, there are several steps you can take to minimize the chances of hearing these disturbing sounds in your home. Regular maintenance and small adjustments can go a long way in keeping your plumbing system quiet and efficient. Monitor Your Water Pressure High water pressure is one of the leading causes of noisy pipes. Ideally, your home’s water pressure should be between 40 and 60 psi (pounds per square inch). If it’s too high, it can cause water hammer, leaks, and other issues. You can use a water pressure gauge to measure the pressure in your system and install a pressure regulator if necessary. Insulate Your Pipes Insulating your pipes not only helps prevent rattling sounds but also reduces the likelihood of freezing during colder months. You can use foam pipe insulation to wrap around your pipes, which will minimize noise and provide protection against temperature changes. Check for Loose Pipes Over time, the brackets and straps that hold your pipes in place can loosen, causing rattling or knocking noises. Regularly check the exposed pipes in your home and tighten any loose fittings. If your pipes are hidden behind walls, consider hiring a plumber to inspect them. Avoid Clogs by Using Drains Properly Many gurgling and bubbling sounds can be avoided by keeping your drains free of clogs. Be mindful of what goes down your drains, and use strainers in your sinks to catch debris. Periodically clean your drains to prevent buildup and ensure proper water flow. Flush Your Water Heater Sediment buildup in your water heater can cause banging or popping noises. Flushing your water heater once a year helps prevent this issue and improves the efficiency of the unit. If you’re not comfortable doing this yourself, you can hire a professional to perform the task. When to Call a Professional If you’ve tried addressing the issues mentioned above but are still hearing strange noises in your pipes, it may be time to call a professional plumber. Chrome Heating Air Conditioning offers plumbing services in Plano, TX, and can assist with diagnosing and resolving any issues with your pipes. Some situations that may require professional help include: Persistent Water Hammer: If water hammer continues despite installing an arrestor, the problem may be deeper in your plumbing system. Frequent Clogs or Drainage Issues: If you’re regularly dealing with clogged drains or gurgling sounds, a professional can help identify whether there’s a bigger issue, such as a problem with your main sewer line. Unidentified Noises: If you’re hearing noises that don’t fit into the categories above, it could indicate a more serious issue, such as a leak within your walls or foundation. A plumber

Uncategorized

How to Avoid Expensive Plumbing Repairs This Year

Plumbing repairs can be costly and inconvenient, especially when they occur unexpectedly. The good news is that you can avoid expensive plumbing issues by staying proactive with maintenance and addressing problems before they escalate. In this article, we’ll discuss several practical strategies that will help you avoid costly plumbing repairs this year and keep your home’s plumbing system in excellent condition. 1. Regular Maintenance Is Key One of the most effective ways to prevent expensive plumbing repairs is by scheduling regular maintenance checks. Much like any other part of your home, your plumbing system needs routine attention to ensure that everything is functioning properly. During a maintenance check, a plumber will inspect your pipes, water heater, drains, and other key elements of your system for signs of wear and tear. They can spot potential issues early and fix them before they lead to more significant damage. Key maintenance activities include: Inspecting for leaks in pipes and faucets Checking water pressure to ensure it’s at a safe level Flushing the water heater to remove sediment buildup Examining the condition of sewer lines and drains Ensuring the sump pump is working correctly Investing in regular maintenance with a professional plumbing service will ultimately save you from expensive emergency repairs down the road. 2. Fix Small Leaks Immediately Many homeowners tend to overlook small leaks, thinking they won’t cause much damage. However, even a tiny leak can turn into a much bigger issue if left untreated. Small leaks often lead to water damage, mold growth, and even structural problems in your home. Beyond the damage, minor leaks can significantly increase your water bills over time. To avoid expensive plumbing repairs, make sure you fix even the smallest leaks as soon as you notice them. Check for signs of leaks, such as water stains on ceilings or walls, damp areas under sinks, and dripping faucets. If you suspect a hidden leak, call a plumber to diagnose the problem before it escalates. 3. Be Mindful of What You Flush Another way to prevent costly plumbing repairs is to be cautious about what you flush down your toilets and drains. Many common household items, even if labeled “flushable,” can cause blockages in your pipes. Items like wipes, feminine hygiene products, and even excessive amounts of toilet paper can lead to clogs, which could require professional intervention. The same applies to your kitchen sink. Avoid pouring grease, oils, or food scraps down the drain, as these substances can harden and cause blockages in your pipes. Instead, use a strainer to catch food debris, and dispose of grease in a separate container. By being mindful of what goes down your drains, you’ll reduce the likelihood of clogs and other plumbing problems that could lead to expensive repairs. 4. Install Drain Screens Drain screens are a simple but effective tool to prevent debris from entering your plumbing system. Hair, soap scum, and other small particles are the primary causes of drain clogs in bathrooms and kitchens. Over time, these materials can accumulate and create blockages, which could require costly repairs. Installing drain screens over your sinks and showers is an inexpensive and easy solution to keep debris from entering your pipes. By catching items before they go down the drain, you’ll significantly reduce the risk of clogs and the need for professional drain cleaning services. 5. Monitor Your Water Pressure High water pressure can strain your plumbing system and lead to pipe damage over time. While it might seem nice to have strong water flow, excessive water pressure can cause leaks, wear out fixtures, and increase the likelihood of burst pipes. This kind of damage often results in expensive repairs, so it’s essential to keep your water pressure at a safe level. If you notice unusually strong water pressure, consider installing a pressure-reducing valve (PRV). A PRV will help regulate the pressure in your plumbing system and prevent unnecessary wear and tear on your pipes. 6. Know the Location of Your Main Shutoff Valve In the event of a plumbing emergency, knowing where your home’s main shutoff valve is located can save you from significant water damage and expensive repairs. If a pipe bursts or a major leak occurs, shutting off the water supply immediately can prevent further damage to your property. Once the water is turned off, you can call a plumber to assess and repair the issue. Familiarize yourself with the location of your main shutoff valve and ensure that everyone in your household knows how to use it in case of an emergency. 7. Insulate Your Pipes Cold weather can wreak havoc on your plumbing system, especially if your pipes are not properly insulated. When temperatures drop, water inside the pipes can freeze, leading to pipe bursts and flooding. These issues can result in extensive damage to your home and require costly repairs. To prevent frozen pipes, make sure to insulate any exposed plumbing in unheated areas of your home, such as the basement, attic, and garage. Additionally, during particularly cold weather, keep a small stream of water running from faucets to prevent freezing. 8. Upgrade Old Pipes If your home has old plumbing, you may want to consider upgrading your pipes to avoid expensive repairs in the future. Older pipes, particularly those made of galvanized steel or polybutylene, are prone to corrosion, leaks, and other forms of deterioration. These outdated materials can fail unexpectedly, leading to significant water damage and repair costs. Replacing old pipes with modern materials like copper or PEX can help prevent plumbing emergencies and improve the efficiency of your plumbing system. Although pipe replacement can be an investment, it will save you money in the long run by reducing the risk of sudden failures and the need for frequent repairs. 9. Flush Your Water Heater Regularly Water heaters are essential components of your plumbing system, and if not properly maintained, they can develop problems that lead to expensive repairs or replacements. One common issue is sediment buildup, which can reduce

Uncategorized

Is Your Water Smelling Weird? Here’s the Fix

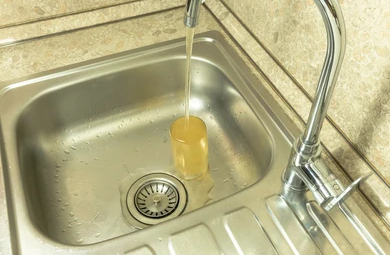
Nothing ruins a refreshing drink or shower like a strange smell coming from your water. If you’ve ever experienced water that smells off, whether it’s a rotten egg scent or a metallic odor, you know how unpleasant and concerning it can be. While weird-smelling water is a common issue, there are straightforward solutions to address the root cause and ensure the water flowing through your home is fresh and clean. In this article, we will explore the potential causes of foul-smelling water, how to identify the issue, and the steps you can take to fix it, regardless of whether it’s coming from your tap, shower, or washing machine. Let’s dive into the world of water quality and how you can tackle this issue head-on. Common Causes of Weird-Smelling Water Several factors can contribute to water smelling odd. The specific scent can often indicate what the underlying issue might be. Here are some of the most common odors and their potential causes: 1. Rotten Egg Smell (Sulfur) A rotten egg smell is perhaps the most well-known and frequently reported water odor problem. This smell is caused by hydrogen sulfide gas, which can occur naturally in groundwater or form in water heaters when bacteria are present. Solution: Check your water heater: If the odor is coming from hot water only, your water heater may be the culprit. The anode rod inside the water heater reacts with bacteria, causing the sulfur-like odor. Replacing the rod or thoroughly cleaning the heater can solve this issue. Water treatment system: If the smell is coming from both hot and cold water, consider installing a whole-house water treatment system, like an aeration system, that removes hydrogen sulfide gas from your water supply. 2. Metallic Smell If your water has a metallic taste or smell, it could be due to the presence of minerals like iron, manganese, or zinc. These metals can come from natural sources like soil and rocks or corroding metal pipes within your home’s plumbing system. Solution: Test your water for metals: A water test will help determine if excessive metal content is the issue. Once confirmed, consider installing a water filtration system designed to remove metals like iron and manganese. Replace old pipes: If the metallic odor is due to corroding pipes, it may be time to update your home’s plumbing system to newer, non-corrosive materials like PEX or PVC. 3. Chlorine Smell While chlorine is commonly used in municipal water supplies to disinfect water, too much of it can cause a strong chemical odor. This is especially noticeable after heavy rainfalls when local water treatment plants might increase chlorine levels to combat contamination. Solution: Activated carbon filter: Installing an activated carbon water filter at the tap or on your entire water system can remove excess chlorine, resulting in cleaner, fresher-tasting water. Let it sit: You can also let a jug of water sit uncovered in the refrigerator for a few hours. The chlorine will dissipate naturally over time. 4. Musty or Earthy Smell A musty or earthy smell in your water can be due to organic matter like decaying vegetation entering your water supply. This can happen if you source your water from a well, as surface water runoff can carry organic debris into your well during heavy rains. Solution: Clean your well: If you use well water, cleaning and maintaining the well is crucial. Shocking your well with chlorine may help eliminate the odor. Install a water filtration system: A filtration system that removes organic matter from your water can also be effective in eliminating this type of smell. 5. Fishy Odor A fishy smell is usually caused by naturally occurring organic materials or barium and cadmium in the water. These substances can come from decaying plant materials or industrial pollution and can pose a health risk if consumed in large quantities. Solution: Water testing: It’s important to get your water tested for barium, cadmium, and other contaminants. If they are present, a filtration system such as reverse osmosis may be necessary to remove these harmful substances from your water supply. Diagnosing the Issue Before jumping to solutions, it’s essential to correctly diagnose where the smell is coming from and whether it’s isolated to a particular tap or affecting the entire home. Follow these steps to identify the source of the problem: 1. Check Multiple Taps If the smell is only coming from one tap, it’s likely a localized issue. This could be caused by bacteria buildup in the pipes, a clogged aerator, or a problem with the water heater for that particular line. If the smell is present at multiple taps, it’s likely a problem with your water source. 2. Hot Water vs. Cold Water Determine if the odor is coming from hot water, cold water, or both. If the smell is present only in hot water, the water heater is often to blame. If it’s in both, the problem might be with your plumbing system or water source. 3. Well Water or City Water If you have well water, contaminants can enter the water supply after storms or heavy rains. For city water users, issues like pipe corrosion or high chlorine levels are more common. Identifying your water source can help narrow down the cause. DIY Fixes for Common Water Odor Problems Once you’ve identified the potential source of the odor, there are several DIY fixes you can attempt to freshen up your water supply: 1. Clean Your Water Heater Sediment buildup and bacteria growth in your water heater can cause foul odors, especially sulfuric ones. Flushing your water heater to remove sediment and cleaning the anode rod can eliminate the smell. Consider doing this at least once a year as part of routine maintenance. 2. Replace the Faucet Aerator Sometimes, bacteria or mineral deposits can accumulate on the faucet aerator, leading to bad smells. Removing the aerator, cleaning it with vinegar, and reinstalling it can be a quick fix for localized odor issues. 3. Use a Whole-House Filtration

Uncategorized

Simple Solutions for Common Plumbing Issues at Home

Plumbing problems are a common occurrence in every household. From leaky faucets to clogged drains, these issues can be both annoying and costly if left unchecked. However, the good news is that many of these common plumbing problems have simple solutions that homeowners can handle without professional help. In this article, we will cover several common plumbing issues and provide practical solutions to fix them. Whether you’re dealing with a dripping faucet, a running toilet, or a slow-draining sink, these DIY fixes can save you time and money. 1. Leaky Faucets One of the most common plumbing problems in homes is a leaky faucet. The constant drip can waste water and increase your utility bills if not addressed promptly. Luckily, fixing a leaky faucet is usually a straightforward task. Solution: The first step is to turn off the water supply to the faucet. Most leaks occur because of worn-out washers, O-rings, or cartridges inside the faucet. Begin by disassembling the faucet and inspecting these components. If you notice any wear or damage, replace the defective parts with new ones. Reassemble the faucet, turn the water back on, and test it to ensure the leak has been fixed. 2. Clogged Drains Clogged drains are another frequent plumbing issue, especially in kitchens and bathrooms. Over time, hair, grease, soap scum, and food particles can accumulate in pipes, causing blockages that slow or completely stop the flow of water. Solution: There are several ways to address a clogged drain. The simplest method is to use a plunger. For minor clogs, plunging can create enough pressure to dislodge the obstruction. If that doesn’t work, a mixture of baking soda and vinegar followed by hot water can help break down the buildup in the drain. In more severe cases, you might need to use a drain snake to physically remove the blockage. Preventive measures such as using drain guards can help reduce the occurrence of future clogs. 3. Running Toilets A running toilet can be a significant waste of water, costing homeowners a great deal on their water bills over time. This problem usually stems from a malfunctioning flapper, a stuck chain, or an issue with the fill valve inside the tank. Solution: To fix a running toilet, start by removing the lid from the toilet tank. Check the flapper to ensure it is sealing properly. If it appears damaged or doesn’t close correctly, replace it with a new one. Also, make sure the chain attached to the flapper is not tangled or too tight. Adjust the fill valve if necessary to maintain the correct water level. After making the repairs, flush the toilet to see if the issue is resolved. 4. Low Water Pressure Low water pressure can be frustrating, especially when it affects your showers and faucets. It can be caused by various factors, including mineral buildup in pipes, leaks, or issues with the water supply. Solution: If low water pressure is isolated to a particular fixture, such as a showerhead or faucet, the problem is likely due to mineral deposits. Remove the affected fixture and soak it in vinegar for a few hours to dissolve any deposits. After cleaning, reattach the fixture and check if the water pressure has improved. If low pressure persists throughout the house, inspect the main shut-off valve to ensure it is fully open. If that doesn’t solve the issue, there might be a leak or blockage in the plumbing system that requires professional attention. 5. Water Heater Problems Water heaters are essential for maintaining hot water in your home, but they can encounter issues such as inadequate heating, strange noises, or water leaks. Solution: For insufficient hot water, start by checking the thermostat setting on the water heater to ensure it’s at the recommended temperature. If the water is too cold, adjusting the thermostat can resolve the problem. If strange noises are coming from the heater, it’s likely due to sediment buildup at the bottom of the tank. Flushing the tank can help remove the sediment and restore the heater’s efficiency. For leaks, inspect the pressure relief valve and connections for any signs of damage. If a leak persists, it may be necessary to replace the water heater. 6. Dripping Showerheads Like leaky faucets, dripping showerheads can waste water and increase your utility bills. The cause is often mineral deposits or a worn-out washer or O-ring. Solution: To fix a dripping showerhead, first unscrew the head from the pipe. Inspect the rubber washers or O-rings inside the showerhead. If they appear worn or damaged, replace them with new ones. You can also soak the showerhead in vinegar to remove any mineral deposits that might be causing the leak. After cleaning or replacing the necessary parts, reassemble the showerhead and test it for leaks. 7. Garbage Disposal Issues Garbage disposals can become clogged or jammed due to improper use, such as putting in hard or fibrous items like bones, fruit pits, or potato peels. This can cause the disposal to stop working or emit unpleasant odors. Solution: First, make sure the garbage disposal is turned off. If it’s jammed, you can use a hex key to manually turn the blades from the bottom of the unit to dislodge the obstruction. For minor clogs, running cold water and turning the disposal on and off several times can help clear the blockage. To eliminate odors, grind citrus peels or a mixture of baking soda and vinegar in the disposal. Always avoid putting large or fibrous items down the disposal to prevent future problems. 8. Burst Pipes Burst pipes can cause significant water damage to your home if not addressed quickly. They are often caused by freezing temperatures, corrosion, or excessive water pressure. Solution: If you suspect a burst pipe, immediately turn off the main water supply to prevent further flooding. Once the water is off, locate the burst pipe and temporarily patch it using a pipe clamp or rubber patch. This will provide a temporary fix until a professional

No Hot Water
Uncategorized

Top 5 Reasons You’re Losing Hot Water Fast

Losing hot water quickly is a common and frustrating issue for many homeowners. Whether you’re taking a shower or washing dishes, the sudden drop in hot water can disrupt your day. There are several reasons this could be happening, and identifying the root cause can help restore your hot water supply efficiently. In this article, we will discuss the top five reasons you might be losing hot water fast and how to address them effectively. 1. Sediment Buildup in the Water Heater One of the most common reasons for losing hot water quickly is sediment buildup in your water heater. Over time, minerals like calcium and magnesium, found in hard water, accumulate at the bottom of the tank. This layer of sediment acts as a barrier between the heating element and the water, making it harder for your water heater to warm the water efficiently. As the sediment builds up, the water heater’s efficiency decreases, causing the hot water supply to run out more quickly. This issue is particularly common in areas with hard water. Flushing the tank regularly can prevent sediment from accumulating. If your water heater is older and the sediment has hardened, you may need to consider professional cleaning or even replacing the unit. 2. A Faulty Thermostat Your water heater’s thermostat is responsible for regulating the temperature of the water in the tank. If it’s malfunctioning or set incorrectly, you may find that your hot water runs out faster than usual. Sometimes, the thermostat may be set too low, preventing the water heater from producing enough hot water to meet your needs. On the other hand, if the thermostat is faulty, it may fail to maintain the desired temperature, causing the water to cool off quickly. This can also lead to fluctuating water temperatures during use. To resolve this issue, check the thermostat setting and ensure it’s set between 120°F and 140°F. If the problem persists, it may require professional inspection and replacement. 3. Worn-Out Heating Element Electric water heaters rely on heating elements to warm the water. Over time, these heating elements can wear out, causing a significant reduction in your water heater’s efficiency. If one of the heating elements is damaged or malfunctioning, it can lead to a rapid loss of hot water. In a typical electric water heater, there are two heating elements: one at the top of the tank and one at the bottom. If the lower element wears out, the heater will only rely on the top element, providing much less hot water before running out. Replacing a worn-out heating element is usually a simple fix that can restore your water heater’s performance. For gas water heaters, a similar problem can occur with the burner. A worn-out or clogged burner may struggle to heat the water efficiently, causing you to lose hot water faster than normal. In either case, it’s essential to get a professional to inspect and replace the faulty component to prevent further issues. 4. An Undersized Water Heater If you find that you’re frequently running out of hot water, the size of your water heater might not be sufficient to meet your household’s needs. This is especially common in homes with large families or households that use multiple appliances that require hot water simultaneously. For instance, if several family members are taking showers, doing laundry, and running the dishwasher all at the same time, your water heater may not be able to keep up with the demand. A water heater that’s too small for your household will deplete its supply quickly, leaving you with cold water when you need it most. The solution may be to upgrade to a larger water heater or consider a tankless water heater, which provides hot water on demand without the need for a storage tank. If you’re unsure about the right size for your home, consult a professional to assess your hot water needs and recommend the appropriate solution. 5. Leaks in the Hot Water System Leaks in your water heater or plumbing system can also cause you to lose hot water quickly. If there’s a leak in the tank, the hot water can escape, reducing the overall supply. Additionally, leaks in the pipes leading to your faucets and showers can result in a decrease in water pressure, making it seem like your hot water is running out faster than it actually is. Signs of a leak include puddles around the base of the water heater, visible drips or moisture on the pipes, or a sudden drop in water pressure. If you suspect a leak, it’s important to address the issue as soon as possible to prevent further damage to your home and to restore your hot water supply. Fixing leaks can range from tightening loose connections to replacing damaged pipes or components. For larger or more complicated leaks, professional plumbing services may be required to ensure the problem is fully resolved. Conclusion Experiencing a loss of hot water can be a major inconvenience, but understanding the common causes can help you address the issue quickly and efficiently. Sediment buildup, a faulty thermostat, worn-out heating elements, an undersized water heater, and leaks are the top five reasons homeowners in Plano, TX, often face this issue. If you’re dealing with any of these problems, Chrome Heating Air Conditioning offers expert services in diagnosing and repairing water heater issues. Whether it’s routine maintenance like flushing the tank or more complex repairs such as replacing faulty parts, they have the experience and tools needed to restore your hot water system to full efficiency. Don’t wait until the problem worsens—get in touch with a professional service like Chrome Heating Air Conditioning today to ensure you have reliable hot water when you need it most. By staying on top of regular water heater maintenance and addressing any issues promptly, you can extend the life of your system and avoid the frustration of running out of hot water. Whether you need a repair, maintenance, or even a

Detecting Hidden Plumbing Leaks
Uncategorized

Detecting Hidden Plumbing Leaks in Your Home

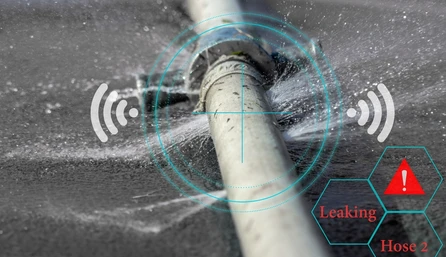
A hidden plumbing leak in your home can lead to severe damage, costly repairs, and wasted water, all without you realizing there’s a problem. Whether it’s a small leak behind the walls or under the foundation, early detection is crucial. This guide will walk you through the signs of hidden leaks, the damage they can cause, and how you can detect them before they become major issues. The Consequences of Hidden Plumbing Leaks Before diving into how to detect hidden plumbing leaks, it’s important to understand why they can be so damaging. A small, unnoticed leak can lead to significant consequences over time. Here are some of the problems that hidden leaks can cause: Structural Damage: Water damage weakens the structural integrity of your home. Leaks can lead to warping, cracking, or rotting of walls, floors, and even the foundation. Mold Growth: Water accumulation in hidden areas, such as behind walls or under floors, creates an ideal environment for mold growth. Mold not only causes damage to your home but can also pose serious health risks to you and your family. Increased Water Bills: A hidden leak, even a small one, can result in a significant increase in your water bill. Over time, this wasted water can add up to hundreds of gallons, driving up your utility costs. Damage to Personal Property: Leaks in ceilings or walls can lead to water dripping onto furniture, electronics, and other personal belongings, causing irreversible damage. Decreased Home Value: Water damage from hidden leaks can decrease the value of your home if left untreated. If you plan to sell your home, potential buyers may be wary of unseen water issues. Common Areas for Hidden Leaks Hidden leaks can occur in several places around the home. While some may be more obvious than others, all of these areas should be checked regularly: Under sinks and cabinets: These areas are often ignored, but plumbing connections can leak behind closed cabinet doors. Behind walls: Pipes running through walls are particularly vulnerable to small leaks, especially in older homes. Beneath flooring: Leaks from appliances or bathrooms can seep into the floors, leading to warping or buckling. Basement and crawl spaces: These areas are often damp, and leaks can go unnoticed for a long time if not regularly inspected. How to Detect Hidden Plumbing Leaks Knowing where leaks can occur is only half the battle. It’s equally important to understand how to detect these leaks before they cause significant damage. Here are some of the most effective methods for detecting hidden plumbing leaks: 1. Monitor Your Water Bill A sudden spike in your water bill, without any increase in water usage, is one of the most telling signs of a hidden leak. Compare your current water bill to past bills to spot unusual changes. Even small, slow leaks can cause noticeable increases in your monthly water costs. 2. Check the Water Meter One of the simplest ways to detect a hidden leak is to check your water meter. First, turn off all water-using appliances and fixtures in your home. Once everything is off, go to your water meter and take a reading. Wait a couple of hours (without using any water) and check the meter again. If the meter has changed, it means there’s a leak somewhere in your home. 3. Watch for Water Stains and Damage Water stains on ceilings, walls, or floors are clear signs of hidden leaks. Pay attention to discoloration, peeling paint, or wallpaper, as well as soft spots on the walls or floors. If you notice any of these signs, there could be a leak behind the surface. 4. Listen for Dripping or Rushing Water Sometimes, you can detect hidden leaks by listening for unusual sounds. If you hear the sound of water rushing or dripping when no faucets or appliances are in use, there may be a leak inside your walls or under the floor. 5. Use Infrared Cameras or Moisture Meters Infrared cameras can detect temperature differences behind walls and under floors, making it easier to find hidden leaks. Moisture meters, on the other hand, measure the level of moisture in building materials like drywall or wood, helping you pinpoint areas that may be water-damaged due to leaks. While these tools are highly effective, they are often used by professional plumbers who are trained to locate and repair hidden leaks. 6. Watch for Mold or Mildew Growth As mentioned earlier, mold and mildew thrive in damp, hidden spaces. If you notice a musty smell or see visible mold growth on walls, ceilings, or floors, it’s a strong indicator of a water leak nearby. Mold can grow quickly, so addressing leaks as soon as you spot these signs is essential. 7. Check Your Yard Hidden leaks can also occur outside the home. Check your yard for any soggy or wet spots that don’t correspond with recent rain or irrigation. These wet areas may indicate a leak in your main water line or in the underground plumbing system. 8. Perform a Toilet Dye Test Toilet leaks are common but often go unnoticed because they’re silent. To check for a hidden toilet leak, place a few drops of food coloring in the tank of your toilet. Wait for about 15 minutes and then check the bowl. If the color has seeped into the bowl, it means water is leaking from the tank, and it’s time to replace the flapper or other parts. The Importance of Professional Inspection While there are several DIY methods for detecting hidden plumbing leaks, some leaks can be particularly challenging to find. If you’re experiencing any of the signs of hidden leaks but can’t seem to locate the source, it’s time to call in a professional. A professional plumbing service, such as Chrome Heating Air Conditioning, can use advanced tools like infrared cameras, moisture meters, and acoustic leak detectors to find even the most well-hidden leaks. Not only can they detect leaks early, but they can also repair them to

Pipes Start Rattling
Uncategorized

Backed Up Sewer Line? Here’s What You Need to Know

Dealing with a backed-up sewer line is one of the most inconvenient and unpleasant experiences a homeowner can face. Not only does it pose a threat to your property, but it can also create unsanitary conditions that are harmful to your family’s health. Understanding the causes, signs, and solutions for a backed-up sewer line can help you tackle the issue quickly and prevent future problems. In this article, we’ll explore everything you need to know about sewer line backups, including how to handle the situation and when to call in professional help. What Causes a Sewer Line Backup? A sewer line backup occurs when the flow of wastewater from your home is obstructed, causing sewage to back up into your plumbing system. Several factors can lead to this unfortunate situation: 1. Tree Root Intrusion Tree roots are one of the most common causes of sewer line blockages, especially in older homes. As tree roots search for moisture, they can penetrate sewer pipes through small cracks or joints. Over time, these roots grow larger and obstruct the flow of wastewater, eventually causing a blockage or pipe collapse. 2. Clogs from Debris Another major cause of sewer line backups is debris accumulation in the pipes. Non-flushable items such as paper towels, diapers, sanitary products, and grease can clog the sewer line, leading to backups. Even excessive toilet paper use can contribute to blockages, especially in homes with older plumbing systems. 3. Aging or Damaged Pipes Sewer lines, especially those made of older materials like clay or cast iron, can deteriorate over time. Corrosion, cracks, and breaks can cause the line to collapse or become blocked, leading to sewage backup. Homes with outdated plumbing systems are at higher risk for these issues. 4. Heavy Rain and Flooding In areas prone to heavy rainfall, municipal sewer systems can become overwhelmed, leading to a backup into homes connected to the system. This is particularly common in neighborhoods with older or insufficient sewer infrastructure. If the city’s sewer system becomes overloaded, it can cause water and sewage to back up into your home through the lowest drains, such as in the basement. 5. Shifting Soil Ground movement due to construction, erosion, or natural settling can shift or misalign your sewer line. Even small shifts in the soil can create gaps, cracks, or blockages that lead to backups. Homes located in areas with clay-heavy soil are especially vulnerable to this type of damage. Signs of a Backed-Up Sewer Line Recognizing the early signs of a backed-up sewer line is essential for preventing a full-blown disaster. Here are the most common symptoms to watch for: 1. Multiple Drain Backups One of the clearest signs of a sewer line problem is when multiple drains in your home begin backing up at the same time. For instance, if your shower drain backs up when you flush the toilet, it indicates that the blockage is likely in the main sewer line rather than an individual drain. 2. Unpleasant Odors The smell of sewage or rotten eggs in your home or yard is a telltale sign of a sewer line issue. These odors are caused by methane and other gases escaping from a compromised sewer line. If you detect a foul odor, it’s crucial to investigate the source promptly. 3. Slow Drains If your sinks, showers, and toilets are draining more slowly than usual, it could indicate a partial blockage in the sewer line. While a single slow drain might be caused by a localized clog, widespread slow drainage is a warning sign that the main sewer line may be obstructed. 4. Gurgling Noises When wastewater struggles to pass through a blocked sewer line, it can create gurgling sounds in your plumbing. If you hear these noises coming from your toilet, sink, or bathtub, it’s a strong indication that a blockage is forming. 5. Sewage Backup The most obvious and alarming sign of a backed-up sewer line is when sewage begins to back up into your home. This usually occurs in the lowest parts of your home, such as the basement, through floor drains or toilets. If this happens, it’s important to act immediately to prevent further damage. What to Do When Your Sewer Line Backs Up A sewer line backup can quickly escalate into a major problem if not handled properly. Here are the steps you should take if you suspect or experience a backup: 1. Stop Using Water The first thing you should do is stop using all water in your home, including sinks, toilets, showers, and appliances like washing machines and dishwashers. This will prevent more wastewater from entering the already clogged sewer line and worsening the backup. 2. Turn Off the Main Water Supply If the backup is severe, consider shutting off your home’s main water supply to prevent further damage. This is especially important if sewage is already backing up into your home, as it will help minimize the flooding. 3. Inspect the Cleanout Most homes have a sewer cleanout, which is a pipe located outside that allows access to the main sewer line. You can open this cleanout to relieve pressure in the system and potentially allow sewage to flow out rather than into your home. However, this is only a temporary solution, and you’ll need professional help to fully clear the blockage. 4. Contact a Professional Plumber Dealing with a sewer line backup is not a DIY project. You’ll need to call in a licensed plumber to assess the situation and perform a thorough inspection. Many plumbers, including Chrome Heating Air Conditioning in Plano, TX, use specialized equipment such as cameras and hydro-jetting to locate and clear blockages without causing further damage to your pipes. 5. Clean and Disinfect Once the sewer line has been cleared and repaired, it’s essential to clean and disinfect any affected areas in your home. Sewage contains harmful bacteria and viruses that can pose serious health risks, so you’ll want to thoroughly sanitize any surfaces that came into contact

Trenchless Sewer Repair
Uncategorized

The Pros and Cons of Trenchless Sewer Repair

Sewer repair is one of those home maintenance issues that most homeowners dread. Traditionally, it involved digging up large sections of your yard, driveway, or even your street, leading to disruption, inconvenience, and high costs. However, trenchless sewer repair offers a modern, less invasive alternative to traditional methods. In this article, we’ll explore the pros and cons of trenchless sewer repair to help homeowners make an informed decision when faced with sewer line issues. What is Trenchless Sewer Repair? Before diving into the advantages and disadvantages, it’s important to understand what trenchless sewer repair entails. Unlike traditional sewer repair methods, which require extensive digging to access damaged pipes, trenchless repair uses advanced techniques to fix or replace pipes without significant excavation. There are two primary trenchless methods: pipe bursting and pipe lining. Pipe Bursting: This method involves breaking up the existing pipe while pulling a new one into its place. It’s commonly used for full pipe replacement. Pipe Lining: In this method, a flexible liner is inserted into the damaged pipe, then inflated and cured to create a new pipe within the old one. Now that we have a basic understanding of how trenchless sewer repair works, let’s explore the pros and cons. Pros of Trenchless Sewer Repair 1. Minimal Disruption to Landscaping and Property One of the most appealing benefits of trenchless sewer repair is the minimal disruption to your landscaping, driveway, and surrounding property. Traditional sewer repair often requires digging large trenches, which can ruin lawns, gardens, patios, and sidewalks. With trenchless methods, the repair or replacement can be done with only a few small access points, meaning your property remains largely untouched. For homeowners who take pride in their outdoor spaces or have invested heavily in landscaping, this benefit cannot be overstated. The idea of digging up your yard or driveway can be a nightmare, but trenchless sewer repair offers a less invasive option. 2. Cost-Effective in the Long Run Although the initial cost of trenchless sewer repair might be higher than traditional methods, it can save money in the long run. Since there’s less need for heavy excavation equipment and fewer labor hours are required for digging, the overall project tends to be faster and more efficient. Additionally, you won’t have to spend extra money on restoring your lawn, driveway, or any other part of your property that would otherwise be damaged by traditional repair methods. Furthermore, trenchless technology often provides a more durable solution than traditional methods. The materials used, such as resin for pipe lining or high-density polyethylene for pipe bursting, tend to have a longer lifespan, reducing the need for future repairs. 3. Faster Repair Time Traditional sewer repairs can take days or even weeks to complete, particularly if they involve extensive digging and restoration of landscaping. In contrast, trenchless sewer repairs can often be completed within a day or two. The time savings result from the less invasive nature of the work, fewer labor hours, and the use of modern technology to expedite the process. This is especially beneficial for businesses or homeowners who cannot afford extended downtime. The quicker turnaround time means that life can get back to normal sooner, with minimal inconvenience. 4. Environmentally Friendly Trenchless sewer repair is also considered to be more environmentally friendly than traditional methods. With less excavation required, there is less disruption to the surrounding soil and ecosystems. In addition, the materials used for trenchless repair, such as pipe liners, are durable and resistant to corrosion, which can help prevent future leaks that could harm the environment. By choosing a method that causes less environmental disruption, homeowners can feel good about opting for a solution that aligns with sustainable practices. 5. Improved Pipe Performance The materials used in trenchless repair, particularly pipe lining, can enhance the performance of your sewer system. The new pipe lining creates a smooth, joint-free surface inside the existing pipe, which can improve water flow and prevent issues such as clogs, root intrusion, or leaks. As a result, your sewer system will be more efficient and less prone to future problems. Cons of Trenchless Sewer Repair 1. Higher Upfront Costs One of the main drawbacks of trenchless sewer repair is its higher initial cost compared to traditional methods. While it may be more cost-effective in the long run due to fewer repair needs and less property damage, homeowners should be prepared for a higher upfront investment. However, for many people, the reduced disruption and longer-lasting results make this investment worthwhile. 2. Not Suitable for Every Situation Trenchless sewer repair isn’t a one-size-fits-all solution. It’s most effective for pipes that are structurally sound but have issues such as leaks, blockages, or corrosion. In cases where pipes have completely collapsed, trenchless methods may not be feasible. Additionally, if the soil around the pipes is unstable or there are severe blockages, traditional digging methods might be required to address the problem properly. Homeowners should consult with an experienced plumber to determine if trenchless repair is a viable option for their specific situation. 3. Limited Access to Certain Pipes In some cases, trenchless repair may not be possible due to the location of the pipes. For example, if a sewer line is located under a building or other immovable structures, trenchless methods might be more challenging to execute. While this is less common, it’s a consideration that homeowners should be aware of when assessing their options. Additionally, if the access points for the repair are difficult to reach, it may add complexity to the process, potentially driving up the cost or time needed for the repair. 4. Requires Specialized Equipment and Expertise Trenchless sewer repair requires advanced equipment and specialized knowledge that not all plumbers possess. It’s crucial to hire a professional who is experienced in trenchless technology to ensure the job is done correctly. While many plumbing companies offer these services, the higher level of expertise required can contribute to the higher cost. When searching for a reputable provider, it’s essential to ensure

DIY Drain Cleaning
Uncategorized

What to Do When Your Dishwasher Won’t Drain

A malfunctioning dishwasher can be frustrating, especially when you discover a pool of standing water at the bottom after a cycle. Fortunately, most issues causing a dishwasher not to drain are easy to diagnose and fix on your own. In this comprehensive guide, we will walk you through the common causes of drainage problems and solutions that can restore your dishwasher to proper working order. If you live in the Plano, TX, area and your efforts to fix the issue don’t resolve it, you can always rely on Chrome Heating Air Conditioning for professional service. Now, let’s dive into the steps to troubleshoot a dishwasher that won’t drain. Common Causes of a Dishwasher Not Draining Several factors can cause your dishwasher to stop draining. Understanding these potential causes can help you identify the issue more quickly. Below are the most common culprits: 1. Clogged Drain Hose The drain hose is responsible for carrying wastewater from your dishwasher to your home’s drainage system. Over time, food particles, grease, and debris can build up in the hose, causing a clog. If your dishwasher isn’t draining, the first thing to check is the drain hose. 2. Blocked Garbage Disposal If your dishwasher is connected to a garbage disposal, a clogged or unemptied disposal can prevent the dishwasher from draining properly. It’s a good idea to run your garbage disposal before running the dishwasher to ensure that the pathway is clear. 3. Dirty Filter Many dishwashers have a filter located at the bottom of the machine, which catches food particles and debris. If this filter becomes clogged, it can restrict water from draining out of the appliance. Regular cleaning of the filter is essential for keeping your dishwasher functioning correctly. 4. Faulty Drain Pump The drain pump forces water out of the dishwasher and into the drain line. If the pump is malfunctioning or has failed altogether, it may prevent the dishwasher from draining. This problem may require a professional technician to diagnose and fix. 5. Kinked Drain Hose In some cases, the drain hose may become kinked or bent, restricting the flow of water out of the dishwasher. Inspecting the hose for any bends or blockages can resolve the issue. 6. Air Gap Blockage Some dishwashers are equipped with an air gap, which prevents dirty water from flowing back into the dishwasher. If the air gap becomes blocked or clogged, it can cause drainage issues. Cleaning the air gap can resolve this problem. How to Fix a Dishwasher That Won’t Drain Now that we have identified some common causes, let’s look at the steps you can take to fix the issue. Keep in mind that some repairs may require professional assistance if you are not comfortable handling plumbing or electrical components. Step 1: Remove Standing Water Before you begin troubleshooting, it’s important to remove the standing water from the bottom of the dishwasher. You can do this using a sponge or a cup to scoop out the water. Removing the water will make it easier to inspect the interior components and perform any necessary repairs. Step 2: Clean the Filter The filter is often the culprit when a dishwasher won’t drain. To clean it: Locate the Filter: It is typically located at the bottom of the dishwasher, under the spray arm. Remove the Filter: Some filters twist off, while others have screws holding them in place. Refer to your dishwasher’s manual for instructions. Clean the Filter: Rinse the filter under warm water, using a soft brush to remove any food particles and debris. Replace the Filter: Once clean, secure the filter back in place. Cleaning the filter should be part of your regular dishwasher maintenance to prevent future drainage issues. Step 3: Inspect the Drain Hose A clogged or kinked drain hose is another common cause of a dishwasher not draining. To inspect it: Disconnect the Power: Ensure the dishwasher is unplugged from the power source before proceeding. Check the Hose for Kinks: Inspect the entire length of the hose for any bends or kinks that may be restricting water flow. Clear Any Clogs: If the hose is clogged, try using a straightened wire hanger or a plumber’s snake to remove the debris. You can also detach the hose and run water through it to clear out any blockages. Once you’ve cleared the hose, reattach it and test the dishwasher to see if the issue is resolved. Step 4: Clear the Garbage Disposal If your dishwasher is connected to a garbage disposal, ensure the disposal is free of any clogs. Run the disposal with water to clear out any debris that could be preventing proper drainage. Additionally, if your garbage disposal was recently installed or replaced, make sure the knockout plug has been removed. This plug blocks the dishwasher drain connection and must be removed to allow water to drain. Step 5: Clean the Air Gap If your dishwasher has an air gap, it’s important to check it for blockages. To clean the air gap: Locate the Air Gap: It is usually a small cylindrical fixture near the sink faucet. Remove the Cap: Twist off the cap or pull it off, depending on the model. Clear Debris: Use a small brush or a pipe cleaner to remove any debris or blockages from the air gap. Once cleaned, replace the cap and test the dishwasher. Step 6: Test the Drain Pump If none of the previous steps resolve the issue, the drain pump may be the problem. Testing or replacing the drain pump may require the assistance of a professional. The pump is located underneath the dishwasher, and accessing it involves disconnecting the appliance from its power and water supply. A technician can use a multimeter to test the pump for continuity and determine if it needs to be replaced. Step 7: Check the Dishwasher’s Timer or Control Board If your dishwasher’s timer or control board is malfunctioning, it may not signal the drain pump to activate during the drainage cycle. These components

Scroll to Top
Chrome Logo Web Transparent

Scheduled an Appointment