Replacing an old showerhead is one of the simplest yet most effective ways to upgrade your bathroom experience. Whether you’re aiming to save water, improve water pressure, or just enhance the aesthetic of your shower, installing a new showerhead can make a significant difference. Fortunately, this is a quick DIY project that most people can complete in under 15 minutes. Here’s a step-by-step guide on how to replace your old showerhead, along with tips on selecting the right model for your needs.
Why Replace Your Showerhead?
There are several reasons why you might want to replace your old showerhead:
- Low water pressure: Over time, mineral buildup can reduce the water flow in your showerhead.
- High water consumption: Older models tend to use more water, making them less eco-friendly.
- Poor spray patterns: Newer showerheads often offer multiple spray settings for a more customizable experience.
- Aesthetic upgrade: A new showerhead can instantly modernize your bathroom.
Before diving into the replacement process, it’s essential to gather all the tools and materials you’ll need. Here’s a quick checklist.
Tools and Materials You’ll Need
- New showerhead (fixed, handheld, or rainfall)
- Adjustable wrench or pliers
- Teflon (plumber’s) tape
- A cloth or rag
Now that you have everything you need, let’s get started.
Step 1: Turn Off the Water Supply
Before beginning, it’s always a good idea to turn off the water supply. This will prevent water from spilling out while you’re replacing the showerhead. Although most showerheads can be replaced without fully turning off the water supply, shutting off the water ensures a dry workspace and prevents any potential leaks.
Step 2: Remove the Old Showerhead
Start by unscrewing the old showerhead from the shower arm. Use an adjustable wrench or pliers to loosen it if it’s stuck. To avoid scratching the finish of your shower arm, place a cloth or rag around it before using the wrench.
Pro Tip: If the old showerhead is stuck due to mineral deposits, spray a mixture of vinegar and water on the joint, wait a few minutes, and then try again.
Once the old showerhead is off, you’ll likely notice mineral buildup or old Teflon tape on the shower arm threads. Clean the threads thoroughly to ensure a proper seal for the new showerhead.
Step 3: Prepare the Shower Arm Threads
Wrap the shower arm threads with Teflon tape to prevent leaks. Wrap the tape around the threads 2-3 times in a clockwise direction. This will help create a watertight seal when the new showerhead is attached.
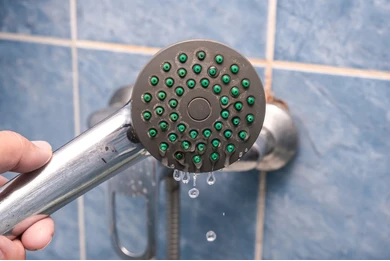
Step 4: Install the New Showerhead
Now it’s time to install your new showerhead. There are different types of showerheads available—fixed, handheld, and rainfall. Choose one that suits your style and needs.
- Fixed showerhead: Screw the new fixed showerhead onto the shower arm by hand. Use the wrench to tighten it gently but avoid overtightening, which could damage the threads.
- Handheld showerhead: Handheld showerheads come with a hose and a bracket. Attach the bracket to the shower arm first, then connect the hose to the bracket and the showerhead. Ensure all connections are tight.
- Rainfall showerhead: Rainfall showerheads are typically larger and require more care during installation. Attach it similarly to a fixed showerhead, making sure the angle is adjusted correctly for overhead water flow.
After tightening the showerhead, double-check that everything is secure and well-aligned.
Step 5: Turn the Water Back On and Test
With the new showerhead installed, turn the water supply back on. Slowly open the shower valve to test the water flow. Check for leaks around the connection to the shower arm. If you notice any drips, use your wrench to tighten the showerhead slightly. Be cautious not to overtighten, as this could crack the fitting.
If there are multiple spray settings on your new showerhead, test them to ensure they’re functioning as expected.
Troubleshooting Common Issues
After replacing your showerhead, you might encounter a few issues. Here’s how to address them:
- Leakage: If water is leaking from the joint, remove the showerhead and check that the Teflon tape is correctly applied. Rewrap the threads and tighten the showerhead again.
- Low water pressure: If the water pressure seems lower with your new showerhead, check if the showerhead has a flow restrictor. Some models include this to conserve water. If needed, remove the restrictor or clean out any mineral buildup that may be affecting water flow.
- Unsteady spray patterns: Ensure there are no blockages in the showerhead. Remove it and soak it in vinegar to dissolve any mineral deposits inside.
Choosing the Right Showerhead
Not all showerheads are created equal. Before replacing your old model, take some time to decide which type of showerhead best fits your needs:
- Fixed showerhead: This is the traditional, wall-mounted type that provides a steady spray. It’s the most straightforward option to install and is available in a wide range of designs.
- Handheld showerhead: If you prefer flexibility, a handheld showerhead is an excellent choice. It allows you to direct the water flow wherever you need it, making it perfect for rinsing or cleaning the shower.
- Rainfall showerhead: For a spa-like experience, consider a rainfall showerhead. These oversized models mimic the feel of natural rainfall and provide gentle, even water distribution.
- Dual showerhead: Want the best of both worlds? A dual showerhead combines a fixed and handheld model, giving you versatility in water flow and usage.
Eco-Friendly Options
If you’re environmentally conscious, consider investing in a low-flow showerhead. These models are designed to reduce water usage without compromising water pressure. By using less water, they help conserve resources and can significantly lower your water bill.
Modern low-flow showerheads use air injection technology to maintain high pressure, making them a great choice for both eco-friendly and comfortable showers.
Regular Maintenance Tips for Your New Showerhead
To ensure your new showerhead lasts as long as possible, follow these simple maintenance tips:
- Clean regularly: Mineral deposits can clog the nozzles over time. Clean your showerhead by soaking it in a solution of vinegar and water every few months to dissolve any buildup.
- Check for leaks: Periodically inspect the connection to the shower arm to make sure there are no leaks.
- Remove flow restrictors: If you live in an area with low water pressure, consider removing the flow restrictor for better water flow.
Conclusion
Replacing your old showerhead is a quick and easy DIY task that can instantly improve your bathroom’s functionality and aesthetic. Whether you’re upgrading to a handheld model, opting for a rainfall experience, or simply choosing a more eco-friendly option, this small change can make a big difference in your daily routine.
By following the steps outlined in this guide, you can replace your showerhead in just minutes, giving your shower a fresh new feel without the need for professional assistance. Regular maintenance will ensure your showerhead stays in top condition, providing you with a comfortable and efficient shower experience for years to come.
FAQ
1. What tools do I need to replace a showerhead?
- You will typically need an adjustable wrench, plumber’s tape (Teflon tape), and a cloth or towel to prevent scratching the fixtures.
2. Can I replace a showerhead without any plumbing experience?
- Yes, replacing a showerhead is a simple task that most people can do without prior plumbing experience. It usually involves unscrewing the old one and screwing the new one into place.
3. How do I remove the old showerhead?
- Use an adjustable wrench to loosen the showerhead by turning it counterclockwise. If it’s stuck, use a cloth to protect the fixture from scratches as you loosen it.
4. Do I need to turn off the water supply to replace a showerhead?
- No, you don’t need to turn off the water supply. Just make sure the water is not running while you work.
5. What is a plumber’s tape, and why do I need it?
- Plumber’s tape, also known as Teflon tape, helps create a watertight seal when attaching the new showerhead to prevent leaks.
6. How do I apply the plumber’s tape correctly?
- Wrap the plumber’s tape around the shower arm’s threads (the part sticking out of the wall) 2-3 times in a clockwise direction to ensure a snug fit.
7. How do I install the new showerhead?
- After applying the plumber’s tape, screw the new showerhead onto the shower arm by hand, then use an adjustable wrench to tighten it slightly if needed.
8. What should I do if my new showerhead leaks after installation?
- If there’s a leak, try tightening the showerhead with the wrench or reapplying the plumber’s tape to create a better seal.
9. Can I install a handheld showerhead myself?
- Yes, installing a handheld showerhead follows a similar process, and many models come with easy-to-follow instructions for DIY installation.
10. How long does it take to replace a showerhead?
- On average, replacing a showerhead takes about 10-15 minutes, depending on the condition of the old one and the type of new showerhead you’re installing.
11. What types of showerheads are easiest to install?
- Fixed showerheads and handheld showerheads with a hose are typically the easiest to install, requiring minimal tools and effort.