Author name: Amelia Manzoor

Uncategorized

Know This Before Paying For A Foundation Repair

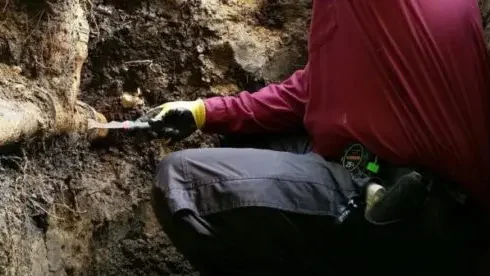
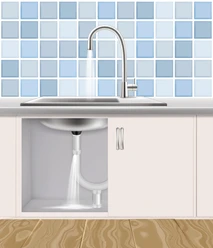
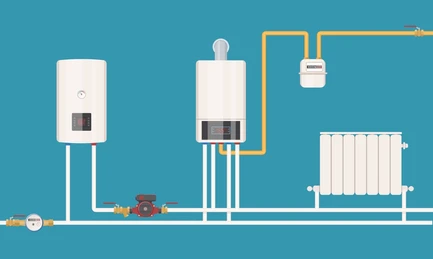
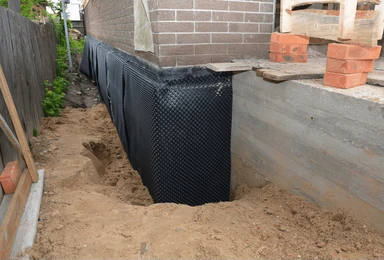
Addressing foundation problems can come with a hefty price tag. Regrettably, foundation concerns are widespread in North Texas. A majority of homes constructed in the region just north of Dallas are situated on a concrete slab foundation. Moreover, the soil in many of these locations is prone to instability. If the land was not adequately prepped before construction, it may result in foundation troubles down the line, long after the house was  If your slab home requires foundation repair, it’s essential to understand the potential impact on the plumbing systems located beneath the slab. Being informed about this critical aspect will enable you to make informed decisions, prioritize tasks effectively, and avoid unexpected complications throughout the process. This article provides a concise overview of the foundation repair process, explores the implications for plumbing systems, and explains the necessary water and sewer tests to be conducted before and after the repair.   An Overview of the Foundation Repair Process While foundation repair projects differ in requirements, there are typically consistent steps that are adhered to during the process. Staging the Job At times, various services may need to be turned off before starting the project. A reputable company will make a concerted effort to complete their tasks with precision and ensure that everything can be reassembled neatly afterward. Using tarps and relocating plants may also be required Installing the Piers To ensure the slab has a strong base to bear its weight it is essential to install piers (constructed from steel or concrete) by excavating under the edges or within the house. For interior piers, a hole can be chipped in the concrete for excavation. Reinstalling carpet over excavated interior piers is relatively simple. However, if the piers must be placed under tiled or wooden flooring, it may be required to engage a separate contractor to repair the flooring correctly. Once the piers are installed, they provide solid points underneath the slab that can be used to first lift and then support the slab at the proper elevation. They use very powerful hydraulic jacks to slowly lift the slab until it is at the right height everywhere. Once it is level and everything is back to where it should be, the jacks are removed and now the slab is permanently resting on the piers.|Lifting the Concrete Slab Filling in the Holes With the foundation repair complete, the next step is to refill the holes created by the pier installation. The previously excavated soil is carefully packed back into the holes, although it’s not possible to achieve 100% compaction. As a result, some excess soil may remain, which is typically piled up near the holes or along the foundation perimeter, where it can settle and compact over time. Finishing Touches A reputable foundation contractor will meticulously restore your property to its original state after completing the project. This includes re-establishing landscaping, grading the soil to a smooth finish, and thoroughly cleaning the interior of your home if internal piers were installed. However, any additional work, such as installing new flooring or advanced landscaping features, will typically require the services of a separate contractor. That concludes the discussion on the foundation company’s perspective. However, we are not finished yet. Up next, we will explore the impact of this activity on the plumbing system.   Foundation Movement and Plumbing Systems Having water underneath the foundation poses a challenge. It is essential to construct residential areas with effective water management systems such as gutters and French drains to prevent excessive moisture from accumulating in the soil beneath the structure. When water does seep under the foundation, the soil expands, exerting enough pressure to shift the foundation. Similarly, when the soil dries out, it contracts, causing any objects placed on top to sink along with it. Understanding this concept highlights the significance of ensuring there are no plumbing leaks beneath. A leak in the home’s clean system could swiftly lead to a significant amount of water accumulating under the foundation. Conversely, slow leaks in the sewage pipes can cause substantial damage over a prolonged period. The pipes are placed below the foundation and covered with soil before pouring them. They rise and go through the concrete wherever a plumbing fixture is located. Essentially, some parts of the plumbing network are anchored in the ground beneath the building while others are secured by the concrete base. Movement of the slab compared to the soil can exert significant pressure, potentially causing damage to the pipes.   chrome air conditioning Plumbing Services Sometimes, water leaks from the plumbing can lead to the shifting of the foundation due to the overflow. As a result, this movement of the foundation can trigger additional pipe damage, continuing the cycle of plumbing problems. |Often, the situation is not as dramatic. The base may have moved slightly due to natura soil shifts, but the plumbing remains undisturbed. As long as the lifting work is not too extensive, the plumbing should remain in good condition during the foundation repairs. Water and Sewer Static Testing Underneath the house, there are two distinct plumbing networks: the pressurized system that supplies clean drinking water and the gravity-fed system that handles wastewater disposal. These two systems require different testing methods, known as “static tests”, to ensure their proper functioning. Water Static Test To conduct a water static test, a pressure gauge is attached to the system to determine the existing water pressure in the pipes. Next, the main water supply valve, typically located at the meter, is closed to isolate the system, such as faulty pipes, dripping faucets, or constantly running toilets, will cause the water pressure to decrease. The rate of pressure drop is directly related to the severity of the leak, with a faster drop indicating a more significant issue. To rule out any potential issues, we’ll need to inspect the above-ground fixtures, such as faucets, to ensure there are no visible leaks. Although these leaks won’t directly impact the foundation, they can mask other, more

Uncategorized

Plumbing Maintenance in Dallas by Chrome Heating

It is common knowledge that plumbing issues can lead to extensive water damage in a household. Taking a proactive approach to plumbing maintenance is essential to avoiding potential problems. There are numerous tasks that homeowners can undertake themselves to identify and address issues before they escalate and create.   This article will outline essential maintenance tasks to perform annually or bi-annually to keep your plumbing system in top condition. By incorporating these routine inspections into your schedule, you can enjoy peace of mind and a reduced risk of costly plumbing issues.   Yearly Each plumbing fixture in your home should have its dedicated shut-off valves. Typically, this includes a pair of valves (one for hot water and one for cold) located under each sink. Toilets usually have a single cold water shut-off valve behind them. Additionally, there should be a shut-off valve for the cold to your water heater. The laundry room should have separate hot and cold valves for the washing machine, and the refrigerator’s ice maker and water dispenser should also have a dedicated cold water shut-off valve.   Regularly using plumbing fixtures is important to maintain their functionality. Failure to use these valves over an extended period increases the likelihood of malfunctions that are needed. Inactivity can cause the valves to become rigid and challenging to operate. The rubber components may deteriorate and become susceptible to leaks. Accumulation of calcium in the ball valve’s chamber can hinder its ability to fully close.   Exercising all of these valves is highly recommended. This practice serves a dual purpose: it helps maintain the valves’ optimal functionality and also identifies any potential issues, allowing you to replace faulty valves before a critical situation arises, such as a plumbing emergency.   To clean the valve, run water through it and toggle the valve on and off a few times. This will help remove any debris and test if the valve closes completely.   As a word of caution: if the valve has not been operated for a long time, there is an elevated risk of the valve breaking while you attempt to operate it. Do this at your own risk. Legacy Plumbing is not responsible for any leaks or damage that result from operating failed plumbing valves in the way they were designed. Learn more about shut-off valves in this video.   Check Water Pressure The water pressure supplied to your residence may fluctuate as modifications are carried out on the utility. Furthermore, if you utilize a pressure-reducing valve (PRV), the pressure levels can vary as the PRV deteriorates. It is recommended to periodically assess the water pressure to prevent potential damage to your home’s plumbing.   The ideal water pressure for fixtures should be within the range of 40 to 80 psi. If the pressure falls below this range, it may cause issues with the functioning of fill valves in toilets and other fixtures. Conversely, if the pressure exceeds this range, it can lead to increased stress on the system’s vulnerable, exceeding their intended capacity. Certain locations within our service territory, including Frisco, are prone to high water pressure problems, which can lead to a greater likelihood of malfunctioning toilet fill valves and damaged or leaking solenoid valves, as well as other compromised plastic components.   Checking the pressure is a straightforward process. To do so, you’ll need to acquire a pressure gauge that fits standard hose threads, which can be found at most hardware stores or online retailers. Once you have the gauge, attach it to the hose connection on your outdoor faucet and turn on the water. Next, take a reading from the gauge to determine if your pressure is within the recommended range. If it’s not, you may need to adjust or replace the pressure-reducing valve. For further guidance, don’t hesitate to contact us.   Check Gas Connections For homes with natural gas appliances, it’s crucial to periodically inspect the connections to prevent potential gas leaks, gas distribution systems, and vertical pipes that carry gas to appliances.   Flexible, corrugated tubing connects gas-powered appliances, such as water heaters, furnaces, gas stoves shut-off valves, providing a secure and reliable gas supply.   A gas manifold is a centralized location where multiple individual gas lines, typically CSST, converge to connect with a larger supply line. In newer homes built on a slab foundation, this manifold is often situated in the attic. Due to the numerous connections and frequent presence of a pressure regulator, it’s crucial to inspect this area for potential leaks.   The pipes that extend from the underground gas line in your yard to outdoor equipment, such as a pool heater or outdoor fireplace, or to a building, are known as gas risers. Due to their exposure to harsh weather conditions and potential damage from accidental impacts, it’s crucial to regularly inspect these connections for signs of leakage.   Verifying these connections is a straightforward process. You can rely on your sense of smell or use a with the latter being a more effective method. Natural gas has a distinctive scent that is intentionally added to ensure safety, which is likely familiar to those with gas fireplaces or stoves. If you have a moderately sensitive sense of smell, you can typically identify minor leaks by sniffing the connections closely. This approach allows you to catch small leaks before they escalate into larger issues.   Another method is to combine equal amounts of water and dish soap in a spray bottle and apply the solution to all accessible connections in the specified areas. Observe the area closely, as bubbles will consistently form and accumulate at the source of any leaks. If you detect a leak, please contact us promptly so we can address the issue before it escalates.   Flush Tankless Water Heater Regular maintenance is essential for tankless water heaters to prevent issues caused by mineral buildup in the heat exchanger’s small passageways. Flushing the tankless water heater with a descaling is especially crucial for those

Prevent Pipe Freezing
Uncategorized

How to Winterize Outdoor Faucets

Deciding on the perfect kitchen faucet can be a challenging task for many homeowners. The kitchen faucet stands out as one of the most utilized plumbing fixtures in a household, being operated multiple times daily by various individuals. Positioned prominently in the kitchen area, this fixture is expected to not only look appealing but also function efficiently. A high-quality kitchen faucet can significantly streamline food preparation and cleaning tasks, making daily chores easier and more convenient.   Homeowners in North Dallas frequently reach out to us with inquiries about kitchen faucet maintenance, seeking guidance on whether to fix their existing faucet or invest in a new one. Common concerns include determining the optimal time to replace a faucet, identifying the top kitchen faucet brands, and ensuring a proper fit with their sink options available. This article aims to provide clarity on these topics, empowering readers to make an informed decision when selecting their next kitchen faucet.   Repairing vs Replacing When considering whether to purchase a new faucet or repair the current one in your kitchen, you might question the value of repairing it. This is a valid inquiry. Repairing the faucet can be the optimal choice in certain situations. Various factors should be taken into account.   How long has this faucet been malfunctioning? For how long has the faucet been experiencing problems? Common issues include leaks around the handle, continuous dripping from the spout, water seepage around the base of the spout when in use, and a spout in place. If the faucet has been exhibiting one or more of these issues for an extended period, the chances of a successful repair are lower, as excessive damage may have occurred. When water infiltrates areas of the faucet not designed for it, the valve body or internal O-rings and seals can deteriorate rapidly, leading to further complications.   Is the faucet made by a reputable manufacturer? When evaluating a faucet for repair, it’s essential to consider the manufacturer’s reputation. A faucet from a well-established and respected brand is more likely to be repairable due to the widespread availability of replacement parts. Additionally, reputable manufacturers tend to design their faucets with better quality and durability in mind, driven by the need to maintain their competitive edge and uphold their warranties. In contrast, cheaper faucets from lesser-known brands can be challenging to repair, as replacement parts like O-rings and cartridges may be hard to find, and installation issues.   Is the faucet finish in good shape? When evaluating the faucet, don’t forget to assess its aesthetic appeal. If the finish is severely deteriorated or the design is no longer stylish, it may not be worth the effort and expense to fix it. A well-crafted, visually appealing faucet can greatly enhance your daily experience.   Faucet brands vary in quality and credibility. Certain lesser-known budget-friendly brands (and even some luxury brands) may not manufacture or create the faucets they sell. It appears that they may just be marketing firms posing as faucet manufacturers. Purchasing a faucet from such a company is generally not advisable, as they are less invested in maintaining a good reputation in the long run Additionally, they could easily change suppliers, leading to frustration and lack of support when it comes to repairing the faucet in the future.   Consider the long-term maintenance and upkeep of your faucet. Regardless of the brand you choose, it’s inevitable that it will eventually require maintenance and repairs. Even higher-ups can experience premature failures. Some people opt for a more affordable faucet with the intention of it when it breaks, but this approach can lead to disappointment and hassle when the faucet fails prematurely and replacement parts are hard to find. In most cases, it is advisable to choose a well-known brand when selecting a. Kohler, Delta (including Brizo and Peerless), and Moen are reputable choices for kitchen faucets based on our positive interactions with them. These companies have a long history in the industry and offer reliable product support. Additionally, their widespread popularity means that replacement parts are typically readily available.   It is generally recommended to choose a kitchen faucet that is towards the upper limit of your budget in terms of price. This is because the kitchen faucet will be frequently used and easily noticed, making it worth investing more money in compared to other types of faucets While many homeowners regret buying inexpensive faucets, it is rare to find someone dissatisfied with a higher-quality faucet purchase.   Popular Kitchen Faucet Styles Various kitchen faucet styles are available in today’s market for you to select from One trendy option currently is the high-arc pull-down kitchen faucet, inspired by commercial environments. These faucets feature a tall, curved spout that extends vertically before arching, providing ample space below for kitchen tasks.   Conventional kitchen faucets typically feature a spout with a low arc, rising diagonally from the center of the faucet. Nowadays, high-arc faucets are increasingly replacing these traditional models. Some high-arc faucets go beyond the usual design and adopt a commercial appearance. These residential pre-rinse style faucets are usually larger, more substantial, and have a high arch constructed from a spring.   Most faucets nowadays feature a single handle, though some models with two handles are still available.out designs, the handle is typically positioned on top of the faucet, while in high-arc styles, it is found on the right side of the faucet.   In summary, there is a wide variety of styles available, including modern, and farmhouse designs. It is important to invest time in selecting one that will bring you daily satisfaction.   Kitchen Faucet Mounting Configurations Different kitchen faucets are designed to be installed in various mounting configurations. Before purchasing a new faucet, it is important to ensure that it is compatible with the existing holes in your countertop or sink basin unless you plan to replace these as well. Faucets are available for 1, 2, 3, or 4-hole installations, with some models being specific to one

Uncategorized

Which Kitchen Faucet Should I Buy?

As the most utilized fixture in the home, life. With its frequent use by multiple individuals, it’s essential to select a faucet that not only looks great but also delivers exceptional performance. As a focal point in the kitchen, it’s on full display for family and guests to see. A high-quality kitchen faucet can greatly simplify various tasks, from food preparation to cleanup, making it a vital investment for any homeowner.   Homeowners in North Dallas often reach out to us with inquiries about fixing or upgrading their kitchen faucets. Should you opt for a new installation or repair the existing one? Which brand is most reliable? How do you ensure a faucet is compatible with your sink? What features and styles are available in the market? This article aims to provide clarity on these common concerns, guiding you in making an informed decision when selecting your next kitchen faucet.   Repairing vs Replacing If you are considering purchasing a new faucet, you might be questioning whether repairing your current kitchen faucet is a more cost-effective choice. This is a. Repairing the faucet can be the preferable option in certain cases. Various factors should be taken into account when making this decision.   How long has this faucet been malfunctioning? Some typical problems include around the faucet handle, continuous dripping from the spout, leakage at the base of the spout, or a very stiff or stuck spout. If the faucet has been displaying any of these issues for an extended period, there is a greater chance that repair attempts may not be successful due to significant damage. Water leaking into areas it shouldn’t reach can cause rapid deterioration of the faucet’s valve body or the seals and O-rings inside. Is the faucet made by a reputable manufacturer? Consider the origin of the faucet to ensure its repairability. The brand of the faucet plays a crucial role in its success. Opting for a well-established and reputable manufacturer increases the chances of a successful repair. Reliable brands offer better availability of parts and superior design due to their competitive warranties and strong reputations. In contrast, repairing lesser-known brands can be challenging as finding affordable replacement parts like O-rings and cartridges becomes arduous, and installing them in poorly designed faucets can be frustrating.   Is the faucet finish in good shape? Ultimately, consider the faucet’s aesthetic appeal. If the finish is severely deteriorated or the design is no longer fashionable, it may not be worthwhile to invest time and resources into repairing it. A well-crafted, visually appealing faucet can greatly enhance your daily experience.   Faucet Brands Authenticity can vary greatly. Some affordable and luxury brands may not actually manufacture or design their products, instead relying on third-party suppliers. These companies may prioritize marketing over product quality, which can be a concern for consumers. Buying from a brand that doesn’t have a vested interest in its products’ long-term performance can lead to disappointing results, particularly when it comes to warranty support and repair services down the line.   Consider the importance of maintenance and assistance! It’s important to remember that of the brand you choose, faucets are not indestructible. At some point, they will require maintenance and repairs. Even reputable brands and well-made designs may have a certain percentage of faucets that fail prematurely. Some individuals opt for lower-cost faucets with a temporary-use mindset. While this strategy may be effective for some, it often leads to disappointment when the faucet malfunctions earlier than anticipated, and finding the necessary replacement parts becomes challenging.   When selecting a kitchen faucet, it’s often wise to opt for a well-established brand. Our experience has shown that Kohler, Delta (including Brizo and Peerless), and Moen consistently deliver high-quality products. These companies have a long history of reliability and offer strong customer support. Additionally, their widespread popularity makes it relatively easy to find replacement parts when needed.   It is advisable to choose a kitchen faucet that falls towards the upper range of your budget in terms of price. Investing more in a higher-quality faucet for the kitchen, given its frequent use and prominent visibility, tends to offer better value for money than opting for cheaper alternatives. While many homeowners regret buying inexpensive faucets, those who choose a more premium option are less likely to experience buyer’s remorse.   Popular Kitchen Faucet Styles Various kitchen faucet designs are available in the current market, catering to different preferences. A trendy option currently is the high-arc pull-down kitchen faucet, inspired by commercial environments. These faucets have a spout that extends high above the sink before curving down, providing extra room underneath for kitchen tasks.   Conventional kitchen faucets typically feature a spout with a low arc that angles up diagonally from the center of the faucet. In current times, high-arc faucets are increasingly replacing these traditional models. Some high-arc faucets go beyond the standard design to adopt a commercial appearance. Residential pre-rinse-style faucets with high arcs tend to be larger, more substantial, and often incorporate a spring in their construction.   Most faucet designs now feature a single-handle design, although some models still have two handles. The single handle is typically on top of the faucet in traditional spout styles and the right side for high-arc styles.   Ultimately, the variety of styles is vast, spanning from timeless classics to sleek modern designs and rustic farmhouse aesthetics. Investing time in finding the perfect one that suits your taste and daily needs is well worth the effort.   Kitchen Faucet Mounting Configurations When selecting consider the existing hole pattern in your countertop or sink basin, unless you’re planning to replace it simultaneously. Faucets come in various mounting configurations, including single, double, triple, and quadruple-hole setups. While some faucets are designed for a specific configuration, others offer flexibility and can be adapted to fit different layouts. Faucets with a single hole are made of spout and handle as a single unit. These faucets are designed to be connected to just one water

Uncategorized

How to Fix a Slab Leak: The Top Four Ways

If you reside in North Dallas and notice a surge in your water bill, hear a subtle hissing noise behind walls or under cabinets, feel warmth on your floor, or see excessive moisture near your foundation, you may be experiencing a slab leak. This type of leak typically occurs on the pressurized fresh water pipes responsible for supplying water to your faucets throughout the house. In the North Dallas, McKinney/Frisco region, homes built before 2010 often feature copper with a concrete slab foundation and copper plumbing, these pipes typically run beneath the foundation, making them difficult to access. When leaks occur, locating and repairing them can be a complex task. This article explores various methods for resolving these issues, and the most effective approach will depend on the specific construction of your home and the location of the leak. One approach to repairing a leak is to break through the concrete slab using a jackhammer necessary repairs. Another method involves creating a tunnel from the exterior, bur reach the source of the leak. A third option is to bypass the damaged pipe by installing a new line that runs through the wall or attic. Alternatively, you can repurpose the existing copper pipe as a conduit by threading a new line through it. Jack-Hammer the Slab The crucial first step in this repair process is to precisely identify the source of the leak. Failure to do so can result in unnecessary damage, with multiple holes drilled into the concrete and a significant mess created inside the home. To avoid this, professionals employ specialized tools to locate the leak beneath the dirt and concrete. They utilize tracing devices to map the route of the copper pipe under the slab and listening devices to pinpoint the loudest noise and anomalies that can indicate a leak in a hot water line. After multiple pieces of evidence indicate a particular location, the flooring and concrete will be broken up using a jackhammer, and the soil will be dug out until the pipe can be reached. An experienced expert can complete this task neatly and ensure that the flooring repair is as smooth as can be. Conversely, an inexperienced plumber might create a significant mess indoors when using the jackhammer. Repairing a slab leak using this method can be effective, but it is the most intrusive approach and necessitates reinstalling flooring. This method only addresses the specific leak location, leaving room for potential future leaks along the same line. Additionally, even with top-notch tools and expertise, there is no assurance of pinpointing the leak on the initial try due to challenges posed by insulated lines or concrete foundation beams. Tunnel Under the House Exactly a tunnel is the most discreet method for addressing the issue from within the home. To initiate this type of repair, it’s essential to first locate the source of the leak using the same detection techniques employed when breaking through the concrete slab. After identifying the source of the leak, locate the closest exterior wall and excavate a shallow pit, approximately three feet in depth. From there, dig a horizontal tunnel beneath the slab to reach the repair site. This labor-intensive process, typically undertaken by a skilled excavation team, requires manual effort, as no heavy machinery is designed to handle this specific task. One benefit of tunneling is that it allows for the replacement of a larger section of damaged pipe if needed. However, the extent of the repair is still constrained by the accessibility of the tunnel. In some cases, the leaking pipe may be embedded in concrete, requiring the use of a small jackhammer to the leak near an outside wall may be a preferable option when safeguarding the interior of the home is a top concern and re-routing the plumbing is not a simple task. While it involves significant effort, this approach can often be the most break away the concrete and expose the pipe for repair. Re-route through the Attic Rather than pinpointing and fixing a specific leak in a water line, a re-route involves identifying the problematic line beneath the slab and tracing its path to where it emerges above the slab. After determining this, the entire outdated copper line is left in place under the slab and a new line is installed, running from the starting point to the endpoint, routed through the walls and attic. Plumbers utilize a range of tools, gear, and approaches to identify the leaking line and its location within the wall. The junction points of multiple copper pipes within the wall, known as “manifolds,” are identified using tracing equipment and methods. Subsequently, pressure testing tools and techniques are employed to pinpoint the leaking line( s) after locating the manifold. Choosing to re-route the plumbing is a beneficial choice as it removes the existing line and reduces the risk of future leaks. However, this approach typically involves cutting into the sheetrock walls in multiple locations, which can be seen as a drawback. In general, re-routing is often regarded as the most effective way to address a slab leak, particularly for single-story homes. Repairing a slab leak in a house with multiple levels can be difficult. Success depends on the structure of the house and the arrangement of water lines. An adequate understanding of plumbing and home construction is essential for proper execution. While it is a highly technical repair method, the entire process typically takes less than a day. Pass-Through the Old Line An alternative approach to fixing a slab leak is the pass-through technique, which shares similarities with the rerouting method. This method also involves removing the entire faulty line. After identifying the start and end points of the leak, a new, narrower pipe can be inserted through the existing copper pipe, effectively using it as a conduit. Once the new pipe is fully threaded through, it can be reconnected, and water service can be restored. One major drawback of choosing this option is that it shrinks the diameter of

Uncategorized

How to Check for a Hot Water Slab Leak (Without Any Tools)

Are you concerned that you might have a slab leak? Have you noticed a faint humming noise emanating from your faucets when they’re not in use, or perhaps a mysterious warm patch on the floor that’s been there for a while? If you suspect a slab leak, this article will guide you through a simple method to detect a hot water slab leak without needing any.   A slab leak occurs when there is a leak in one of the pipes that is pressure located beneath the concrete slab foundation. In Dallas and across Texas, the majority of homes constructed after 1960 have a concrete slab foundation. Repairing leaks under a concrete slab foundation can be challenging and costly compared to other types of foundations In contrast, older homes in the DFW area may have a pier and beam foundation, which is typically easier to repair.   Homes constructed after 2010 are more likely to feature flexible PEX water pipes routed through the attic, rather than traditional copper pipes located beneath the foundation. This design choice reduces the risk of simplified plumbing access.   Prerequisite of the Test. Before conducting this test, ensure that your water heater has a functional shut-off valve. If the valve is an outdated gate valve with a round handle that hasn’t been used in a long time, it may not function lever-style handle, the test should be straightforward.   Before testing the system, it is important to ensure that none of the fauc. Verify that all sink faucets and tub/shower faucets are fully turned off and not leaking. Focus on fixing any running or dripping faucets before proceeding. Inform everyone in the household that you will be testing the system and ask them not to turn on any faucets until you have completed the test.   Performing the Test. To test for a potential slab leak, start by ensuring all appliances are turned off Proceed to the water heater, and if there is a recirculation, ensure it is disconnected. Then, shut off the cold water supply valve on the water heater, typically located at the top right when facing it. Wait for approximately 2 minutes before reopening the valve. If you hear or feel the water flowing through the valve upon reopening, it may indicate a slab leak. Conversely, if there is no noticeable sound, a slab leak is less likely. If the initial are inconclusive, you can repeat the test and extend the waiting period beyond two minutes.   A frequent indicator of a noticeable temperature variation on the floor, such as a warm or hot area. To identify these areas, inspect the floor thoroughly, either accurately, or with an infrared thermometer.   Chrome Air Conditioning Plumbing Services How This Test Works. When you close the valve and verify that all hot water fixtures are secure, you establish a sealed system. If the system is leak-free, the pressure will remain constant and no water will flow through the valve when it’s reopened. However, if a leak is present, the pressure will decrease over the 2-minute test period. Upon reopening the valve, a noticeable flow of water will occur as the system replenishes the lost water.   Imagine a congested road at a busy intersection. When the light turns green, you’re stuck in place because the road ahead is jammed. In this scenario, the traffic light represents the shut-off valve and the road beyond it symbolizes the hot water piping system. As long as the traffic is blocked by an accident, the flow of traffic is halted, regardless of the light the next time the light turns green (the valve opens), traffic will start moving again.   In a typical setup, hot water pipes a leak would likely occur either beneath the foundation or within the walls of the house. Given that indoor leaks usually cause noticeable water damage, the issue probably lies beneath the slab. When you such as a warm floor, unusually high water consumption, and strange noises, the evidence strongly suggests that a leak in the sub-slab hot water pipes is the likely culprit.   The Cold Water System, Cross-Overs, and Other Considerations. The effectiveness of this test is not guaranteed on its own. There could be a connection between the hot and cold water systems in a different location, such as a shower valve. If such a scenario exists, simply closing the cold water inlet valve at the water may not fully separate the hot water system, rendering the test ineffective.   Testing the cold water system without tools is feasible, although it is more complex. The presence of water lines running through the yard and serving the irrigation system adds to the difficulty. While conducting a test at the water meter or observing the meter flow indicator may reveal a leak in general, it won’t specifically identify a slab leak. By isolating the irrigation system, you can gain further insights. It is also to perform this test on the cold water system if there is a reliable valve at the main water line entry point However, keep in mind potential misleading results like water flow from slowly-running toilets.   Next Steps on Fixing a Slab Leak. If you suspect a slab leak and are interested in learning about potential repair options, consider reading an article that discusses the four methods for fixing a slab leak.   For personalized guidance and a tailored quote, we invite you to contact us and speak directly with our expert plumber. They will walk you through various options for your needs, all from the convenience of a phone call.   Chrome air conditioning Plumbing, and slab leak repair are our areas of expertise. We understand that each home is unique, and what works for one may not work for another. That’s why we take a tailored approach, considering your specific needs and preferences. With our extensive experience and refined techniques, we’re skilled at identifying the most effective solution for your home’s slab leak repair.

Uncategorized

Can Cold Weather in Texas Damage Your Water Heater?

Cold weather in the Frisco area and nearby North Dallas cities can greatly affect how well your water works and how long it lasts. Until February 2021, people in North Texas didn’t pay much attention to the relatively mild winters. However Winter Storm Uri led to extensive damage to pipes and water heaters, resulting in over 15 billion dollars in insured losses, exceeding the damage caused by Hurricane Harvey.   It’s crucial to stay ready and arrange regular maintenance and repairs for you. If your water heater is malfunctioning contact chrome air conditioning Plumbing for assistance. Our team of skilled Frisco residential plumbers can effectively address your needs.   Can A Hot Water Heater Freeze? Tankless water heaters come equipped with a feature called ‘freeze protection’ to freezing. They are generally safe from freezing as long as there is a power source. However, freezing may occur if there is a prolonged power outage combined with very cold temperatures.   Conventional gas tank water heaters can function as long as there is a gas supply to the home, ensuring that the tank remains at the desired temperature.   If the gas is turned off or if the is of the electric tank style, the likelihood of water freezing is minimal because of the tank’s thermal mass and insulation. The main risk of freeze-related damage is with the water lines connected to the water heater.   How Does Cold Weather Affect a Water Heater? While many homeowners often overlook their plumbing system, it plays a crucial role in maintaining a comfortable and functional living space. One significant factor that can compromise its performance is the weather,, when freezing temperatures can rapidly lead to costly plumbing problems.   Frigid temperatures can cause pipes to freeze and expand, leading to ruptures and water heaters. In some cases, this can result in subtle leaks that may go unnoticed, but can ultimately lead to significant and costly damage over time.   chrome air conditioning Plumbing Services 5 Signs Your Water Heater is Damaged Recognizing the warning signs of a faulty water heater is crucial for prompt and effective repairs. Here are five key indicators that your water heater may require attention from a professional:   Water Leak One clear indication that there might be a problem is a water leak. In cold temperatures, the pipes near your water heater can expand and contract, leading to potential cracks in older units. These cracks may allow water to escape, causing considerable harm to the structure.   High Energy Bills Cold water heaters, particularly those situated in unheated spaces, forcing them to operate more  intensively. If your winter energy bills are unexpectedly skyrocketing, it’s worth investigating whether your.   Rust The presence of a hidden leak or a sign that your water heater is nearing the end of its lifespan. In severe cases, rust can also contaminate the water supply, resulting in brown or yellowish water flowing from your faucets and drains.   Noisy Operation It is ideal for water heaters to operate smoothly and quietly. If you hear noises like banging or knocking coming from your unit while it is in use, it could indicate sediment accumulation as the root cause of the issue.   Are you experiencing a rapid depletion of hot water in your residence? Is your water heater struggling to produce heat? Inadequate water heating is an indication that your water heater requires repairs or, at the very least, some maintenance.   If you require a repair or wish to have our experienced plumbers examine your water remember to contact Chrome Air Conditioning Plumbing.   How Can You Prevent Cold Weather Water Heater Damage? To safeguard your water heater from the harsh effects of winter, it’s essential to be crucial in preventing damage, and this involves a thorough examination of the system, replacing worn-out or faulty components, and, if necessary, draining and flushing the unit to ensure optimal performance.   Installing pipe insulation is a valuable maintenance suggestion, particularly for dealing with cold weather. By using pipe your plumbing from extreme temperatures and reduces the risk of pipes freezing.   Is the chill of a toll on your water heater? Seeking a trustworthy partner for repair and upkeep? Look no further than Chrome Air Conditioning Plumbing, your go-to residential plumbing specialist, dedicated to addressing all your plumbing concerns.  

Uncategorized

How to Find a Leak Under the Kitchen Sink

If you’ve opened your kitchen cabinet to find damp paper towels or water droplets on your cleaning products, you may suspect that the garbage disposal, faucet, or pipe leak is often easy to identify due to visible signs of damage, a small leak can be more elusive. In such cases, water from the leak may be present on multiple components, making it challenging to pinpoint the source of the issue.   Chrome air conditioning Plumbing frequently encounters such situations, therefore this article provides a structured method that you can implement to examine the plumbing beneath your kitchen sink. Identifying the source of the leak will allow you to determine the necessary steps for repair.   Establishing a Baseline To effectively identify a stubborn leak, it’s essential to thoroughly prepare the area space under the sink to provide unobstructed access to all components. To inspect the area behind the sink, you may need to use a flashlight to illuminate the space. Additionally, gather a few dry towels to aid in the process.   Following that meticulously dry all surfaces. Ensure the garbage disposal, drain pipes, shut-off valves, and supply lines to the faucet and dishwasher are completely dry. Use the edge of the cloth or paper towel to soak up any remaining moisture in tight spaces and crevices.   As you may uncover additional clues about the leak’s location. Pay attention to areas where water consistently reappears after you’ve dried them or within the faucet itself. If you identify such a spot, you’ve likely pinpointed the source of the leak. Otherwise, move on to the next step in the process. The Flow Test The Drainarea is a potential issue. Leaks in kitchen sinks often occur in the drain lines, particularly at loose or poorly secured slip joint connections, which can. Begin by turning on the water in both sink basins and allowing it to run for a few minutes in each one. As the water flows, use a flashlight and a dry cloth to carefully scan the pipes for any signs of moisture or leaks.   Begin by inspecting the topmost areas where the pipes meet the sink basin It is crucial to be vigilant to detect any leaks promptly. Delaying may make it challenging to identify the source of the water leakage. Use your sense of touch to check for water in obscured areas.   The basin Test involves filling the basins with water after a regular flow test has been completed. By placing stoppers in the basins, you can observe how well the drain pipes handle stress. The stoppers are then removed, allowing the water to drain while running the garbage disposal. This test helps to evaluate the performance of the drain pipes under maximum stress conditions, resembling typical usage. It is important to closely monitor both the pipes and the garbage disposal throughout the test.   If the issue persists, proceed by Allowing it to operate for a short period, filling it with water, before pressing the “cancel/drain” button, which may be labeled differently on your specific model. The dishwasher will likely drain into the garbage disposal through a black or white pipe, and you should be able to hear the sound of water flowing into it. Alternatively, the water may flow through an “air gap” device, usually located on the countertop near the faucet, so be sure to inspect this as well.   Chrome Air Conditioning Plumbing Services   The Faucet Stress Test If the source of the leak remains elusive after conducting the basin test and draining the dishwasher, grab a flashlight and meticulously inspect the shut-off valves and faucet supply lines once again. A slow leak may have gone undetected during your initial examination, so be sure to scrutinize the area for any signs of corrosion or mineral deposits, which can appear as white residue or rust on the hardware.   Perform a thorough examination of the faucet, similar to the one you conducted on the drain pipes. Activate and deactivate the faucet multiple times and move the spout from side to side. Simultaneously, extend and retract the sprayer, testing its various functions. Continuously inspect the area under the cabinet for any signs of new water droplets or moisture, as some faucets may only leak when in specific operation modes or when the spout is positioned in a particular way.   What’s Next If the initial tests haven’t yielded any results, you’re likely dealing with a leak that only occurs sporadically. Rather than speculating and replacing components unnecessarily, it’s more effective to monitor the situation over time. To do this safely, without putting your cabinets at risk, you can place two or three baking sheets or specialized rubber drip trays under the sink’s plumbing fixtures.   Return all your cleaning supplies to their place under the sink and usual. Remember to inspect them from time to time, especially after extensive use. If you find water in the drip tray, simply go through the troubleshooting steps outlined earlier. The drip pan is designed to protect your cabinet from any potential water damage.   Additionally, you may consider purchasing a water alarm. This device is battery-operated and designed to detect any water accumulation in the cabinet, triggering an alert. Some models are to connect to your Wi-Fi network, sending a notification to your smartphone in case of any moisture. It’s recommended to place one of these alarms under the kitchen sink and another in the water heater drain pan.   Conclusion In closing, we trust that this procedure will assist you in identifying the source of the leak. Should it turn out to be the garbage disposal, feel free to explore the garbage disposals available for additional details. If the an issue with the kitchen faucet, we recommend reading our guide on selecting the ideal kitchen faucet. While we offer a basic kitchen faucet, you may opt to buy one independently if you desire specific features or finishes.   If you’re having trouble finding the source

Commercial HVAC Contractor Dallas TX
Uncategorized

Little Elm Water Information

Nestled in the heart of a lake town, Little Elm takes pride in its aquatic surroundings. The community’s affinity for water makes it the perfect home for chrome air conditioning Plumbing, conveniently located just off Eldorado Parkway. This article delves into the world of plumbing in Little Elm, providing lifelong residents and newcomers alike.   Where Does Little Elm Get Its Water From? Is It Hard Water? Like other municipalities in the northern Dallas-Fort Worth region, Little Elm the North Texas Municipal Water District. As a result, residents of Little Elm may encounter the same hard water issues common in North Texas, characterized by high concentrations of unsightly buildup on showerheads, faucets, and aerators.   Although hard water is tolerable for many people, a significant number of individuals prefer to use water filtration and softening systems to improve its quality and make it more suitable for their skin and drinking. While installing a comprehensive whole-house system can be a substantial expense, many choose to install a smaller, reverse-osmosis system specifically for purifying their drinking water.   It is recommended that residents of Little Elm establish a routine for regularly cleaning faucet aerators and showerheads. Luckily, this process is quite simple. Just remove the showerhead or aerator, wash away any particles from the filter screen, and soak it in vinegar to eliminate the calcium buildup.   The Water Tastes Unusual. Does Little Elm Have Good Water Quality? The taste of the water may seem strange at times. Is the water quality in Little Elm reliable? Variations in the tap water taste throughout the year are common for customers due to seasonal algal blooms.   Little Elm conducts regular monitoring of water quality to ensure it is free from contaminants. The comprehensive 2019 water quality report is available for viewing. Similar to other cities in the region, Little Elm’s water supply includes chlorine and fluoride. While most of the water is sourced from Lake Lavon, it may also come from other reservoirs like Lake Texoma and Lake Chapman.   Little Elm offers a specific form on their website that allows you to address any concerns you may have regarding the. Fill out this form to ensure that your feedback reaches the right person. chrome air conditioning Services Does Little Elm Practice Water Conservation? Given the finite nature of water resources, particularly during droughts, Little Elm places a  strong emphasis on water conservation. The town’s comprehensive water conservation plan is available for review. Additionally, residents can find information on the restrictions and schedules, which are in place to promote responsible water use.   Little Elm provides a useful tool to help you monitor your water usage more effectively. The tool, known as the “My Water Advisor App,” allows you to set up personalized alerts and track your water consumption through various methods.   To learn more about Little Elm’s rates for drinking water and wastewater services, refer to the relevant ordinance on this page. The town’s potable water supply is monitored through individual property meters. Meanwhile, the sewer fee is calculated based on a seasonal average, which is determined by the water usage recorded during the winter months of December, January, and February, a period when outdoor irrigation is typically minimal.   What Affects My Little Elm Water Bill? How Do I Shut the Water Off? Factors Impacting Your Little Elm Water Bill and Emergency Shut-Off Procedures. A water leak can significantly drive up your water bill, but you may be eligible for a Water Leak Adjustment from the City of Little Elm to mitigate the additional cost. This program encourages prompt repair of leaks by offering relief from excessive charges. To apply, complete the online form and attach a copy of your plumbing repair invoice, following the provided guidelines.   If there is a leak or problem that necessitates turning off the water supply to your house, two primary methods to do so. According to plumbing regulations, a shutoff valve must be installed on the main water line as it enters the house. In Little Elm, most of these valves are situated in a plastic “valve box” that is buried in the front garden. Interestingly, many homes in Little Elm have this valve box positioned near the front corner of the house closest to the water meter.   The water meter is another location where the water supply to the house can be turned off. It is typically found in a circular metal or rectangular plastic enclosure near the street. If you require the water to be shut off at the meter, the city can assist you with this service free of charge. To request this, you can contact the Public Works Department at 469-361-2700 during regular hours, or reach out to their emergency contact number at 469-361-2700 after hours.   Our upcoming article will delve deeper into the specifics of Little Elm’s plumbing regulations and explore some of the most frequently encountered plumbing problems.  

Plumbing Heating and Cooling Near Me
Uncategorized

What Type of Gas Line Do I Have?

In the northern Dallas-Fort Worth region, numerous residences are equipped with gas lines courtesy of Coserv or Atmos. Compared to electricity, natural gas offers several benefits. For instance, gas-powered water heaters and their electric equivalents. Additionally, gas furnaces can warm up a space more rapidly. Many homeowners also prefer the cooking experience provided by gas stovetops over electric ones. Furthermore, the ambiance and warmth of a gas fireplace are a welcome luxury during the cold winter months.   Natural gas can be unsettling as, requires periodic maintenance in your home. Better understanding of gas system care, you can alleviate any apprehension you may have. Whether your current home already has or you are considering buying one, this article is aimed at helping you.   In this section, we’ll explore traditional materials and methods used for residential gas lines in the North DFW region, highlighting potential problems associated with each approach.   Where is Your Gas Meter? The gas utility provider, either Atmos or Coserv, is accountable for maintaining the gas infrastructure that serves the neighborhood, with their responsibility ending at the point of the individual home’s gas meter. From there, the homeowner assumes ownership of the gas line. Typically, the gas meter can be found in the alley behind the residence or situated adjacent to the house, often on the right or left side are commonly colored gray or forest green and are roughly the size of a standard backpack.   When the gas meter is positioned close to the house, the line in the yard supplying the meter falls under the gas company’s jurisdiction. However, if the gas meter is situated at a distance from the house, such as in the alley, then the gas line running through the yard to the house becomes the homeowner’s responsibility.   In yards of older homes constructed before the mid-to-late1970s, it is common to find lines buried underground unless they have been updated. These pipes are customized to the required length and threaded using specific tools. The underground line in the yard typically includes 90-degree fittings at both ends to direct the pipeline vertically. One end connects to the meter, while the other end emerges above ground and enters the building. In many cases, there is a shut-off valve where the line enters the structure.   Regrettably, the deterioration of these steel yard lines is not a question of possibility but inevitability. Despite not carrying water but gas instead, the moisture in the soil will eventually corrode the lines, leading to leaks. A leaking gas line underground may manifest with a patch of dead grass above the leak, a noticeable sulfur odor in the surrounding area, and an increase in the gas bill. Typically, in cases of such failures, the entire line is replaced rather than attempting to repair a specific section.   Polyethylene Yard Line In the mid-to-late 1970s, a new type of gas line, known as polyethylene, began to emerge in this region. One of the key benefits of these lines is their resistance to rust and corrosion, thanks to their durable plastic composition. The underground section of the line will consist of a single, unbroken length of polyethylene piping, with connections only at the beginning and end. At each termination point, the polyethylene line will be joined to an anodeless riser, a steel sleeve shaped like an “L” that facilitates a smooth transition from the underground plastic line to above-ground steel piping.   Polyethylene pipe is not as structurally strong as steel pipe, making it susceptible to damage if struck during excavation or if a stake is forced into the ground. Apart from these instances, there are typically no other significant issues that may arise with the gas line itself.   Typically, gas leaks on these lines are discovered at the points where the underground pipes connect to the risers or on the exposed steel pipes above ground. The most common culprits behind these leaks are shifting soil and subpar installation practices. When a leak occurs, it often manifests as a strong gas odor in the surrounding area and an unexpected spike in gas consumption.   Black Iron Piping in the Home In residential settings, black iron piping is commonly used for distributing gas to various appliances such as fireplaces, dryers, ranges, furnaces, and water heaters. Older homes in the North DFW region typically utilize black iron or steel pipes for this purpose, with each pipe section being cut to size and threaded during construction. The assembly of the pipes and fittings is done by hand.   System Design Designing the system involves starting with a larger pipe size at the point of entry into the house, which can vary in size depending on the system. As smaller pipes branch off from the main, they progressively decrease in size until they reach the appliances, usually at a smaller size. The mainline typically runs through the attic, while the smaller lines drop down behind the appliances and connect to them. Each appliance should have a shut-off valve, commonly identifiable by its red, yellow, or older gray handle.   Common Problems Although this steel pipe is remarkably resilient, its vulnerability lies in the threaded connections. As the pipe undergoes thermal expansion and contraction in the attic, the fittings can develop leaks, particularly if the installation is not done with meticulous attention to detail. A distinctive indication of a leak is the pungent odor of sulfur, which is a characteristic of the gas. If you suspect a gas leak within your home, please refer to our service page for guidance and further assistance.   CSST GAS Systems Residential construction, spanning the past decade been equipped with CSST gas systems. CSST, or Corrugated Stainless Steel Tubing, is a type of flexible piping that offers a lightweight and straightforward installation process. While the material itself may be pricier than traditional black iron, the reduced labor costs associated with its ease of installation often offset this expense, making it a preferred choice among builders.

Scroll to Top
Chrome Logo Web Transparent

Scheduled an Appointment