Uncategorized

Uncategorized

Why You Should Never Ignore a Small Leak

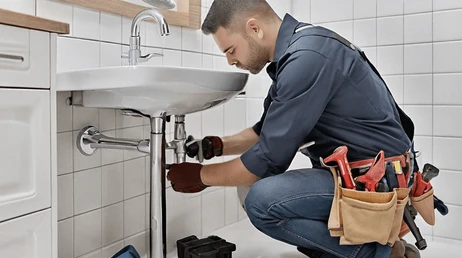
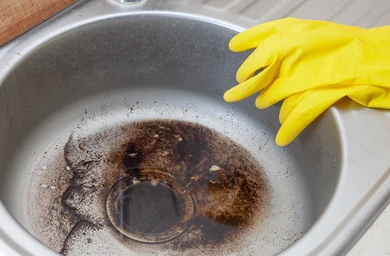
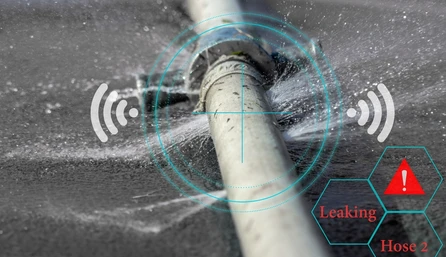
When it comes to home maintenance, one of the most common issues many homeowners encounter is a small leak. Whether it’s a drip from a faucet, a tiny trickle under the sink, or a barely noticeable damp spot on the wall, it might seem harmless at first glance. However, even the smallest leaks can lead to significant problems if left unattended. Understanding the importance of addressing these leaks early can save you from more extensive damage, costly repairs, and unnecessary stress. The True Cost of a Small Leak At first, a small leak might not seem like a big deal. It might only appear as a minor inconvenience, with a few drops of water here and there. However, these small leaks can add up over time. According to the U.S. Environmental Protection Agency (EPA), a single household leak can waste more than 10,000 gallons of water annually, enough to fill a swimming pool. This water waste increases your utility bills and contributes to the global water crisis. Moreover, the financial impact isn’t limited to just your water bill. A small leak can slowly worsen over time, causing structural damage to your home. Water can seep into floors, walls, and foundations, leading to mold growth, wood rot, and damage to electrical systems. The longer you wait to fix the leak, the more expensive the repairs become. Damage to Your Home’s Structure One of the most significant dangers of ignoring a small leak is the damage it can cause to your home’s structure. Water might seem harmless, but it can be incredibly destructive over time. Constant exposure to moisture can lead to the rotting of wooden structures such as floor joists, beams, and studs. It can also weaken drywall and insulation, causing it to become soggy and lose effectiveness. Over time, this can result in sagging ceilings, warped floors, and even compromised foundations. For instance, if you have a small leak in your attic or roof, it could slowly drip down into the walls, leading to water stains, peeling paint, and mold growth. If left unchecked, this could require major renovations, including replacing drywall, repainting, and treating mold infestations. By addressing small leaks early, you can avoid these costly and invasive repairs. Mold and Mildew: Hidden Health Hazards One of the silent but dangerous consequences of a small leak is the growth of mold and mildew. Mold thrives in damp, dark environments, which makes your walls, floors, and ceilings the perfect breeding ground. Once mold begins to grow, it can spread rapidly throughout your home, affecting air quality and potentially causing health problems for your family. Mold exposure has been linked to various health issues, including respiratory problems, allergic reactions, and skin irritation. Those with asthma or weakened immune systems are particularly susceptible to the adverse effects of mold. In extreme cases, prolonged mold exposure can lead to more severe health complications, such as lung infections. In addition to the health risks, mold is notoriously difficult and expensive to remove. Professional mold remediation services are often required, and extensive portions of your home’s structure may need to be replaced. By addressing small leaks as soon as they appear, you can prevent mold growth and ensure your home remains a safe, healthy environment for your family. Wasting Water and Money Another reason you should never ignore a small leak is the waste of water—and by extension, your hard-earned money. A tiny drip from a faucet might seem insignificant, but over time, it can lead to a surprising amount of wasted water. For example, a faucet that drips once per second can waste over 3,000 gallons of water per year. That’s money going down the drain! If you live in an area prone to water shortages or droughts, like Plano, TX, conserving water is even more critical. Local governments often impose restrictions on water usage during dry spells, and wasting water due to a small leak could lead to fines or penalties. Addressing leaks promptly is a simple way to save water, reduce your utility bills, and contribute to the responsible use of a precious resource. Electrical Hazards: A Hidden Danger Water and electricity are a dangerous combination, and a small leak can easily lead to significant electrical hazards in your home. Water from a leak can find its way into electrical wiring, outlets, or appliances, increasing the risk of short circuits, electrical fires, or electrocution. If a leak occurs near electrical systems, the risk of fire increases dramatically. For instance, a leak near a ceiling light fixture can cause water to drip onto live wires, sparking a fire. Additionally, water can damage appliances, rendering them unsafe to use and requiring costly replacements. To avoid these risks, it’s essential to repair leaks near electrical systems as soon as possible. It’s also a good idea to have a professional assess the extent of the damage to ensure your home is safe from electrical hazards. Protecting the Environment Beyond the immediate financial and health implications, fixing small leaks plays a significant role in environmental conservation. Water is a finite resource, and in many parts of the world, it’s becoming increasingly scarce. By addressing leaks in your home, you can do your part to reduce water waste and lessen the environmental impact. Moreover, water treatment and delivery require energy. The more water wasted through leaks, the more energy is required to treat and pump that water, contributing to greenhouse gas emissions. Fixing leaks is a small but meaningful way to reduce your household’s carbon footprint and support sustainable living. The Importance of Professional Help While some homeowners may be tempted to fix small leaks on their own, it’s often better to seek professional help. DIY repairs can be risky, especially if you don’t have the necessary experience or tools. A quick fix might seem effective in the short term, but it could lead to bigger problems down the road if not done correctly. A licensed plumber can accurately assess the cause of the leak and make

Uncategorized

Top 5 Tips for Preventing Frozen Pipes This Winter

As the temperatures start to drop and winter approaches, homeowners often face the risk of frozen pipes, which can lead to costly repairs and significant damage. Pipes are particularly vulnerable during cold weather, especially in areas where the winters are relatively mild but freezing spells still occur. For homeowners in Plano, TX, it’s important to take preventive steps before winter hits full force. This guide provides five essential tips to keep your pipes safe and prevent them from freezing during the colder months. 1. Insulate Your Pipes Properly One of the most effective ways to prevent frozen pipes is by insulating them. Exposed pipes in areas like basements, attics, garages, and crawl spaces are particularly at risk of freezing. By adding insulation to these pipes, you create a protective barrier between them and the cold air, helping to maintain a warmer temperature inside the pipes. Pipe insulation can come in various forms, including foam rubber or fiberglass sleeves. These materials are affordable and can be found at most hardware stores. When insulating, pay close attention to any joints, corners, and bends in the pipes. These areas are often more vulnerable to cold temperatures. Additionally, wrapping hot water pipes, as well as cold water pipes, helps ensure that even the warmest pipes maintain a consistent temperature, reducing the risk of freezing during especially cold nights. Bonus Tip: If you’re unsure which pipes need insulation or if you’re concerned about hard-to-reach areas, a professional inspection from a plumbing expert can provide a thorough assessment and help you avoid potential issues. 2. Keep a Consistent Thermostat Setting When temperatures drop, it’s essential to maintain a consistent thermostat setting, both day and night. Many homeowners lower their thermostat at night to save energy, but this can increase the risk of frozen pipes if the house cools down too much. A general rule of thumb is to keep the thermostat set to at least 55°F, even if you’re going away for an extended period. This ensures that your home’s internal temperature stays high enough to prevent any freezing inside your pipes. Modern thermostats often have energy-saving features that can keep your heating system efficient without sacrificing warmth. If you haven’t upgraded your thermostat yet, consider a programmable or smart thermostat to help regulate temperatures more efficiently throughout the day. Bonus Tip: If you plan to be away from home for several days during the winter, it’s a good idea to ask a friend or neighbor to check on your house and make sure the heating system is running correctly. 3. Let Faucets Drip During Freezing Weather Allowing your faucets to drip slightly during freezing weather can help prevent pipes from freezing. Moving water is less likely to freeze than still water, so even a small drip keeps water flowing through the pipes, reducing the chances of ice formation. This is especially helpful for pipes located along exterior walls or those exposed to colder parts of the house. When a faucet is left to drip, it helps relieve the pressure inside your plumbing system, which is often what causes pipes to burst when they freeze. However, this technique is best used in conjunction with other preventive measures like insulation and maintaining a warm home temperature. Bonus Tip: You don’t need to leave all faucets dripping. Focus on faucets connected to exposed pipes or areas that are more likely to freeze, like the kitchen or bathroom. 4. Seal Cracks and Gaps Around Pipes Cracks and gaps in walls, windows, or doors can allow cold air to seep into your home and come into contact with your pipes. Sealing these gaps will not only help you prevent frozen pipes, but it will also improve your home’s overall energy efficiency. Use caulk or insulation foam to seal any cracks around windows, doors, or areas where pipes enter your home. Pay particular attention to areas around utility pipes, which may have gaps that let cold air in. Additionally, check for drafts near areas like attics, basements, and crawl spaces where pipes are often exposed to colder temperatures. Sealing these areas prevents cold air from getting into your home and ensures that your pipes stay at a more consistent temperature. Bonus Tip: Don’t forget to check outdoor areas like garden hoses, sprinklers, or exterior faucets. Disconnect hoses and cover outdoor faucets with insulated covers to protect them from freezing temperatures. 5. Drain and Shut Off Outdoor Water Sources Your outdoor water supply is more vulnerable to freezing, so taking steps to drain and shut off outdoor faucets and sprinklers is crucial before winter arrives. Start by draining water from hoses, sprinkler systems, and any outdoor faucets. Once drained, disconnect and store hoses inside to prevent damage. For homes with sprinkler systems, make sure to follow the manufacturer’s instructions for winterizing the system. This often involves draining the water from the system and shutting off the water supply to avoid any remaining water from freezing in the lines. Similarly, shut off the water supply to any outdoor faucets that aren’t in use during the winter, especially those connected to exterior walls. Bonus Tip: If your home has a pool or any other outdoor water features, take the necessary steps to winterize them as well. Even a small amount of standing water in pipes connected to these features can freeze and cause damage. Preventing frozen pipes should be a priority for homeowners in Plano, TX, especially during unpredictable winter weather. Taking these simple preventive measures can save you from the stress and expense of dealing with burst pipes and water damage. Insulating your pipes, maintaining a consistent indoor temperature, letting faucets drip, sealing gaps, and winterizing outdoor water sources are all essential steps in keeping your home’s plumbing safe throughout the winter. For professional help with your plumbing or HVAC needs, the team at Chrome Heating Air Conditioning is here to assist you. Whether you need advice on winterizing your home or require emergency repairs, we provide expert service to ensure your

Emergency Plumbing
Uncategorized

How to Choose the Right Plumber for Your Repairs

When it comes to home repairs, plumbing issues can be some of the most challenging and stressful problems to deal with. A leaky faucet, clogged drain, or burst pipe can quickly disrupt your daily routine and, if not addressed promptly, lead to more severe damage. Whether you’re facing a minor repair or a major plumbing overhaul, finding the right plumber is essential to ensure the job is done correctly. Here’s a guide to help you choose the best plumber for your repairs and avoid costly mistakes. 1. Check for Proper Licensing and Certification The first step in choosing the right plumber is to verify their credentials. A professional plumber should be fully licensed and certified to perform plumbing work in your area. This ensures that they have undergone the necessary training and are familiar with local plumbing codes and regulations. When contacting potential plumbers, always ask for their licensing information and verify it through your local regulatory body. In addition to a general plumbing license, some plumbers may hold additional certifications in specific areas, such as backflow prevention or gas fitting. These qualifications can be valuable if your plumbing needs require specialized knowledge. 2. Look for Experience and Expertise Experience matters in the plumbing industry. While newly licensed plumbers can be skilled, an experienced plumber brings years of hands-on knowledge to the table. This expertise can make a significant difference, especially when dealing with complex plumbing systems or unexpected complications. A plumber with a long track record of successful repairs and installations is more likely to provide reliable service. When researching plumbers, look for those who have experience handling repairs similar to yours. Whether you need help with a simple fixture replacement, a drain cleaning, or a water heater installation, a plumber who has tackled these tasks many times before will be more efficient and effective. 3. Read Reviews and Ask for Recommendations One of the most reliable ways to find a trustworthy plumber is by reading online reviews and asking for recommendations from friends, family, or neighbors. Many homeowners have dealt with plumbing issues at some point, and they can offer valuable insights into which plumbers in your area provide excellent service. Online platforms such as Google, Yelp, and Angie’s List are excellent resources for reading customer reviews. Pay attention to feedback about the plumber’s punctuality, professionalism, pricing, and quality of work. While a few negative reviews are inevitable, consistently poor feedback should be a red flag. 4. Ask About Insurance and Warranties Plumbing work can sometimes involve risks, including property damage or personal injury. For your protection, it’s crucial to choose a plumber who carries both liability insurance and workers’ compensation. Liability insurance covers any damage that may occur during the repair, while workers’ compensation protects you from being held liable if the plumber is injured while working on your property. Additionally, inquire about warranties on both labor and parts. A reputable plumber should offer a guarantee on their workmanship and use high-quality parts that come with manufacturer warranties. This gives you peace of mind knowing that if something goes wrong after the repair, you’re covered. 5. Evaluate Their Communication Skills Good communication is a hallmark of a professional plumber. From the initial phone call or consultation, the plumber should be clear, courteous, and transparent about what they can offer. They should take the time to explain the problem, outline possible solutions, and provide an accurate estimate for the work. Avoid plumbers who are vague or evasive when discussing the details of your repair. You want someone who is honest and upfront about the cost, timeline, and any potential challenges they foresee. A plumber who communicates well will also keep you informed throughout the repair process, ensuring there are no surprises. 6. Compare Multiple Quotes It’s a good idea to get quotes from at least three different plumbers before making a decision. This allows you to compare pricing, services, and availability. Be cautious of unusually low estimates, as they may indicate a plumber who cuts corners or uses subpar materials. When reviewing quotes, make sure they are detailed and itemized. The estimate should include the cost of labor, materials, any additional fees (such as for emergency services or after-hours work), and an estimated completion time. Don’t hesitate to ask the plumber to explain any part of the quote that seems unclear or inflated. 7. Consider Availability and Response Time Plumbing emergencies can happen at any time, and when they do, you need a plumber who can respond quickly. Before hiring a plumber, ask about their availability for emergency services. Some plumbers offer 24/7 emergency repairs, which can be a lifesaver if you’re dealing with a burst pipe or severe water damage. Even for non-emergency repairs, you want a plumber who can fit you into their schedule promptly. Long wait times can allow a minor issue to escalate into a more serious (and expensive) problem. 8. Check Their Tools and Technology The right plumber should have access to modern tools and technology to efficiently diagnose and repair your plumbing issues. Plumbing has evolved over the years, and cutting-edge equipment like video inspection cameras, hydro-jetting machines, and electronic leak detection devices can help plumbers address problems more accurately and with minimal disruption to your home. During your consultation, ask the plumber what tools and techniques they use for common repairs. Plumbers who stay up to date with the latest advancements in the industry are more likely to provide efficient and high-quality service. 9. Ask About Payment Plans and Financing Options Plumbing repairs, especially large ones like water heater replacements or pipe rerouting, can be expensive. If you’re concerned about the cost, ask the plumber about their payment options. Many plumbing companies offer flexible payment plans or financing options to help homeowners manage the financial burden of unexpected repairs. A plumber who is willing to work with you on payment options demonstrates that they prioritize customer satisfaction and understand the financial strain that major repairs can cause. 10. Verify Their

Uncategorized

Why DIY Drain Cleaning Could Be a Big Mistake

Drain clogs are a common household issue that most homeowners have dealt with at one time or another. Whether it’s a slow drain in the bathroom or a full blockage in the kitchen sink, the temptation to tackle the problem yourself is understandable. After all, a quick trip to the local hardware store for some tools or chemicals seems much easier and less expensive than calling in a professional plumber. However, DIY drain cleaning can often lead to bigger problems, making what seemed like a simple task a costly and stressful ordeal. In this article, we’ll explore the reasons why attempting to clean your drains on your own could be a big mistake and why leaving it to the professionals is often the best course of action. 1. Risk of Pipe Damage One of the most significant risks of DIY drain cleaning is damaging your pipes. Commercial drain cleaners, which are often the first go-to for homeowners, contain harsh chemicals designed to dissolve clogs quickly. While these products might provide temporary relief, they can severely damage your pipes over time. Chemical drain cleaners generate heat as they break down the clog, and this heat can weaken or melt certain types of pipes, especially older PVC or plastic ones. Additionally, if the clog is not fully dissolved, these chemicals can sit in your pipes, corroding the walls and potentially leading to leaks or pipe bursts down the line. In some cases, using a snake or other mechanical tools improperly can also cause physical damage to the pipes, resulting in costly repairs. 2. Temporary Fixes Don’t Solve the Underlying Problem Many DIY solutions for drain cleaning provide only a temporary fix. You may manage to clear out some debris, but the root cause of the clog could remain. Drains can become clogged for a variety of reasons, from grease build-up to tree root intrusion or a misalignment of the pipes. Without proper diagnostic tools, it’s challenging to identify what’s causing the blockage. A professional plumber has access to specialized tools, such as video inspection cameras, that can assess the condition of your pipes and locate the true source of the problem. By identifying the underlying issue, they can provide a long-lasting solution that prevents future clogs from occurring. 3. DIY Cleaning Can Lead to Bigger Problems It’s not uncommon for homeowners to try and tackle drain cleaning on their own, only to make the situation worse. For example, forcing a drain snake into the pipes or using a plunger incorrectly can compact the clog further or even push it deeper into the plumbing system, making it more difficult to remove. In some cases, DIY attempts can lead to a complete blockage, requiring more intensive work to resolve. Additionally, without the right experience or tools, you might miss warning signs that indicate a more significant issue, such as sewer line blockages or damage. Addressing the problem early on can save you from more expensive repairs in the future, like needing to replace large sections of your plumbing system. 4. Health and Safety Risks Using chemicals to clean drains poses significant health risks. Most commercial drain cleaners contain caustic substances like lye or sulfuric acid, which can cause chemical burns, respiratory issues, and other health problems if they come into contact with your skin or if the fumes are inhaled. Moreover, if multiple chemical drain cleaners are mixed, they can produce dangerous gases that can be harmful in enclosed spaces like bathrooms or kitchens. Additionally, DIY drain cleaning often involves removing debris by hand. If you’re dealing with water that’s been sitting in the pipes for a while, it could contain harmful bacteria or contaminants. A professional plumber will have the proper protective equipment and knowledge to handle these hazards safely. 5. Hidden Costs of DIY Drain Cleaning While attempting to clean a drain yourself may seem like a cost-effective solution, it often leads to hidden expenses. For example, if a chemical cleaner damages your pipes or a tool breaks during the cleaning process, you may end up paying for expensive repairs or replacements. Additionally, repeated purchases of drain cleaners or DIY tools can add up over time. Hiring a professional plumber might seem like a bigger upfront cost, but it can save you money in the long run. A professional will be able to resolve the problem efficiently and provide a long-lasting solution that reduces the need for frequent maintenance or repair. 6. Lack of Professional Expertise One of the most significant downsides of DIY drain cleaning is the lack of professional expertise. While there are plenty of online tutorials and tips available, they can’t match the years of experience and knowledge that a trained plumber brings to the table. Professionals understand the complexities of plumbing systems and can identify issues that are not immediately visible. For example, what seems like a simple clog might actually be a sign of a more severe problem, such as a collapsed pipe or tree root intrusion. A plumber will have the tools and expertise to fix these issues quickly and efficiently, preventing future problems from arising. 7. Environmental Impact Another reason to reconsider DIY drain cleaning is its potential environmental impact. Many chemical drain cleaners contain toxic ingredients that can harm the environment when washed down the drain. These chemicals can contaminate water supplies, damage local ecosystems, and pose a risk to wildlife. Additionally, improper disposal of DIY drain cleaning tools or chemicals can contribute to environmental pollution. Professional plumbers often use environmentally friendly methods to clean drains, such as hydro jetting, which uses high-pressure water to clear blockages without the need for harsh chemicals. By choosing professional services, you’re not only protecting your home but also doing your part to reduce your environmental footprint. When to Call a Professional While minor clogs caused by hair or small debris may be manageable with basic tools, it’s essential to recognize when a problem is beyond your expertise. If you notice frequent clogs, foul odors, gurgling sounds,

Uncategorized

How to Detect Water Leaks Before They Cause Damage

Water leaks, if left undetected, can lead to costly repairs and severe damage to your home. The good news is that with the right knowledge and preventive measures, you can detect water leaks before they cause extensive harm. Whether it’s a small drip or a hidden leak inside your walls, catching these issues early can save you time, money, and headaches. In this article, we’ll explore several key ways to detect water leaks and prevent them from causing damage. 1. Monitor Your Water Bill One of the first signs of a hidden water leak is an unexpected increase in your water bill. If your water usage hasn’t changed but your bill continues to rise, it’s time to investigate. A higher water bill without any significant changes in usage patterns may indicate that water is escaping somewhere in your home. Take note of your water bill over several months and compare it to previous periods. Even if the leak is small, over time, it can add up to a noticeable increase in your water consumption, triggering higher costs. If you notice a spike, consider consulting a professional to inspect your plumbing system. 2. Check for Visible Signs of Leaks Some leaks are easy to spot, especially when water begins to pool or stain surfaces. Be sure to regularly inspect the following areas for visible signs of water damage: Under sinks: Look for water stains, pooling, or dampness around pipes. Bathrooms and kitchens: Check around toilets, faucets, and showers for drips or puddles. Ceilings and walls: Stains or discoloration on your ceiling or walls can indicate a leak from a pipe hidden inside the structure. Water heaters and washing machines: Check these appliances for moisture or rust around the connections and hoses. These visible signs can help you detect leaks early before they become more serious. 3. Test Your Water Meter A water meter test is one of the most effective ways to determine if your home has a hidden leak. Here’s how you can perform the test: Step 1: Turn off all water-using appliances and fixtures in your home, ensuring that no water is being used. Step 2: Locate your water meter and take note of the reading. Step 3: Wait at least one hour without using any water, then check the meter again. If the meter reading has changed during this time, it’s a sign that you may have a leak. A slow leak may take longer to show up, so you can repeat the test over a longer period to ensure accuracy. 4. Listen for Sounds of Running Water One of the easiest ways to detect leaks is simply by listening. You might hear the sound of running water when no faucets or appliances are in use. This could indicate a leak, especially if it’s happening behind walls, under floors, or within your plumbing system. If you suspect a leak but can’t locate the source, professional leak detection services use specialized listening devices to pinpoint the exact location. 5. Inspect Your Water Pressure A sudden drop in water pressure can signal a potential leak. If you notice that your water pressure has decreased, especially in a specific part of your home, there could be a leak in the plumbing. Low water pressure is often caused by water escaping from pipes, which reduces the amount of water that reaches your faucets and fixtures. To check your water pressure, use a pressure gauge. If the pressure is lower than the normal range (typically between 40-60 psi), a leak may be the cause. Investigate further by checking for other signs of water damage or contact a professional to perform a thorough inspection. 6. Monitor Moisture and Humidity Levels Moisture and humidity can be key indicators of water leaks in areas where water lines run, such as basements, crawl spaces, and utility rooms. Use a moisture meter or a humidity sensor to monitor these areas for elevated moisture levels. If you notice a higher-than-normal reading, it could be a sign of a hidden leak. Additionally, excessive moisture can lead to mold and mildew growth, which thrives in damp environments. 7. Check for Mold and Mildew Mold and mildew thrive in damp, humid areas, making them common indicators of water leaks. Even a small leak can create the perfect conditions for mold to grow, especially in areas like basements, attics, and behind walls. Pay attention to any musty odors in your home, as they can signal the presence of mold. Visible mold growth, discoloration on walls or ceilings, or black, green, or brown spots can all point to a leak. If you spot mold, it’s important to address both the mold issue and the underlying water leak to prevent further damage and health risks. 8. Inspect Your Lawn and Exterior Water leaks don’t only happen inside your home. Outdoor leaks can also cause significant damage, particularly if they go unnoticed. Check your lawn and exterior areas for signs such as: Wet patches or soggy ground when there hasn’t been any rain. Water pooling around outdoor faucets, spigots, or irrigation systems. Unusual growth patterns in your lawn, such as patches of grass that are greener or grow faster than other areas. An underground water line may have broken or developed a leak, which can lead to damage not only to your home’s foundation but also to your landscaping. 9. Use Leak Detection Technology Advancements in technology have made it easier than ever to detect leaks early. Smart water leak detectors are available and can alert you to leaks in real-time. These devices can be installed near vulnerable areas such as under sinks, around water heaters, or near washing machines. Many of these detectors can be connected to your smartphone, allowing you to receive alerts when a leak is detected. Some detectors also monitor water flow and shut off the water supply automatically if an unusual amount of water is detected, preventing further damage. Investing in leak detection technology can provide peace of mind and

Uncategorized

What to Do When You Have No Hot Water

There’s nothing quite as frustrating as turning on the tap only to discover there’s no hot water. Whether it’s an icy cold shower or a sink full of cold dishwater, the inconvenience of no hot water is a problem no one wants to face. Fortunately, many common causes can be identified and resolved without a professional. Here’s a detailed guide on what to do when you find yourself with no hot water. 1. Check the Water Heater The most obvious place to start is with your water heater. There are a few reasons your water heater may not be working properly, depending on whether you have a gas or electric unit. Gas Water Heater If you have a gas water heater, ensure that the pilot light is on. If the pilot light has gone out, this will stop the water from being heated. Here’s how to relight the pilot light: Turn off the gas valve to the water heater and wait for any remaining gas to dissipate. Locate the pilot light assembly and the reset switch. Turn the gas valve to “pilot,” press down the reset button, and use a long lighter to relight the pilot light. Once lit, hold the reset button for a few seconds to ensure the pilot light stays on. If the pilot light won’t stay lit or you smell gas, stop and contact a professional immediately. Electric Water Heater For electric water heaters, the problem could be related to the power supply. Check the circuit breaker for the water heater and ensure it hasn’t tripped. If it has, reset it. If the breaker continues to trip, or there’s no obvious issue with the electrical supply, you may have a faulty thermostat or heating element, which will require professional repair. 2. Examine the Thermostat Settings Water heaters come with a thermostat that controls the water temperature. Over time, this thermostat can be accidentally adjusted or malfunction. The standard water heater temperature should be set between 120°F and 140°F. If it’s set too low, the water may not be getting hot enough. If the thermostat is faulty, it won’t heat the water to the proper temperature. To check, locate the thermostat on your water heater. Adjust it to a higher setting if necessary, and wait to see if the water heats up. If not, it may be time to call a technician to replace the thermostat or assess any further issues. 3. Inspect for Leaks A leaking water heater can cause a major drop in available hot water. Check the surrounding area of your water heater for puddles or water stains. Even a small leak can result in a lack of hot water and potential damage to your home. If you detect a leak, turn off the power supply to the water heater and shut off the water valve. For minor leaks, it’s essential to call a professional to assess the situation and repair any damages. In more severe cases, you may need to replace the water heater entirely, especially if it’s an older unit. 4. Flush the Water Heater Sediment buildup inside the water heater tank is a common issue that can reduce efficiency and cause hot water shortages. Minerals and debris settle at the bottom of the tank, obstructing the heating elements and decreasing the overall heating capacity of the unit. To flush your water heater: Turn off the power or gas supply to the water heater. Attach a garden hose to the drain valve and direct the hose outside or into a drain. Open the drain valve and allow the tank to empty completely. Once drained, close the valve, remove the hose, and refill the tank by turning on the water supply. This process will help eliminate sediment buildup and allow your water heater to work more efficiently, ensuring you have hot water when you need it. 5. Investigate the Water Supply Sometimes the issue isn’t with your water heater but with the water supply itself. If there’s no hot water throughout your home, but the water heater seems to be functioning correctly, the problem may lie in the plumbing. Check to see if all hot water faucets in the home are affected. If only one faucet is impacted, there may be a localized issue, such as a clog or faulty valve. However, if all faucets are affected, you may have a problem with the pipes that carry hot water from the heater to your home. In colder climates, pipes can freeze during winter, cutting off the hot water supply. If you suspect frozen pipes, locate the affected section and gradually thaw it using a hairdryer or heat lamp. Never use an open flame to thaw pipes as it can damage the pipes or cause a fire. 6. Inspect the Water Heater Capacity If you’ve recently noticed a lack of hot water, consider whether your household’s water usage has increased. The water heater may not be able to keep up with the demand if multiple appliances or showers are in use simultaneously. A water heater that’s too small for your home can result in hot water running out quickly. For larger households, consider upgrading to a water heater with a larger tank or a tankless water heater, which provides hot water on demand. 7. When to Call a Professional While some hot water issues can be fixed with basic troubleshooting, others may require the expertise of a professional. If you’ve tried the above solutions and still have no hot water, or if you’re uncomfortable performing the steps yourself, it’s best to call a trusted HVAC and plumbing specialist. A professional technician can accurately diagnose the problem, whether it’s a malfunctioning heating element, a leaking tank, or an issue with the gas or electrical connections. Additionally, if your water heater is old or requires frequent repairs, replacing the unit entirely may be the most cost-effective long-term solution. Preventing Future Hot Water Issues To avoid being left without hot water in the future, consider these

Uncategorized

How to Install a New Faucet in Just 10 Minutes

Installing a new faucet may seem like a time-consuming task, but with the right tools and a clear step-by-step guide, you can complete it in just 10 minutes. Whether you’re upgrading your kitchen or bathroom faucet for a modern look or simply replacing a worn-out one, this guide will walk you through the process in a straightforward manner. No need to be a seasoned plumber to get it done—just follow along, and you’ll have a new faucet installed in no time! Tools and Materials You’ll Need Before starting, make sure you have the following tools and materials ready. Preparing everything in advance will help you stick to that 10-minute timeframe: New faucet Basin wrench Adjustable wrench Plumber’s tape Silicone sealant (optional) Bucket or towel (to catch any water) Cleaning cloth Now that your tools are ready, let’s dive into the step-by-step installation process. Step 1: Turn Off the Water Supply The first and most important step is to turn off the water supply to the sink. Locate the shutoff valves beneath the sink and turn them clockwise to stop the water flow. If your sink doesn’t have shutoff valves, you may need to turn off the main water supply to your home. After turning off the water, open the faucet to drain any remaining water in the lines. This will prevent any mess during installation. Keep a bucket or towel handy to catch any water that might drip out during the process. Step 2: Remove the Old Faucet With the water turned off, you’re ready to remove the old faucet. Use your basin wrench to loosen the nuts securing the faucet to the sink from underneath the countertop. Depending on the model of your old faucet, there might be one or two nuts to unscrew. After removing the nuts, gently pull the old faucet out from the top of the sink. Be sure to also disconnect the water supply lines by unscrewing them with your adjustable wrench. Once the old faucet is removed, take a moment to clean the sink area, removing any old sealant or debris. Step 3: Install the New Faucet Now it’s time to install the new faucet. Most modern faucets come with straightforward installation instructions, but the general steps are similar across different models. Start by inserting the faucet through the pre-drilled holes in your sink. Make sure the faucet is aligned properly. From underneath the sink, secure the faucet using the provided nuts. Hand-tighten them first, then use your basin wrench to tighten them a bit more, ensuring a snug fit without over-tightening. Over-tightening could damage the sink or faucet. Step 4: Connect the Water Supply Lines Next, connect the water supply lines to the faucet. If your new faucet didn’t come with water supply lines, you might need to reuse the old ones or purchase new ones. Attach the lines to the hot and cold water valves under the sink, making sure they are properly tightened with your adjustable wrench. For added security and to prevent leaks, wrap the threads with plumber’s tape before attaching the water supply lines. This step can help create a watertight seal. Step 5: Test the Faucet With everything connected, turn the shutoff valves back on by rotating them counterclockwise. Slowly open the faucet to check for leaks. Let the water run for a minute to make sure there’s a steady flow of both hot and cold water. Inspect the connections underneath the sink to ensure there are no drips or leaks. If you spot any leaks, use your wrench to tighten the connections a little more. If everything looks good, congratulations—you’ve successfully installed a new faucet in just 10 minutes! Additional Tips for a Smooth Installation 1. Use Silicone Sealant for Extra Stability Some faucets may require or benefit from a small bead of silicone sealant around the base to prevent water from seeping under the fixture. This is especially useful if your sink is uneven or has gaps around the faucet holes. Apply the sealant sparingly and wipe away any excess to maintain a clean appearance. 2. Choose the Right Faucet for Your Sink Before purchasing a new faucet, ensure it matches the configuration of your sink. Most sinks have either one, two, or three holes for faucet installation. If your new faucet has a different hole configuration, you may need an adapter plate or a different faucet model. 3. Check Water Pressure and Flow Rate After installation, if you notice that the water pressure or flow rate is lower than expected, check the aerator at the faucet spout. Sometimes, debris from the plumbing lines can get stuck in the aerator during installation. Simply unscrew the aerator, clean it out, and reattach it. 4. Regular Maintenance Extends Faucet Life Installing a new faucet is a quick task, but keeping it in great condition requires regular maintenance. Clean the faucet with a gentle cleaner and soft cloth to prevent buildup. Regularly check for leaks, and address them promptly to prevent water damage. Conclusion Installing a new faucet doesn’t have to be a daunting task. With the steps outlined above, you can have a fully functional and stylish faucet in place within just 10 minutes. Whether you’re upgrading your bathroom or kitchen, this simple project can make a big impact on the look and functionality of your home. For professional assistance or more complex plumbing needs, consider reaching out to Chrome Heating Air Conditioning for expert service in the Plano, TX area. With their trusted team of professionals, you can ensure that every faucet installation or plumbing task is handled with precision and care. Now, with your newly installed faucet, you can enjoy improved water flow and an upgraded aesthetic in your home! FAQ Is it really possible to install a new faucet in just 10 minutes? Yes, with the right tools and preparation, installing a new faucet can take as little as 10 minutes, especially if it’s a simple replacement and the plumbing is in good condition.

Uncategorized

Why Hard Water Is Ruining Your Plumbing System

If you’ve noticed strange issues in your plumbing system, like clogged pipes, low water pressure, or white chalky deposits on your faucets, you might be dealing with hard water. Hard water refers to water that has a high mineral content, particularly calcium and magnesium. While these minerals may seem harmless, over time, they can wreak havoc on your plumbing system and appliances. Let’s explore why hard water can be such a detrimental factor in the health of your pipes, fixtures, and water-using appliances. What Is Hard Water? Hard water is water that contains a significant amount of dissolved minerals, particularly calcium and magnesium. These minerals are naturally present in water as it flows through soil and rock. The higher the concentration of these minerals, the “harder” the water becomes. Though not dangerous to human health, hard water can cause numerous problems within your home, particularly when it comes to plumbing systems. How Hard Water Affects Your Plumbing System The effects of hard water on your plumbing system can manifest in several ways: 1. Mineral Buildup Inside Pipes The most significant issue caused by hard water is the buildup of mineral deposits inside your pipes. These deposits are known as limescale and can gradually accumulate along the inner walls of your plumbing. Over time, this buildup reduces the effective diameter of the pipes, making it harder for water to flow through. When the flow of water is restricted, several problems arise, such as reduced water pressure and slower drainage. In severe cases, the buildup can completely block a pipe, leading to significant plumbing issues that require professional intervention. 2. Corrosion of Pipes The minerals in hard water can also contribute to corrosion. While corrosion tends to be a bigger problem in metal pipes, even modern materials like PVC can experience issues when exposed to mineral-heavy water for prolonged periods. Corrosion weakens the structure of pipes, increasing the likelihood of leaks, which can lead to water damage in your home. Corroded pipes may also leach harmful substances into your drinking water, posing a potential health risk to your family. The combination of corrosion and mineral buildup can significantly reduce the lifespan of your plumbing system. 3. Reduced Efficiency of Water Heaters Hard water can also take a toll on water heaters. As water is heated, the dissolved minerals in hard water tend to precipitate out and form solid deposits at the bottom of the water heater tank. This sediment buildup can insulate the heating elements from the water, forcing the system to work harder to maintain the desired temperature. When a water heater has to work harder, it uses more energy, resulting in higher utility bills. In addition, the lifespan of the water heater can be significantly reduced as the heating elements are exposed to excessive wear and tear. 4. Damage to Fixtures and Appliances Hard water doesn’t only affect your pipes; it also impacts your fixtures and appliances. Those unsightly white, chalky stains you see on faucets and showerheads are the visible effects of hard water. These stains are caused by the minerals left behind after the water evaporates, leaving a residue that can be tough to clean. More importantly, the same limescale that builds up inside your pipes can also accumulate inside your appliances, such as dishwashers and washing machines. This buildup can reduce the efficiency of these appliances and increase their energy consumption. Over time, this can lead to more frequent breakdowns and the need for costly repairs or replacements. Signs of Hard Water in Your Home Hard water issues often go unnoticed until they start causing visible problems. Some common signs that you may have hard water in your home include: White, chalky deposits on faucets, showerheads, and other fixtures Soap scum in sinks, tubs, and showers that’s difficult to remove Clogged showerheads and faucets with reduced water flow Clothes that feel rough after washing and appear dull over time Dry, itchy skin after showering, as hard water makes it more difficult to wash away soap residue If you notice these signs, it’s important to take action to prevent further damage to your plumbing system. Long-Term Effects on Plumbing Over time, hard water can reduce the overall efficiency of your plumbing system. The combination of limescale buildup and pipe corrosion can lead to more frequent leaks, lower water pressure, and even burst pipes in severe cases. Additionally, because water-using appliances are forced to work harder in a hard water environment, they tend to break down more frequently and require more repairs. The long-term effects of hard water can also impact your water bills. When pipes are partially clogged with mineral deposits, your water flow is restricted, causing your pumps and water heaters to use more energy to maintain normal performance. This translates to higher energy consumption and increased costs for you. Solutions to Hard Water Problems Fortunately, there are solutions available to mitigate the effects of hard water on your plumbing system. 1. Water Softeners The most common and effective solution to hard water is installing a water softener. Water softeners work by removing calcium and magnesium from your water through a process called ion exchange. In this process, the minerals are replaced with sodium ions, which do not cause buildup or corrosion in your pipes. By installing a water softener, you can prevent limescale from forming, reduce the likelihood of pipe corrosion, and improve the efficiency of your appliances. A water softener also helps protect your water heater, reducing the amount of sediment buildup and extending its lifespan. 2. Regular Maintenance Even if you have hard water, regular plumbing maintenance can help you stay ahead of potential issues. Having a professional plumber inspect your system for limescale buildup, corrosion, and appliance efficiency can prevent costly problems down the road. Cleaning your water heater and descaling your appliances can also help prolong their lifespan. 3. Filtration Systems In addition to water softeners, whole-house filtration systems can remove impurities and minerals from your water before they reach your

Uncategorized

How to Spot Early Signs of a Gas Leak in Your Home

Gas leaks can pose a serious risk to your home and health, but early detection can help prevent accidents. Knowing what to look for and how to act quickly can save lives. While natural gas is a common and efficient source of energy in homes, it can be dangerous if leaks occur. Recognizing the early signs of a gas leak can make all the difference in keeping your family safe. Here are some key indicators of a gas leak that you should be aware of, along with steps to take if you suspect a problem. 1. The Smell of Rotten Eggs Natural gas is odorless, but utility companies add a harmless chemical called mercaptan to give it a distinctive sulfur or rotten egg smell. This odor serves as a clear warning that there could be a gas leak in your home. If you detect this unpleasant smell, it’s important not to ignore it. Even if the smell is faint, it could indicate a small but potentially hazardous leak. What to do: Open windows and doors immediately to ventilate the area. Avoid using electrical switches, lighters, or any device that could create a spark. Evacuate your home and call your local gas company or emergency services from a safe location. 2. Unusual Sounds Near Gas Appliances A hissing or whistling sound near gas lines or appliances is another common sign of a gas leak. This noise typically occurs when gas is escaping from a damaged pipe or connection. If you hear such a sound, it’s a strong indicator that gas is leaking and you should act quickly. What to do: Immediately turn off your gas supply if it’s safe to do so, usually by using the shutoff valve near your meter. Evacuate your home without delay and contact a professional to inspect the source of the sound. 3. Physical Symptoms of Exposure Exposure to gas leaks can cause a range of health symptoms that may initially seem unrelated. Common symptoms include: Dizziness Nausea or vomiting Fatigue or drowsiness Difficulty breathing Headaches These symptoms often occur when people are exposed to low levels of gas over a prolonged period. If you notice these signs and can’t find an explanation, it’s important to consider the possibility of a gas leak, especially if multiple people in your household experience similar symptoms at the same time. What to do: Leave your home immediately and get fresh air. Seek medical attention if symptoms persist, and inform your doctor that you may have been exposed to natural gas. Contact a professional to check your gas system for leaks before reentering your home. 4. Dead or Discolored Plants Plants are often one of the first indicators of a gas leak because they are sensitive to changes in air quality. If indoor plants suddenly start to wilt, die, or show signs of discoloration without any apparent cause, it could be due to a gas leak. Similarly, outdoor plants and grass around gas lines may also die off if a leak occurs underground. What to do: Check the soil around the base of your plants for signs of moisture or bubbling, which could indicate a leak below the surface. Call a licensed technician to perform a thorough inspection of your gas lines. 5. Unexplained Increase in Gas Bills A sudden, unexplained spike in your gas bill can sometimes indicate a gas leak. Leaks cause gas to escape without being used efficiently, leading to higher consumption and increased costs. If you’ve noticed a significant change in your monthly gas bill without a corresponding increase in usage, it’s worth investigating further. What to do: Monitor your gas meter for unusual activity. If the meter continues to run when all gas appliances are turned off, this may point to a leak. Have a professional inspect your home’s gas system to identify any potential issues. 6. Bubbling Water or Dirt Another subtle but significant sign of a gas leak is the presence of bubbles in water or unusual behavior in soil or dirt near your home’s gas line. This can happen if an underground gas line is damaged, causing gas to escape and disturb the surrounding environment. If you notice water bubbling on the surface or soil that appears to be shifting or raised, these could be signs of a gas leak underground. What to do: Avoid digging in the area where you’ve noticed this activity, as disturbing the soil could worsen the leak. Contact a professional immediately to inspect your gas line and determine the extent of the issue. 7. Malfunctioning Appliances Gas-powered appliances like stoves, furnaces, or water heaters can also signal a gas leak if they begin to malfunction. For example, if a burner on your stove has a weak or flickering flame, or if the pilot light on your water heater keeps going out, these could be signs that gas is not reaching the appliance correctly due to a leak. What to do: Turn off the affected appliance and avoid using it until it’s been inspected. Schedule a service call with a professional to examine your gas lines and appliances. 8. Air Pressure Changes Gas leaks can sometimes cause noticeable changes in the air pressure inside your home. You may feel a sudden draft or breeze in a room without an open window or door. This occurs when gas is escaping and altering the balance of air pressure inside your home. What to do: Open windows and doors to ventilate your home. Call a professional to inspect your home for any gas line leaks. Preventative Measures While spotting early signs of a gas leak is essential, prevention is equally important. Regular maintenance of your home’s gas lines, appliances, and detectors can significantly reduce the risk of a gas leak. Here are a few steps you can take to keep your home safe: Install Carbon Monoxide Detectors: These devices can help detect gas leaks and alert you to dangerous levels of gas in the air. Have Annual Inspections: Regular checkups

Uncategorized

When to Replace Your Old Plumbing Pipes

If you’ve been living in your home for a while, you’ve likely encountered the occasional plumbing issue—whether it’s a small leak under the sink or the need to tighten a faucet. But as your home ages, so does its plumbing, and those minor fixes might point to a larger issue lurking in your walls and under your floors. Knowing when to replace your old plumbing pipes can prevent costly repairs, water damage, and even health hazards. Here’s how to determine when it’s time to upgrade your home’s plumbing. 1. The Age of Your Pipes One of the first things to consider is the age of your home’s plumbing system. Just like anything else, pipes have a limited lifespan. If you live in an older home, particularly one built before the 1970s, there’s a good chance that your pipes are made of materials like galvanized steel or iron, which corrode over time. These older pipes are prone to leaks, blockages, and even bursts, causing extensive damage. If your home is more than 50 years old and still has its original plumbing, it’s worth having a professional inspection to determine whether it’s time to replace the pipes. For homes with galvanized steel pipes, replacement should be seriously considered after 40 to 50 years, as these pipes are notorious for rusting on the inside, leading to low water pressure and discolored water. 2. Frequent Leaks and Pipe Damage A leak here and there might not seem like a big deal, but if you’re frequently dealing with leaky pipes, this could be a sign that your plumbing system is on its last legs. When pipes become corroded, the metal weakens and is more likely to develop small cracks or holes, leading to leaks. If you’ve had to repair several leaks within a short period, it may be more cost-effective to replace the entire system rather than continually patching up the existing pipes. Frequent leaks can also indicate structural damage to the pipes. Materials like copper, which is more commonly used in modern plumbing, can also experience wear and tear over time, especially in areas with hard water. Hard water contains high levels of minerals like calcium and magnesium, which can cause mineral buildup in your pipes, further weakening them. 3. Visible Corrosion or Rust If you notice any rust or corrosion on exposed pipes, it’s a sign that your plumbing may need replacing. Corrosion can eat away at the metal, leading to leaks and even pipe bursts. Rust is especially concerning because it can contaminate your drinking water, making it unsafe for consumption. Look out for signs of rust on fixtures as well, such as faucets and showerheads, as this can indicate corrosion inside the pipes. Water that appears reddish-brown when you first turn on the tap is another strong indication of rust within the plumbing system. 4. Discolored or Contaminated Water Water that appears cloudy, discolored, or has an unusual smell or taste can indicate serious problems with your plumbing. If your water is brown, yellow, or reddish, this is usually a sign that rust is present in your pipes. While drinking rust-tainted water isn’t typically harmful in small amounts, it’s still not something you want flowing through your taps long term. Other contaminants like lead can leach into your water supply if your home has old lead pipes, which were commonly used in homes built before the 1940s. Lead pipes pose significant health risks, especially to children and pregnant women, as lead exposure can lead to developmental issues and other health problems. If you suspect your pipes may contain lead, it’s crucial to have them replaced as soon as possible. 5. Decreased Water Pressure Another common sign that it’s time to replace your old plumbing pipes is a noticeable decrease in water pressure. Over time, pipes can develop blockages due to mineral buildup, corrosion, or internal damage. When this happens, water flow is restricted, leading to reduced pressure throughout your home. If you’re experiencing a significant drop in water pressure, particularly in multiple faucets or showers, it could be a sign that your pipes are narrowing and need to be replaced. In some cases, decreased water pressure may be caused by a leak or a blockage in a specific section of piping, which can be repaired. However, if the problem is widespread throughout the home, it’s likely a systemic issue that requires a full pipe replacement. 6. Water Damage or Stains on Walls and Ceilings One of the most telltale signs of old, failing plumbing is the appearance of water damage on your walls, ceilings, or floors. If you notice damp spots, peeling paint, or brown water stains, it could indicate a hidden leak in your pipes. These leaks can be caused by corroded pipes or joints that have deteriorated over time. In addition to damaging your home’s structure, hidden leaks can lead to mold growth, which poses serious health risks, particularly for people with respiratory conditions or allergies. Replacing old pipes before they leak or burst can help you avoid these issues and protect both your home and your health. 7. Noisy Plumbing If your plumbing makes strange noises—like banging, clanging, or rattling—it could be a sign that something is wrong with your pipes. Noisy plumbing is often caused by water hammer, a phenomenon that occurs when water flow is suddenly stopped, causing the pipes to vibrate. While water hammer can sometimes be addressed with simple fixes, such as installing air chambers or water hammer arrestors, it can also indicate loose pipes or worn-out plumbing components that need replacing. Another noise-related issue is the sound of gurgling drains, which can indicate a blockage or improper ventilation in your plumbing system. While gurgling may not always necessitate a full pipe replacement, it’s worth investigating, especially in older homes where blockages can become more frequent as the plumbing system ages. 8. Material of the Pipes The material of your pipes can also be a major factor in determining when they need to

Scroll to Top
Chrome Logo Web Transparent

Scheduled an Appointment