Author name: a.ameliaseo@gmail.com

Laundry Room Remodel
Uncategorized

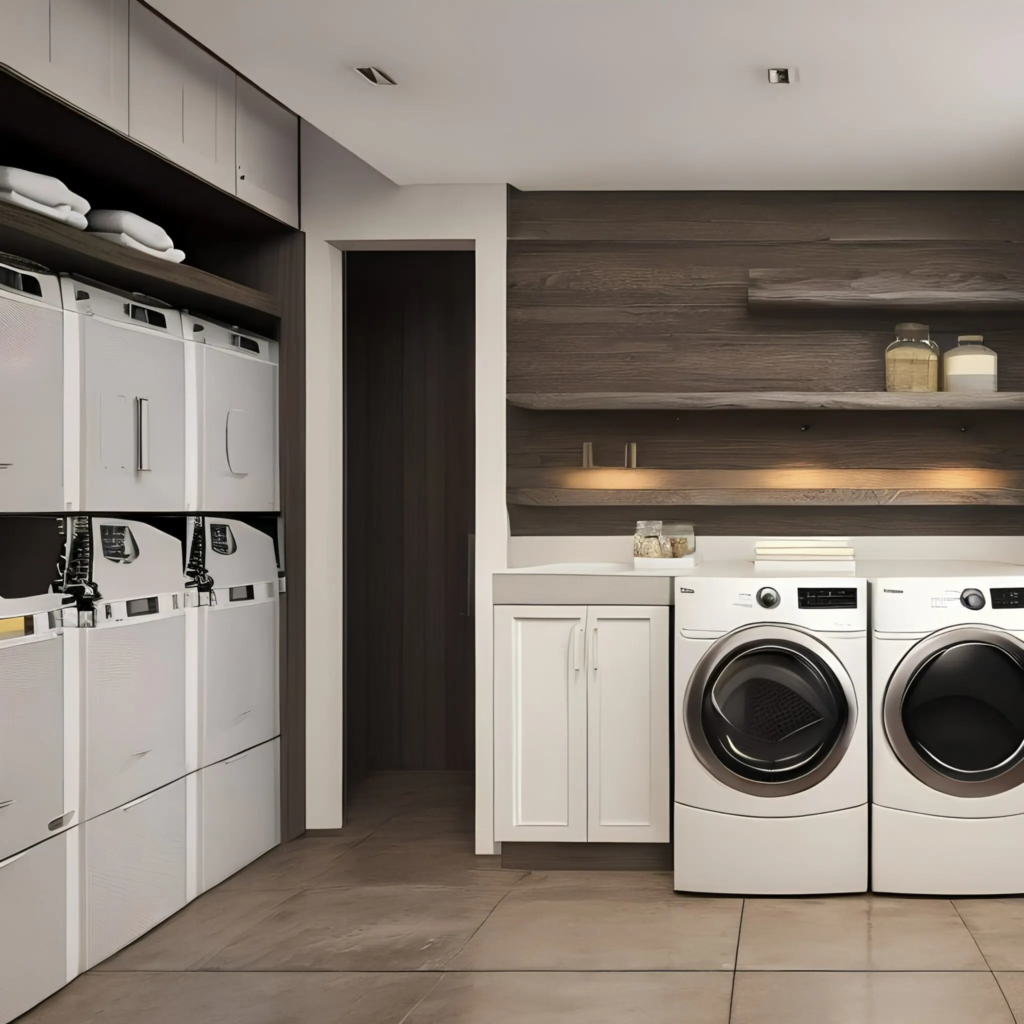
Moving A Washer & Dryer For A Laundry Room Remodel

Ren a practical way to maximize your home’s potential. Although it may not master bathroom makeover, a laundry room renovation is often more affordable and can have a significant influence on your daily routine. When considering various designs and arrangements for your space, it is crucial to consider the plumbing requirements. Below are the essentials found in a standard laundry room Valves controlling gas flow to dryers, faucets and drainage systems for utility sinks, and water supply and drainage lines for washing machines are all components that will be examined separately, with a focus on the potential consequences of repositioning them.   Moving The Gas Connection For A Gas Dryer Many homes with gas service don’t even have a gas hookup option for a gas dryer! If your home does, you’ll need to consider relocating the gas supply valve to wherever you are planning on moving the gas clothes dryer.   You may have a gas valve installed, but if you currently rely on an electric dryer, you might be inclined to overlook the valve and focus solely on relocating the electrical outlet. However, it’s essential to think about the potential consequences of this decision. Flexibility to use a gas dryer, so it’s worth considering the resale value of your home when deciding how to proceed.   If you choose not to keep the option of having a gas dryer, it is crucial to appropriately remove the old gas valve. Do not conceal it within a wall or in a hard-to-reach area. Instead, trace the gas pipe supplying this valve back to where it connects to the main line. There, disconnect and seal it off to prevent any potential gas leaks in the future.   To relocate the gas connection while retaining it, the approach will vary based on the original layout and design of your laundry room.   To move the valve in a single direction along the wall, consider redirecting the gas line by cutting through the sheetrock. Create holes in the studs for the new gas line to pass through to its new position. If you need to relocate the gas valve to a different wall, you might need to install a new gas from the attic to the new location. This involves disconnecting the existing line in the wall and redirecting the gas line through the attic.   Moving The Faucet Supplies And Drain For A Utility Sink Illustration showing the layout of the gas lines in a laundry room, including wall surface, dryer vent, and electrical socket. Rearranging the water supply and drainage system for a utility sink is a convenient task. Utility sinks are highly practical in a laundry room and can be easily relocated a short distance to either side during a renovation without the need for extensive plumbing adjustments. This is feasible due to the p-trap under the sink being allowed to be situated up to six feet away from the vertical drain/vent pipe by standard plumbing regulations in most cases. Moving the sink beyond its current position or to a different wall poses a greater challenge due to the drain piping. While it is often feasible to redirect the water supply pipes within the wall with relative ease, the same can not be said for the drain pipe. Re-routing the drain pipe to a new location typically involves working underneath the floor. In cases where the laundry room is situated on a concrete slab, the cost of such a task may be prohibitive.   Moving The Water Supply And Drain For A Clothes Washer Relocating the water supply and drainage for a washing machine typically involves adjusting the positioning of the hot/cold water valves and the drain pipe. These components are usually housed together in a unit known as a washer box, with the valves connecting to the hot and cold water pipes within the wall.   A drain pipe is unique in that every plumbing fixture needs a p-trap at its connection to the drain system. The p-trap, a U-shaped pipe, serves to prevent sewer odors from entering the house. Typically, sinks have the p-trap located beneath the sink, while for a standard machine, the p-tr is situated within the wall under the washer box. The clothes washer box can be relocated laterally by a few feet by simply accessing the wall and redirecting the pipes. As per plumbing regulations, the standard distance between the clothes washer box and the vertical drain/vent pipe on the wall can be up to eight feet. Moving the washer box beyond its current position or relocating it to another wall will require more extensive work. This includes rerouting the drain/vent pipe underneath the floor, similar to what is done when moving a utility sink. If on a concrete foundation, modify the concrete with a jackhammer or excavate a tunnel beneath the slab to facilitate the necessary changes. In addition to the main plumbing work, the drain vent will need to be repositioned. Fortunately, this task is often relatively simple. Typically, the vent pipe can be redirected through the attic to its new position. Alternatively, in certain regions, it’s possible to install an air admittance valve, which eliminates the need for a traditional roof vent.   Other Factors To Consider During A Laundry Room Remodel A visual’s inner workings, featuring the washer box, drainage pipes for the washing machine, and valves and pipes for water supply, can be a valuable reference point. Beyond plumbing, there are several key elements to take into account when renovating a laundry room and repositioning the dryer and washing machine.   In addition to the physical layout, consider the electrical aspects of your project, as outlet repositioning may be necessary. To ensure a safe and successful outcome, it’s crucial to hire a licensed electrician to handle this task.   In addition, you’ll need to plan for the dryer vent’s installation. Although it doesn’t require a downward slope like a drainage pipe, it will still need to be directed outside

Dripping Faucets
Uncategorized

How to Prevent Water Damage to the Home by Chrome Heating

Vacation-Ready Plumbing Tips for the Summer Before going on vacation and leaving your house empty, it is crucial to protect your property from potential damage. A burst pipe or a leak from a water heater can result in costly harm to your home. Implement a water damage prevention plan to minimize the chances of water damage and secure your property by following three suggestions:   Make sure water pressure is regulated to between 40 and 80 PSI. Maintain a stable water pressure level between 40 and 80 pounds per square inch to prevent damage. Regularly inspect your water heater and consider replacing it before it reaches its expected lifespan to avoid unexpected failures. Consider investing in a comprehensive water monitoring system that can detect leaks in real time, helping you respond promptly to any issues. Additionally, develop a water damage prevention plan that you can implement immediately.   Managing Water Pressure One key factor in preventing costly water damage from undetected plumbing leaks when you’re not at home is effectively managing the water pressure in your pipes.   Understanding the Risks of High Water Pressure Elevated water pressure elevates the chances of unexpected plumbing leaks occurring within your household. Inadequate sink and toilet supply lines may fracture when exposed to increased pressures, while the solenoid water inlet valves found in appliances such as dishwashers and clotheswashers are more susceptible to leaks in environments with high water pressure. This underscores the importance of maintaining your water pressure below 80 PSI (pounds per square inch) as part of a comprehensive water damage prevention plan.   How to Check the Water Pressure in Your Home Checking the water pressure in your home is a that you can do yourself. You will require a water gauge that can be attached to an outdoor hose faucet. If the pressure is too high, it is likely due to a malfunctioning PRV (Pressure Reducing Valve). PRVs are responsible for controlling and ensuring safe water pressure in your household. Many individuals are unaware of a PR until they begin noticing the effects of high pressure in their home.   Professional Services for PRV Installation and Replacement Expert PR for Homeowners is  TX Dallas, TX Frisco, TX McKinney,  TX Plano, specializing in the installation and with local regulations. We adhere to strict standards, ensuring a seamless and reliable process that not only meets but exceeds expectations. Our comprehensive service includes the installation of a top-grade PRV and a new whole-home shut-off valve, providing homeowners with confidence that their water pressure is well-managed and minimizing the risk of costly water damage.   Addressing Worn-out Water Heaters To safeguard your home against water damage while you’re on vacation, it’s essential to inspect and address any issues with your water heater. Aged and corroded water heaters can spring leaks that quickly escalate for your property. Typically located in vulnerable areas like attics or closets, these appliances require regular attention to prevent costly and destructive water damage. When to Replace Your Water Heater Are you aware of the age of your current water heater? In the North Dallas region, gas water heaters generally have a lifespan of 10 to 12 years, while electric models can last around the local water quality.   As a precautionary measure, it’s recommended to water heaters after a decade of use, especially if they’re situated in areas prone to costly damage from leaks, such as attics or closet spaces. For electric water heaters, replacement is typically advised after 13 years of service.   If you are preparing for a vacation lasting a week or two and your water heater is near the end of it’s it is advisable to have it replaced before you go to prevent any potential issues. Similarly, if you are expecting guests at your home, the increased hot water usage can strain the old water heater. This presents a good chance to replace it in advance.   Other Signs of Water Heater Leaks to Watch Out For It’s important to note that age is not the sole indicator to monitor. Water heaters may develop leaks near the supply lines or thermal expansion tanks even before they reach their anticipated lifespan. It is essential to routinely inspect for signs of rust or calcium accumulation, as these could signal possible leaks. The presence of any discolored areas, corrosion, or mineral deposits on your water heater should be viewed as a warning sign that requires immediate attention.   Inspect the points where the water pipes are attached to the top of the tank visually. Examine the bottom of your expansion tank as well. Look for any indications of water around the water heater’s base.   Chrome Air Conditioning Expert water heater services   offers professional water heater services to address all your water heater requirements. We can conduct a detailed assessment of your water heater and provide insight into identified problems. Our team is dedicated to providing you with thorough reasons for our recommendations and services, whether you need replacement repairs or maintenance. We focus on offering genuine advice and information about the most effective methods and factors that impact your home’s plumbing without any high-pressure sales tactics or unnecessary. .Features of the Flo by Moen The Flo by Moen offers a range of capabilities for monitoring water in your entire home, allowing you to identify leaks, conserve water, and safeguard your property from potential water-related issues. Its functions include   MicroLeak Technology:  This technology can detect leaks as small as a single drop per minute, even behind walls and foundations. Automatic Water Shutoff:  If Flo detects a leak, it can automatically shut off your water supply to prevent further damage. Water Usage Monitoring: Flo tracks your water usage and provides you with detailed reports, including a water damage prevention plan, so you can see where your water is going and identify areas where you can save water. Smart Alerts:  Flo sends you alerts on your smartphone or tablet if it detects a leak, a sudden increase

Outside Faucet Leaking
Uncategorized

Is Your Outside Faucet Leaking? A Sign of Spring in Texas by Chrome Heating

As spring arrives in Texas, residents may start to notice problems with their exterior faucets. Outside faucet leaks are a frequent issue, and if left unchecked, can result in inflated water bills and potentially expensive fixes. This article will guide how to detect and prevent leaks in outdoor faucets, helping you maintain a healthy plumbing system.   What Causes Outdoor Water Faucets to Leak? Several reasons can lead to leaks in outdoor water faucets. Below are some typical causes: Keeping the Faucet Turned On All the Time Some individuals install a “Y” splitter with built-in valves at the hose outlet, allowing them to regulate the water flow while keeping the primary faucet handle in a permanently open position. Others opt to attach an irrigation timer or an automatic pool fill to the faucet, also leaving it continuously turned on. However, this approach is not recommended and can result in accelerated wear and tear on the vacuum breaker and other faucet components.   Inadequate Winterization A frequent in preparing for cold weather is failing to disconnect hoses and other accessories from frost-resistant faucets. If left attached, water remains trapped inside the faucet, even when it’s turned off, which significantly raises the risk of freezing and subsequent damage during the winter months.   Old Worn-Out Washers The majority of outdoor faucet gaskets shut the water supply when the handle is rotated. However, deteriorates with age. Excessive tightening of the faucet can accelerate this degradation.   Loose Packing Nuts An outdoor faucet is a gasket that prevents water from seeping out around the handle when the faucet is in use. However, this gasket can deteriorate over time, leading to leaks. Fortunately, a simple fix often involves the issue. If you’re experiencing leaks around.   Steps for Fixing an Outdoor Faucet That Leaks Around The Handle If water escapes from around the handle when you turn on the outdoor faucet, it may be due to a worn-out stem packing. As the seal ages, it can deteriorate and allow water to seep out, potentially leading to an outside faucet leak. Fortunately, this issue can often be easily resolved with a DIY repair, suitable for most types of outdoor faucets.   Use an adjustable wrench, also known as a Crescent wrench, to fit onto the flat surfaces of the fastener behind the faucet handle by adjusting it to the proper size.   Secure the faucet with one hand to prevent it from turning completely. Attach the wrench to the fastener and tighten it gently with minimal effort, usually requiring about a 1/4 turn.   Next, reopen the faucet and inspect whether there is still a leak around the handle. Additionally, ensure that the handle moves easily. Increasing the tightness of the packing nut will result in the handle being more difficult to turn. If you tighten it too much, the handle may become too stiff. If this happens, simply loosen it until the handle turns smoothly and without leaking. For an outside faucet leaks, follow the same steps to ensure proper adjustment and smooth operation.   Tips for Your Outdoor Water Faucet A faulty outdoor faucet can lead to significant water loss and inflated utility bills leak of 30 drips per minute can result in over 1,000 gallons of wasted water annually. To minimize waste and prevent damage, consider the following advice. Regular maintenance of your outdoor faucets is crucial to prevent problems, including an outside faucet leaks. Check them frequently to ensure the handles are easy to turn and not over-tightened, addressing any issues promptly to avoid complications. Before winter, take steps to protect your faucets by removing hoses and installing protective covers, which can be found at local hardware stores. Additionally, familiarize yourself with the location of your water shut-off valve, so you can quickly respond to emergencies and minimize potential damage to your property and plumbing system. If you notice a leak in your outdoor water faucet and it appears to be a significant issue, it’s recommended that The experts at Chrome Air Conditioning provide top-notch repair services for outdoor faucets, ensuring they function properly. Reach out to us for more information and to schedule a service.

AC Repair Plano
Uncategorized

Can Air Conditioner Condensate Cause Water Damage?

Water Damage Chrome Air conditioning is a Texas staple; regular maintenance is crucial to keep it running smoothly. While a malfunctioning A/C unit is usually a minor inconvenience, a lesser-known issue can lead to costly water damage: the Air Conditioner Condensate drain. This often-overlooked component can become clogged or faulty, resulting in water leaks and damage to your home. In this article, we’ll delve into A/C condensation and provide you with the essential knowledge to safeguard your property against potential water damage. What is an AC condensate? In essence, an air unit’s operation involves removing excess humidity from the air, resulting in a counterconditioning nous flow of water that can be substantial enough to create a steady stream of liquid from the AC unit indoors.   Taking it a step further, the key lies in the connection between air temperature and its capacity to retain moisture. Essentially, warmer air can contain a greater amount of water vapor than.   The component of the air-conditioning system that cools down is located indoors, known as the evaporator coil. This coil consists of a network of tubes and metal fins that work together as a heat transfer device, drawing heat from the surrounding air into the refrigerant circulating through the tubes.   When warm, humid air encounters the chilled pipes within the air conditioner, its temperature drops rapidly. As a result, the air’s capacity to retain moisture decreases, causing the excess water to condense and collect on the heat exchanger.   The same phenomenon that leads to condensation on a chilled drink on a swelter. However, it’s not just a few scattered droplets – substantial amounts of moisture are drawn from the air on hot, humid days, and this excess water needs somewhere to collect.   Where does the AC condensation drain to? The AC condensation typically flows to a specific drain location in a home located in North The indoor component of the air conditioning system is commonly situated in the attic or a closet within the house. Homes constructed in the past few decades often feature a dedicated drainage system that gathers condensed water from the air conditioner and directs it through pipes to the drain beneath a bathroom sink or a tub drain in the wall. If the primary air-conditioning condensate line becomes blocked, the water from condensation will accumulate in the air conditioning unit and flow into the secondary emergency drain pan or drain line.   Chrome Air Conditioning Services   Typically, this is connected to the outside of the house the soffit above a window, or at a visible location. This is often seen as a small white tube protruding from the underside of the roof. It is also known as the “tattletale drain” because if you notice it leaking, it indicates a problem with the main drain line that requires attention. What happens when the condensation drain gets clogged? If the condensation drain becomes blocked, what occurs? They anticipate the cond drain pipe becoming obstructed. This is inevitable. Without a backup plan, the moment the condensate line is blocked, it will begin to leak inside your house and lead to water damage!   Various methods are used to create a system that homes from potential damage. One such approach is the tattletale drain mentioned previously, which channels water from the catch pan below the unit to the outside of the house. However, if this drainage system becomes blocked, additional safeguards may be in place. For instance, certain air-conditioning systems are equipped with a float switch either in the pan or along the pipe. This switch is designed to deactivate the unit if water levels begin to rise, preventing any backup issues.   Many of the older houses we cover lack a secondary drain in the closet where the air conditioning unit is located. Instead, they rely on a primary condensate drain that leads to a main drain on the closet floor. In case the main drain line gets blocked, a float switch to turn off the unit.   How do you service an AC condensate drain? Regular maintenance is essential for the HVAC condensate pan to prevent clogs bacterial growth. It is important to service the AC condensate drain regularly to keep it clean and functioning properly. Cleaning the drain lines with a suitable cleaner can help prevent the accumulation of gunk and ensure the efficient operation of the air conditioning unit.   To give this section of the air-conditioning system a more comprehensive maintenance, it’s essential to clean the evaporator coil to remove any debris that could potentially clog the condensate drainage system. Furthermore, various treatments can be applied to the condensate drain line to prevent the growth of bacteria and other microorganisms.   Occasionally, the drain line needs to be cleared using compressed air if it becomes blocked. The air conditioner condensate drain line is too narrow for a standard plumbing auger or snake to be used for clearing it.   The best method to clear the condensation line without causing damage is to use to remove any buildup. In many cases, additional fittings may need to be added to aid in the cleaning process, as it is often necessary to access the drain line for effective purging.   What can the homeowner do to maintain the condensate drain? The condensate drain is in good working order, homeowners can take a simple step: occasionally adding a small amount of bleach to the drain line, especially during times of heavy use. This helps to reduce the growth of bacteria, although it’s not a foolproof way to prevent clogs. Here’s a step-by-step guide on how to do it:   Typically, in the attic near the air-conditioning unit, you’ll find a small access point or pipe connected to a tee connection on the drain line. This access point is usually located within a short distance, typically less than 12 inches, from the unit itself. This configuration is common in many air-conditioning setups found in North Texas.  

heating and cooling Plano
Uncategorized

Gas vs Electric Appliances & Vice Versa by Chrome Heating

Comparing Gas vs. Electric for Water Heaters, Stoves & More. When considering Gas vs Electric appliance options for Water Heaters, Stoves, and other appliances, it is important to note that gas lines play a vital role in supplying natural gas or propane to various household appliances like furnaces, stoves, and water heaters. In Plano, Frisco, and other North Dallas cities, many homes are equipped with natural connections. This availability of natural gas provides homeowners with the flexibility to choose between gas and electric appliances based on their preferences.   In this article, we will evaluate the advantages & disadvantages of gas and electric appliances. Additionally, we will discuss the steps in switching from one type to the other.   Benefits of Gas Appliances Lower Operating Cost Operating gas appliances generally results in lower costs in the long run, although this can differ depending on the prevailing gas and electricity rates in a specific region. Electric heating elements are significant power guzzlers. According to the Department of Energy, relying on a conventional tank-style electric water heater devotes approximately one-fifth of its total electricity usage to heating and maintaining hot water. Although advancements in technology, such as heat-pump electric water heaters, can help reduce energy consumption purchasing and installing these systems is often higher than traditional options .Faster Cooking Times Compared to electric stovetops, which rely on heating coils or elements, gas stoves often boast quicker heat-up and cool-down times. As a result, many professional chefs prefer gas stoves for their cooking needs. These stoves also tend to provide precise temperature control, making them highly responsive to the cook’s   Newer cooking methods, such as induction cooktops, often minimize this concern. By utilizing electromagnetic fields to heat cookware directly, induction cooking achieves faster heating and more precise temperature management. On the other hand, this advanced technology typically comes with a significantly higher price tag compared to conventional electric stoves.   Reliability During Power Outages When the power goes out, certain gas-powered appliances can continue to function. For example, conventional tank water heaters with a standing pilot light don’t require electricity to operate. Additionally, many gas stoves can be manually lit using matches, providing a reliable alternative during outages.   In February 2021, a severe winter storm system brought widespread devastation to Texas, culminating. The crisis left a staggering 4.5 million homes and businesses without power, with many enduring prolonged outages that lasted for days. In addition to certain types of gas water heaters, stoves, and fireplaces, many gas-powered devices also rely on electricity to function, including furnaces and tankless water heaters. Benefits of Electric Appliances Purchasing Rebates Texas residents can take advantage of rebates and tax incentives offered by government agencies and utility companies for purchasing energy-efficient appliances, such as heat-pump electric water heaters. Additional incentives are expected to be announced later this year for newer, more efficient models. Convenience and Safety Electric appliances are generally more straightforward to notable example is electric stoves, which can be controlled simply by turning a knob. This eliminates the need to ensure a steady flame is established before adjusting the temperature.   Furthermore, electric appliances offer a significant safety advantage over gas heaters, as they eliminate the flame. This means that users are not exposed to the potential dangers of gas leaks or carbon monoxide poisoning. Steps to Replacing an Electric Appliance With A Gas One Before swapping out an electric appliance for a gas-powered one, it’s essential to verify that your home has a natural gas supply line in place. The installation of a new gas line is required to connect the main trunk line in the attic to the location where the appliance will be set up. The specific methods for accomplishing this task will vary based on the house’s structure and the layout. To put in a new gas line, it is important to calculate the BTU demand of the system to make sure the sizes are correct and comply with regulations. Following this, a permit must be obtained from the local government to pass an inspection by a third party.   Although some gas appliances do not require ventilation, the majority of them necessitate the installation of exterior venting pipes to ensure that all combustion gases are safely expelled outside the home, away from inhabited spaces. Steps to Replacing a Gas Appliance With An Electric One On the other hand, perhaps you’d like to remove the existing gas appliance and install a nice electric one. What is involved in this project? To properly remove the old gas valve, it is important to follow the gas piping until it connects to the main trunk line. Once you reach this point, disconnect the valve and seal it off. This process helps prevent any potential gas leaks from occurring in the future. It is crucial not to conceal the valve in a wall or difficult-to-access location. To ensure a safe and successful installation, it’s crucial to choose the correct electric appliance and understand its specific needs. Electric appliances typically require a high-amperage dedicated circuit, which may demand an upgrade to your electrical panel. To avoid any potential hazards, it’s recommended to consult a licensed electrician who can install the necessary wiring and circuit break. To guarantee safety and adherence to building regulations, it’s crucial to consider the electrical requirements when comparing Gas vs Electric Appliances. Unlike gas stoves, which can operate on a standard 110-volt connection, electric stoves require more power and usually demand a 220-volt outlet. As a result, electricians must also upgrade the wiring to accommodate the increased voltage when swapping out 110-volt outlets for 220-volt ones. Is it Worth Switching from Gas to Electric? We trust that this piece has provided you with a more comprehensive understanding of the factors to consider when deciding to switch between natural gas and electric power sources.   When considering a new appliance, several factors come into play, including the upfront purchase price and the range of features available. Additionally, you’ll the initial cost

Repair Slow Flushing Toilet​
Uncategorized

Toilet Flushing Too Slowly? When to Call a Plumber by Chrome Heating

Toilets are a vital part of daily life, playing a crucial role in the functionality of homes and workplaces. They are often used without a second thought, but toilet flushing problems such as poor flushing performance can quickly become a source of annoyance and disruption. Certain toilet issues can be resolved with simple DIY solutions, but others require the expertise of a professional plumber. Knowing when to tackle a problem yourself and when to seek professional help can help you avoid unnecessary expenses, wasted time, and frustration. Before seeking the assistance of a professional, it’s crucial to be aware of the possible reasons behind a toilet’s slow drainage and the available DIY solutions, so you can make an informed decision about when to call a plumber. Understanding the Potential Causes Several factors can lead to toilet flushing issues, spanning from relatively insignificant concerns to more severe and complex plumbing problems. Although a slow-draining toilet may seem like a simple problem, it’s crucial to consider that a more complex toilet flushing issue may be lurking beneath the surface. Here are some common causes that are often to blame. Partial Clog A common culprit behind a sluggish toilet is a blockage in the pipes that’s not complete, but still significant enough to hinder proper flushing. The buildup, toilet paper, or misplaced items, can restrict the that flushes slowly or fails to fully empty. Low Water Level When the water level in the toilet tank is too low, it can impact how well the toilet flushes. Having a higher water level can provide greater force to efficiently remove waste, preventing a weak flush. Faulty Flapper The flapper is a rubber valve at the toilet tank’s bottom. When the flapper becomes worn or is not properly aligned, it can restrict the amount of water that enters the bowl, resulting in poor flushing performance. Mineral Deposits Toilets have small jets all around the underside of the rim, where water flows into the bowl from the tank when you flush. Over time, mineral deposits can accumulate and clog these tiny openings, restricting water flow into the bowl and resulting in a sluggish flushing performance. Blocked Vent Stack The vent stack is a pipe that runs from the plumbing system to the roof and allows air to enter the drain system, aiding proper drainage. However, when the vent pipe becomes clogged with debris or animal nests, it can significantly impair the toilet’s flushing efficiency. Damaged Sewer Line A malfunctioning sewer line could cause your toilet is flush slowly. When a sewer line is damaged or collapsed, it can block the smooth flow of waste, leading to slow draining and flushing problems in the entire plumbing network. DIY Troubleshooting and Quick Fix Recommendations When your toilet is draining sluggishly, it’s tempting to take matters into your own hands and resolve the issue independently. This approach allows you to quickly address the problem and resume your daily routine without needing to wait for professional assistance. Fortunately, there are several DIY solutions you can attempt, depending on your schedule and the resources at your disposal. A Plunger or Drain Snake A plunger can often dislodge minor blockages, allowing your toilet to drain more efficiently. If the plunger doesn’t work, a drain snake can be used to further clear the pipe and restore proper flow. Modify the Water Level To enhance flushing performance, you may need to adjust the water level in the toilet tank, enabling it to hold more water. This increase in water volume generates greater flushing force, resulting in a faster and more efficient flush. To achieve this, simply adjust the float arm on the fill valve located inside the tank. Vinegar Down the Overflow Tube To improve your toilet’s flushing power, try pouring vinegar it sit for several hours or overnight. This can be especially effective in removing mineral buildup that may be obstructing the toilet’s flushing jets. Signs That It’s Time to Call a Plumber If your attempts at a DIY fix have been unsuccessful, or if you prefer to have an expert handle the job from the start, your next move is to contact a professional plumbing service of Chrome Air Conditioning. When you reach out to a plumber, be sure to give them a thorough explanation of the issue, including specifics about how the toilet is acting and the steps you’ve taken to try and fix it the plumber quickly identifies and solves the problem, getting your bathroom back in faster. 1 Persistent Slow Flushing If your toilet continues to flush slowly even after trying to clear it using tools like a plunger or drain snake, it is advisable to contact a professional plumber. Plumbers have the necessary skills and specialized tools to address tough clogs or difficult problems efficiently. 2 Foul Odors / Sewage Backup The presence of bad smells or sewage backup along with a toilet that doesn’t flush properly indicates a possible obstruction or issue in the sewer line. It is important to seek help from a skilled plumber promptly to avoid additional harm or risks to health. Another possibility is a damaged wax ring seal, in which case the toilet may need to be taken out and reinstalled with a new seal. 3 Multiple Slow-Flushing Toilets If multiple toilets in your home or workplace are flushing slowly, it may suggest a larger problem with the plumbing system. In such situations, a plumber can inspect the entire plumbing setup and pinpoint any root issues that are impacting multiple fixtures. Importance and Benefits of a Professional Assessment A slow-draining for different reasons, spanning from small blockages to more serious plumbing issues. Even though you can try some simple on your own, there are instances where seeking help from a plumber is essential. By hiring a skilled plumber, you can have peace of mind that you are making your DIY attempts have been unsuccessful, or if you’re worried about making the problem worse, it’s best to seek the help of a reliable

Plumbing Inspection Before Buying a Home
Uncategorized

Schedule a Plumbing Inspection When Buying a Home by Chrome Heating

Buying a home is a major purchase, so nothing should be overlooked when deciding if you have found the right home for your family. With all the factors you’re juggling – price, location, number of rooms, etc. – it might not occur to you to schedule a plumbing inspection. The plumbing of your home should be a deciding factor in your choice. Everything about your potential home could look fine on the surface, only to discover that the plumbing is one blocked drain away from collapsing upon moving in. Having a plumber conduct a plumbing inspection of your home’s system will help you bring up problems with your realtor before you make your purchase. Don’t be afraid to have a plumber inspect your home before you make a purchase. A reputable seller won’t mind you being informed about the property and should encourage you to find out as much as you can. During a plumbing inspection, a plumber will confirm that everything is safe, legal, and installed including: Inspect for leaks During the inspection, your plumber will make sure that your shower, dishwasher, sinks, faucets, tub, and toilet are not leaking. Small leaks increase your water bill and can cause much bigger problems. Check pipes By checking the size of your pipes, a plumber can determine the water pressure of your home.  For good water pressure, the pipes should be at least ½” in diameter and the lines should be ¾” to 1 inch from the main source of water.  If the home was built before 1986, a plumber will also check to see if it has lead pipes. As we know now, lead is an environmental toxin and you may not want to live in a home that has lead pipes. Water heater A plumber can determine where your water heater is located, its capabilities, and its age. If the home water heater needs repair or replacement, you may be able to knock money off the asking price. You can also request that a new one be installed before you move in. A plumber will also inspect the emergency water shut-off, drain valve, thermostat, gas/electric connections, temperature and pressure relief valve, temperature setting, gas thermocouple, emergency gas shut-off, and flue pipe. The water heater plays an important role in your home, and having it unexpectedly break down is not only inconvenient but also expensive. Sewage system and exposed pipes A visual inspection of your pipes will reveal if any changes need to be made before you move in. A plumber can also help you determine whether there is a septic tank installed on the property or if your waste goes to a municipal sewer system. If there is a septic tank, your plumber can determine if there are any problems with it as well as where it is located, what pipes lead to it, and when it was last serviced. A broken septic tank is an expensive problem that you can avoid by making sure it’s in good working order before you buy. Make sure that you are properly informed on all areas of your potential home before you buy. A plumbing inspection can help you make the right choice and familiarize you with your plumbing for later on if something goes wrong. Inspections Don’t Find Everything Arguably, the most important in this category would be a plumbing inspection. That’s because the potential hazards that could manifest themselves once the move has been completed could be extremely costly. It’s not inconceivable to consider the possibility that failure to take care of these issues could eventually make the home uninhabitable. However, such concerns can be alleviated by employing the services of Chrome Air Conditioning, which performs such tests regularly and is well-versed in all the nuances that make up a plumbing system. Led by licensed professionals. The plumbing inspection tests that we conduct are much more thorough than the standard ones that every home receives before purchase, which can often miss out on key trouble areas. Finding Slab Leaks One area that rarely gets looked at in a new home inspection is above or below the slab, where the major concern relates to leaks that could be draining the home of its value. While there are clear signs of what constitutes a slab leak, someone purchasing a home may be unaware of them. Those signs include such things as: water pressure that’s far below normal; a monthly water bill that surges; mysterious moist spots that develop on the floor or one that’s either warm or hot; water that can be heard running despite none being used; and floors that begin cracking. The different causes for this trouble relate to pipe corrosion, poor installation of the plumbing, and a shifting foundation. In the latter case, this is a geographical reality when living in North Texas. These leaks will often take place on either sewer or water lines that lie directly below the home. . Detecting Drain Issues Regarding other options, a frustrating issue for a homeowner can develop when a sewer drain line becomes clogged for whatever reason. While certain consumer products can handle basic issues that develop from time to time, there are several instances where a call for professionals to handle the job is the only answer. Those more serious cases relate to sewer problems that again may be due to shifting ground or poorly-conceived installation. More specific reasoning might be related to pipes made of clay tile or old cast iron, bellies in the line, or roots from nearby trees that have found their way into this area. This is also an area where Chrome Air Conditioning has the expertise to make a clear detection of the problem. By using an in-line camera to look at the affected area, we can see exactly what the problem is, eliminating any guesswork. Money Well Spent In some cases, the damage done may already make potential plumbing repairs beyond the scope of what someone wants to pay. So that investment

High Pressure Water Gun​
Uncategorized

Check for High Water Pressure in Dallas by Chrome Heating

Water pressure supplied by municipal water sources within the Chrome air conditioning  ,1110 SUMMIT AVE SUITE 8 PLANO, TX 75074, USA service area ranges from Dallas TX, Frisco TX, McKinney TX, Plano TX. High water pressure can be controlled by the installation of a Stress Reducing Valve (PRV) on the homeowner’s side of the water meter. If you already have a PRV and are still seeing high water pressure, it may need to be adjusted or serviced. The recommended water pressure, especially if you have a moistness softener or a sprinkler system, is between 60 and 80 pounds.   Low Water Pressure Is the problem occurring at every faucet/fixture?   If not, the problem could be a clogged aerator. Check the screens for rust or other particles that could be blocking the flow and clean/replace the aerator as deemed necessary. In single-handle faucets, the issue could have several different sources: the mixing valve cartridge is broken, the water supply line is kinked or the shut-off valve is partially closed.   Is the stress the same for both hot and cold water?   If only the hot water side is being affected, the problem could be with your water heater. Check the shut-off valve located next to the water heater to make sure it is not closed.   Do you have a water softener?   Put the softener on the bypass to see if the pressure increases. If the increases, the problem is likely in the moisture softener.   Do you have a pressure-reducing valve (PRV) on your property?   You can find the Tension Reducing Valve on your side of the water meter. If you do have a PRV, it may need to be adjusted or serviced.   Is your customer valve fully open?   This valve is usually located on the homeowner’s side of the water meter which allows you to turn off the wetness to your home.    Low water pressure can also be a sign of a water leak somewhere on your property. If you have issues with your “Remember to maintain water pressure.”e, give us a call here at Chrome Air Conditioning at 469-361-2700. We are always here to answer your questions and assist you in any way that we can.   What is water pressure? Water pressure is potential energy. More energy provides higher water pressure. If you live close to your municipal water supply, you’re likely to have more energy. The further away you live, the lower the water pressure because your water has to do more work to get to you.   How can you find the source of low water pressure?   Your water pressure may be the right for your home and pipes, even if it doesn’t feel like it. You could just be accustomed to high water pressure, which is wasteful and damaging to your appliances, faucets, and pipes– not to mention your wallet. To be sure, have your local water department do a pressure reading. You can also test them yourself with a pressure gauge.   Older, galvanized water piping systems may be the source of the problem. The only solution is to have the pipes replaced, which should be done by a licensed plumber. If you have experienced a sudden drop in water pressure, there also may be a leak.   Check that shut-off valves are open.   The shut-off valves on your system must be fully opened to ensure proper water flow.. This could be a simple fix to your water problem.   Clean or replace your faucet aerator   If you have low water in specific faucets, you could have a clogged faucet aerator. Just like pipes, build of debris, rust, and corroding clog your faucet aerators. Unscrew the tip of the problem faucet and clean or replace it.   If you’re still unable to determine the cause of your low water problem or you don’t know how to remedy it, contact a plumber to properly diagnose the issue.   Protect Water Heaters, Washers & Dishwashers Replacing a water heater is not cheap—most water heaters should last for at least a decade. That’s why a plumbing emergency is such a dreaded occurrence—you have to worry about the inconvenience and the unexpected expense. You can avoid putting undue pressure on your appliances by making sure that you have the right pressure in your home. When the pressure is too high, the life expectancy of your appliances will diminish. So, how do you make sure that you have the right pressure in your home? It’s a simple fix! Buy an inexpensive gauge which screws into the hose bib. If the pressure is too high, you can purchase a regulator to control the pressure from the supply line. Maintaining consistency in the home.  

Burst Pipe Repair​
Uncategorized

Expert Burst Pipes Repair Services in North Dallas by Chrome Heating

You may find it surprising that Texas ranks as the fourth worst state for burst pipes. Having pipes burst due to the freeze-thaw cycle is more than an inconvenience. Burst Pipes Repair, along with clean-up and restoration after leaking pipes, can be costly, and the process can be frustrating and stressful. Your home is most at risk for frozen pipes breaking over the winter months. This is often after a winter storm causes freezing temperatures in North Dallas. In 1110 SUMMIT AVE SUITE 8 PLANO, TX 75074, average January low temps are close to 32 degrees. The risk grows if you are spending less time at home or if it’s unoccupied while you’re out traveling.   Preventing Your Pipes From Bursting A little preparation can prevent the need to call a plumber for emergency pipe repairs. Try these tips to prevent your pipes from bursting:   Keep Plumbing Fixtures Warm and Prevent Freezing You don’t have to put a space heater up to your plumbing, but even opening up a cabinet door to fixtures on your outside walls can dramatically decrease the chances of those fixtures freezing.   If you notice a draft inside the cabinet where the fixture is, contact an insulation contractor to seal up any areas where the draft might be originating. You can also wrap pipes in unheated areas for extra protection.   Let Faucets Drip   One of the main reasons North Dallas residents experience burst pipes is to remember to drip their faucets. Letting your faucets drip can help you effectively prevent your pipes from bursting. Remember to drip water from both the faucet’s hot and cold sides.   You can conserve water if the faucet is on the exterior wall. However, an upstairs interior wall fixture supplied by a first-floor water line on an outside wall could be a different story. A professional plumber specializing in Burst pipe repair can determine which faucets you should let drip in your home. Remove Attachments From Outside Fixtures   You will want to remove any attachments from your outside faucets. This includes splitters and pool fill lines.   Prepare Your Outdoor Kitchen Do you have an outdoor kitchen? You’ll want to prepare it for the winter months as well. Consider shutting off the water supply and removing the water from any supply lines or faucets. You might also try adding drain-safe antifreeze to the p-trap or applying a pipe-heating cable to any components susceptible to freezing.   Turn Off the Water and Drain Your System   If you’ll be away for an extended period this winter, the Dallas Fire Department suggests turning off your water and draining your system. Shut off the main valve and turn on all your fixtures, like faucets and showers, to flush them. Be sure to turn off the water heater.   Have Your Thermal Envelope Audited The thermal envelope is an area that separates the lived-in spaces or spaces you climate control from the ones you don’t. The better your thermal envelope, the more energy efficient your home is, and the better insulated it will be.   A qualified contractor can audit your thermal envelope to see where you can make improvements. A more energy-efficient home will retain heat, reducing the chances of pipes freezing. Most modern homes, except for power outages, are built to prevent frozen pipes without dripping faucets.   Winterize Your Sprinkler System    If you’re a homeowner in North Dallas with a large lawn, you likely have a built-in sprinkler system to water it. Unfortunately, these pipes can freeze relatively easily if you aren’t careful.   How you winterize your system will vary, so refer to the manufacturer’s instructions before you start. You should also drain your backflow device before winter hits.   Pipe Bursting FAQs Can Insurance Protect Against Water Pipes Breaking?   Should a water pipe break, insurance will often cover part or all of the cost of repairs. However, it will depend on your policy and the extent of the damage.   What Is the Average Insurance Claim for Burst Pipe Water Damage? The average for pipe burst damage claims is roughly $10,000. This is the second-most commonly filed insurance claim in the country.   When Should I Call a Plumber for Burst Pipes?   If a pipe in your home bursts turn off the water at the supply, then call a professional plumber immediately to minimize frozen burst pipe cleanup later.   What Will a Plumber Do and Not Do After a Burst Pipe?   It depends on the plumber and the nature of the damage. For example, a plumber may focus on water leak detection if the location of the burst pipe isn’t immediately apparent. In any case, your plumber’s goal will be to handle Burst Pipes Repair and fix any damaged pipes. A plumber will not perform pipe burst cleanup and repairs; you will need to hire a restoration company to do this. Don’t Wait for Winter’s Wrath: Call Us Today   Prevention is vital to protecting your home from frozen pipes. But even the most careful homeowners can find themselves in a bind in the frigid temperatures DFW can experience.   The skilled team at OUR LOCATION 1110 SUMMIT AVE SUITE 8 PLANO, TX 75074, SERVICE AREA Garland, TX Dallas, TX Frisco, TX McKinney, TX Plano, can tackle your frozen burst pipe repair needs properly and efficiently.

Outside Plumbing Pipes​
Uncategorized

Essential Outside Plumbing Tips for Spring in the USA by Chrome Heating

As the weather warms up and you are spending more time outdoors, now is a great time to check your Essential Outside Plumbing and make sure everything is in working order. Here are a few quick checks you can perform: Prevent Freeze Breaks: Protect Your Outside Faucets This Winter: Although many outside faucets are “frost-proof” by design, they can still have a freeze break if a water hose is left attached during the wintertime. When you turn the handle to close a frost-proof faucet, it shuts off the water back inside the wall behind the brick or siding. This is done so that all of the water that is outside the home’s thermal envelope can drain out of the faucet and won’t freeze.   However, if a garden hose is left attached during the wintertime, it doesn’t allow all of the water to drain out. The water that is still inside the faucet can burst the pipe when it freezes. Because the water is shut off before this point, it won’t start leaking right away. You won’t notice this problem until you turn the faucet on for the first time in the Spring. When you do, you will notice the hose faucet leaks.   It is only then that water fills the tube and sprays into the wall behind the brick or siding where you can’t see it right away. Pay close attention the first time you turn on each of your exterior faucets after a freeze. Turn them on for a few seconds, then turn them off. If that looks fine, hook up a hose with a spray head on the end. Leave the head turned off so that the hose builds up water pressure. Look carefully at the wall below the faucet where the brick meets the concrete foundation. This is called the brick ledge. Go inside and look at the bottom of the wall directly behind the faucet. If you see water in places it shouldn’t be– you might have a frost-proof faucet with a burst pipe in the wall that will need to be replaced.   So, what if your outside faucet is just dripping constantly even if you have it shut off all the way? If you can catch the leak soon after it starts, there is a possibility that you can repair the faucet by replacing a washer inside the faucet. However, if it has been leaking for more than a couple of weeks, replacement is probably necessary. This is because the slow water leak can quickly create a groove inside the brass faucet “seat” that is not repairable. If this happens, you’ll need to replace the entire faucet.   Know Where Your Water Box Is So what exactly is a water box and why is this important? Most houses are equipped with a shut-off valve close to the house that can shut off the main water supply coming into the house. These are typically located in a plastic valve box in a flowerbed (possibly under some bushes or shrubbery). The lid is usually either a black or green rectangle a little larger than a sheet of paper or a green circle about 10″ in diameter.   It is important to know where yours is located if you ever need to shut the water off to your house quickly to prevent water damage in the event of an emergency leak. Taking a few minutes to find yours and ensure it is in working order might save you some heartache later on.   If you can’t seem to locate your valve box near the house, one hint is to locate the round black-lid meter box near the street and follow a straight line toward the house. You might need to dig around a bit under the mulch to uncover it. Another way to find it is to look for your main sewer cleanouts. If your house was built sometime within the past 30 years, then these usually look like two white pipes close to each other with caps on them sticking up out of the ground. The water box for the home is very often a couple of feet to the right or the left of these sewer cleanouts.   Once you’ve located the water box, remove the lid and take a look inside. If you see water in the box (and it hasn’t rained recently), you might leak. If you just see dirt, the valve inside has likely been buried by dirt intruding into the box over time. It usually isn’t a good idea to try to use these valves when they are in this condition. If you see a pipe but not a handle, then the handle has probably rusted off entirely! If you find yours in this condition, it’s probably time for a new one.   If you can see the valve(s), then you will probably either see a lever-style handle or a round-style handle. The lever-style handle is called a ball valve, and these are usually pretty reliable valves. The round-style handle valves are most likely ‘gate valves,’ which shut the water off by lowering a “gate” as you turn the handle. These guys are notorious for sticking (either in the open or closed position). Handle with care, as you don’t want to turn it off only to discover you can’t get it to turn back on! We recommend replacing this type of valve with a quarter-turn ball valve with a lever handle.   Quick Tip :  If you do need to operate an old gate valve, do so with care and by turning two turns down/one turn up … two turns down/one turn up … until you get it turned off. This can help break up any calcification but is not guaranteed to work. Chrome Air Conditioning Services  Check For Yard Leaks Check to see if you have any wet or soggy spots in the yard. You may have a spot of grass that is noticeably more green than

Scroll to Top
Chrome Logo Web Transparent

Scheduled an Appointment